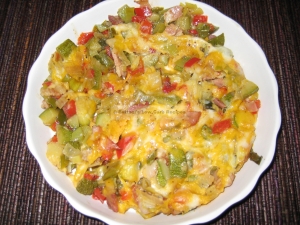
Swiss Chard & Mushrooms

I grow Swiss Chard in my grow-bag garden out back and it is producing nicely this year. I tried a new sauté with it last night that we just loved. A thumbs up from both of us! If you’re not a fan of mushrooms, you can certainly leave them out here, as I’ve made this vegetable that way as well and it’s quite good. Note: I did not include stems when harvesting the chard from my garden.

I served this alongside pot roast, but you could probably enjoy it with any dish you would enjoy that has spinach. This dish is suitable for all phases of Atkins and Primal/Paleo as well.

INGREDIENTS:

3 slices bacon, thick slice (with grease it renders), chopped coarsely

1-2 T. extra bacon grease (add only if very lean bacon)

2 T. unsalted butter

2 oz. red onion, chopped

6 large fresh mushrooms, sliced

1/8 tsp. coarse black pepper

8 Swiss chard leaves (8″ long without stem), coarse chop

DIRECTIONS: Fry bacon in skillet over high heat. Add onion & butter and extra bacon grease (if needed) to pan when bacon is almost done. Bear in mind calories/fat count will be lower than shown below if no extra bacon grease is needed). Sauté until onion is translucent. Lower heat to medium and add sliced mushrooms, sautéing until no longer opaque. Sprinkle on black pepper. No salt is needed as the bacon makes this salty enough. Add chopped chard to the pan. Let it just sit atop skillet contents a minute or so, until it begins to wilt. Turn with spatula to wilt the other side. Stir/sauté a couple times until chard is just softened to your desired state. Serve at once.

NUTRITIONAL INFO: Makes 4 servings, each contains:

184 cals, 16g fat (cals & fat will be lower if extra grease was not needed), 6g carbs, 2g fiber, 4g NET CARBS, 5g protein, 350 mg sodium

Jicama Hash Browns

Here’s a hearty breakfast to start your day off!  Hash browns made with jicama (diced or grated) are very similar to those made with potatoes.  A little crunchy, but the taste is very close.   I love them best with caramelized onion added in.  This was one of the steadfast recipes that helped get me through the difficult initial 2-week Atkins Induction Phase.  They are pretty good with scrambled eggs and bacon/sausage, but I occasionally enjoy these at dinner with steak.  I hope you’ll give them a try sometime.  The difference in texture is not bothersome enough to me to not enjoy the carb “savings” jicama offers over hash browns made with real potatoes.  

INGREDIENTS:

1 c. peeled jicama, diced or shredded (I like shredded best)

1 oz. chopped yellow onion

2 tsp. bacon grease

Dash salt and pepper

DIRECTIONS:  Grate the jicama (or dice into 1/2″ pieces).  Drain and pat dry with paper towels.  Chop onion.  Melt grease in no-stick skillet and brown the two together, stirring often, until jicama is well-browned.   Serve at once.

NUTRITIONAL INFO: Makes 1 large serving which contains:  (Divide into 2 svgs. for even greater carb savings!)

136 cals, 8.7g fat, 13.6g carbs, 6.6g fiber, 7g  NET CARBS, 1.2 g protein, 175 mg. sodium

Calabacita

Click to enlarge

We’re having this flavorful side dish with some broiled shrimp tonight.  They should go well together.   I’ve seen a wide variety of recipes for this dish over the years, but my version with bacon is our favorite.   Bacon always seems to make everything a wee bit better.  🙂

For those not familiar with what we Texans call Calaba squash, the pic below is an example of one popular strain in all our local grocery stores.  This squash is also referred to as ‘Mexican Zucchini’.  They are mild and very similar to zucchini in taste, but are shorter, lighter green, slightly striped (some have even darker stripes than the squash in the pic) and they are more oval in shape than zucchini.  The inside flesh is firmer, yellower and best of all, does not bleed water into your recipes as badly as regular Italian zucchini does. You can definitely substitute zucchini in this dish if you can’t get calaba squash where you live, but expect it to be a ‘wetter’ dish with that substitution.  I’ve even been known to make this recipe with yellow summer squash.  Comes out tasting a little different, but still quite good.  This dish is most certainly Atkins Induction friendly.

INGREDIENTS:

1 lb. diced calaba squash (½-¾” dice)

½ large leek, sliced thin

4 slices lean bacon, chopped

1 T. butter, unsalted

½ c. sweet red pepper, chopped

3 oz. cheddar cheese

3 oz. Monterrey Jack cheese

Pinch each of black pepper, ground cumin and celery seed

VARIATION:  Omit the bacon entirely for the more traditional calabacita.

DIRECTIONS: Brown the chopped bacon in a non-stick skillet over medium-high heat (do not drain off grease unless there is more than 2 tablespoons).  When done, add butter and diced calaba squash, stirring often and cook until just about fully tender.   Add sliced leeks, red pepper and spices  and continue stirring for about 5-10 minutes until all veggies appear to be done.  Top with cheeses and pop into 350º oven for about 20 minutes or until cheese is melted nicely.  This dish goes well with pork, fish and most Mexican meat entrées.  My leftovers are frozen & added into the next pot of Mexican-style soup I make.

NUTRITIONAL INFO: Makes 4 large servings each containing:

235.5 cals, 17.7 g fat, 7.65 g carbs, 1.8 g fiber, 5.85 g NET CARBS, 12.9 g protein, 394 mg sodium

Smoked Gouda Cauliflower

I thought I’d reach back into my archives and pull up one of my recipes that keep the weight-loss adventure from being called a “boring diet “.   This recipe is anything but boring in the flavor department and has proven to be one of the most popular recipes on my website.  It was a real hit with my brother, an executive chef at one time at Top-of-the-Mark in San Francisco and my husband just loves it.  It also garnered hundreds of thousands of fans on Facebook (when I posted there) so I’m reposting it in case it somehow eluded some of my followers.  It’s one of my favorite. easy ways to serve cauliflower now.     

Smoked Gouda doesn’t melt easily in dry heat, but if shredded underneath a veil of moisture, it usually melts pretty nicely.  In this dish, smoked Gouda takes an ordinary cheesy cauliflower casserole and transforms it into the sublime.  The smoked Gouda truly sets this one apart from all the other cauliflower casseroles you have tasted.  I promise.  It’s Atkins Induction friendly, too! 

The smoked Gouda I buy at Sam’s Club has a very smooth, pronounced smoke flavor.  Not all grocery stores carry quality smoked Gouda, so be sure yours has a nice flavor to begin with or your casserole will be boring in flavor.  The brand I bought in San Antonio at my mother’s grocery store was just awful, so I know it is not all made of equal quality.   Be sure yours has a pronounced smoked flavor before making this casserole. 

This recipe appears in Volume 1 of Low Carbing Among Friends by best-selling author Jennifer Eloff and other talented chefs, including George Stella!  There are 5 volumes already released and two more due out soon!  More info on their Facebook page linked above.   You can order our cookbooks here or at Amazon.com.  These cookbooks are filled with easy, gluten-free, tasty low-carb creations by a group of very creative cooks. 

INGREDIENTS:

1 medium-large head cauliflower

6 oz. cream cheese, softened

4 oz. smoked Gouda cheese, grated or shredded

¼ tsp. coarse black pepper

chopped chives or green onion to garnish

DIRECTIONS: Cut up cauliflower into manageable pieces and boil or steam until tender.  Drain off any water and mash the chunks up slightly with a fork (do not puree, however).   Stir in softened cream cheese until it is melted and blended well.  Grease glass casserole dish and spoon half the cauliflower mixture in.  Sprinkle with half the grated smoked Gouda (I do not recommend using slices for this.  Grate it to facilitate melting).  Spoon remaining cauliflower into dish and top with rest of Gouda cheese.   Sprinkle with just a dash of salt and pepper if desired, but cheese has a lot of sodium.  If you are sodium sensitive, I wouldn’t add ANY salt.   Sometimes I add some chopped chives or green onion to the top, but this is not in the nutritional info below.  Bake at 350º for 20-30 minutes or until bubbly.

NUTRITIONAL INFO: Serves 6, each serving contains:  (you may get 8 servings, reducing carbs even more)

190 cals, 15.22g fat, 6.17g carbs, 2.4g fiber, 3.77g NET CARBS, 8.77g protein, 312 mg  sodium

Sausage-Bacon Stuffed Portobello Mushrooms

I saw a package of lovely Portobello caps in the grocery store yesterday and decided to bring them home for a new stuffing trial. Since we hadn’t done any in ages, it just sounded good. I decided to throw in several common stuffed mushroom ingredients and the combo came out particularly good. I think you’ll like these as much as we did! If you are still on Atkins Induction Phase, do leave out the Sauvignon Blanc wine called for below. You can use smaller button mushrooms to produce bite-size party food or snacks with this recipe. I would estimate the filling would stuff approximately 20-24 small mushrooms.

INGREDIENTS:

2 large 3oz. Portobello mushroom caps (mine had no stems)

2 tsp. olive oil

4 slices thick bacon, chopped

1½ links sweet Italian Sausage (I used Johnsonville), casing removed, crumbled

¼ c. chopped green onion (or yellow onion if you prefer)

1 small low-carb dinner roll, crumbled

2 T. grated Parmesan cheese

½ c. shredded mozzarella cheese

2 T. (1 oz.) cream cheese

½ tsp. coarse black pepper

¼ c. white wine (I used Sauvignon Blanc)

DIRECTIONS: Wipe mushrooms with clean cloth or paper towel to remove any dirt. Spoon out and discard the black gills. Using a brush, oil the smooth outside with olive oil and place gill-side up in your baking dish. Set aside and Preheat oven to 350º.

In a skillet, brown the bacon until nearly crispy. Add sausage and cook until no longer pink. Add onion and sauté a couple minutes until tender. Add wine (skip if still on Induction Phase) and sauté 2 minutes. Add cream cheese, working with the back of your spoon to help it melt and blend in uniformly. Add all remaining ingredients and stir well to evenly mix them evenly. Remove from heat and spoon mixture equally into your 2 mushroom caps. Pop into 350º oven for about 20-30 minutes or until golden on the top. Serve at once with low-carb garlic bread and a green veggie of choice or perhaps a nice green salad.

NUTRITIONAL INFO: Makes 2 servings, each contains:

575 cals, 50g fat, 15g carbs, 8g fiber, 7g NET CARBS, 28g protein, 1084 mg sodium (in the meats and cheese).

Chorizo-Stuffed Pattypan Squash

Normally I shy away from chorizo.   The commercial stuff can be very greasy and is usually way too heavy with spices for me.  But what I created for our lunch today with the chorizo I get from my grass-fed beef supplier (actually made by Eades Meat Market up in Amarillo) was anything but!  These little stuffed pattypan squash were delightful tasty and not the slightest bit greasy or spicy with the chorizo in my opinion.  This delicious recipe will be a keeper in my house whenever I can get my hands on pattypan squash.  You almost have to grow it yourself to find it where I live.  This dish can be served either as an entrée or a side.  These are suitable for Atkins once you get to phase 2 and can be eaten by Keto followers if the carbs fit your daily allowance.  Primal and Paleo folks can enjoy if you use a plan suitable bread or other filler.

VARIATION:   1) Use browned bulk breakfast sausage instead of chorizo.  2) Use zucchini or Mexican zucchini instead of the patty pan squash.

INGREDIENTS: 

4 pattypan (white, scalloped) summer squash

Enough Olive oil to brush tops of squash

6 oz. chorizo sausage

1½ slices my Gluten-Free Focaccia bread (or other low-carb bread on hand)

1 beaten egg  (use ½ c. shredded cheese of choice if egg sensitive)

2 T. my Sofrito sauce

Dash black pepper

DIRECTIONS:  Preheat oven to 375º.  Cut the stems off the squash and level the outer bottoms with your knife so they sit flat on a pan.  Slice the pattypan squash in half horizontally, making eight lovely, scalloped pieces.  Place them on a baking sheet and lightly baste with olive oil on the tops.   Bake at 375º until half done when tested with a knife tip, or about 20 minutes.  You’ll prepare the filling while they bake.

For the filling, in a non-stick skillet over medium-hi heat, brown the chorizo lightly, crumbling as you stir it around.  If there is excess grease, spoon a little of it off.  Add a dash of black pepper, the moistened crumbled bread and the sofrito.  Stir to blend ingredients well.  Beat the egg with 1-2 T. water and stir it into the chorizo mixture to bind all together. Stir well.  Mark off the mixture in your pan into 8 portions and top each squash half with an equal portion of mixture.  When the squash is half done, remove from oven.  Lower oven to 350º, top each half with 1/8 the filling mixture.  Pop the pan back in that oven and bake another 20 minutes or until golden on top.  Squash should be fully tender when done.  Enjoy with a green salad or a guacamole salad.

NUTRITIONAL INFO:  Makes 8 stuffed halves.  It will take 2 to fill an adult as an entrée, 1 if a side dish.  Each stuffed half contains:

208 cals, 16.5g fat, 5.35g carbs, 1.63g fiber, 3.75g NET CARBS, 10g protein, 450 mg sodium

Baked Italian Eggplant Stacks

This tasty dish is incredibly easy to make!  It’s just a matter of layering the ingredients in a pan.  The really hard part is being patient while it bakes, because it smells so darn good while it’s cooking!  It takes some time for the eggplant to get tender, but it is well worth the wait.  It went very nicely with a seared pork chop and small Italian salad.  This dish is Atkins Induction friendly and Paleo-Primal friendly as well if you eat the occasional cheese.  Of course, you can add browned ground beef to this dish for a complete meal.

This recipe appears in Vol. 5 of Jennifer Eloff’s Low Carbing Among Friends cookbooks.  Be sure you add this series to your cookbook collection as it contains some of the tastiest recipes from George Stella and other very talented low-carb cooks. You can order your set (or purchase them individually) from Amazon or here:  http://amongfriends.us/.

INGREDIENTS:

1 T. olive oil

16 oz. eggplant, sliced 3/16″ thick or less

3 large Roma tomatoes, sliced thin

1 c. grated mozzarella cheese

1/3 c. shredded Parmesan cheese

4 oz. ricotta cheese

1 tsp. oregano (or Italian Seasoning blend of your choice)

½ c. low-carb sugar-free spaghetti sauce (I use homemade, Belo vita or Lucini Italia Tomato Basil)

DIRECTIONS:  Preheat oven to 350º.  Grease well a ceramic quiche or pie plate with the olive oil.  Slice eggplant and tomatoes.  I found I had enough eggplant and tomatoes for 3 layers in my pan.  Begin with a layer of eggplant on the bottom of the quiche dish.  Top with a layer of tomato slices.  Next sprinkle with 1/3 of the oregano/Italian seasoning.  Next sprinkle 1/3 of the Mozzarella and 1/3 of the Parmesan evenly on top.  Dot surface with 1/3 of the ricotta.  Repeat the layers two more times.  Spoon the spaghetti sauce evenly over the top, spreading it with the back of your spoon.  Pop into preheated 350º oven for about 1 hour 15 minutes.  Check at 1 hour with a fork.  The tomatoes and eggplant will produce a great deal of moisture during the first half of cooking (this is to be expected), but all of it will evaporate by the time the eggplant is tender.  If the fork goes into the eggplant easily, the dish is done.  If not, cook it another 15-20 minutes.

NUTRITIONAL INFO:   Makes 6 servings, each contains:

157.2 calories, 10.2 g  fat, 7.65 g  carbs,  2.78 g  fiber, 4.87 g  NET CARBS, 9.8 g  protein, 274 mg sodium

Black Soy Bean Salad

I don’t eat beans very often, but when I do, I reach for soy black beans.  This little salad is quite tasty and I do allow myself this treat once in awhile.  Black soy beans have so much fiber, it reduces their net carb count to 1g.  per ½ c. serving.  So they can be a very useful bean if you’re following a low carb lifestyle. 

This salad can be served as an entrée or with bits of leftover grilled steak or chicken, for a complete meal.  This dish is not suitable for Induction.  When you get to the legumes rung of the Atkins OWL carb re-introduction ladder, you can enjoy this delicious dish.

NOTE:  Black soy beans are not to be confused with regular black beans that have 14 net carbs per ½ cup!  So I only use the black soy beans for this salad or in your chili recipes. 

INGREDIENTS: 

1   14 oz. can black soy beans, rinsed and drained (I use Eden brand)

2 leaves romaine lettuce, sliced

1 oz. red onion, sliced thinly

2 T. balsamic vinegar  (or red wine vinegar)

3 T. olive oil

1 clove garlic, minced

Dash each black pepper, salt, and cayenne pepper

DIRECTIONS:   Rinse beans in a strainer, drain well and put into a mixing bowl.  Slice lettuce and add.  Sliver onion and add.  Toss well.  Mix dressing ingredients and spices in a little jar, shake and pour over salad.  Refrigerate for 30 minutes or so to allow flavors to meld.  If adding leftover grilled meat, heat the meat and add slices on top right before plating.

NUTRITIONAL INFO:  Makes 4 servings, each contains:

138.5 cal, 11.75g fat, 5.98g carbs, 2.53g fiber, 3.45g NET CARBS, 3.35g protein, 52 mg. sodium

Chipotle-Lime “Sweet Potatoes”

I clipped a recipe out of the Houston Post many years ago, but I have low-carbed it using pumpkin and subbing in maple extract for the brown sugar in the original recipe, so that I can now have these as often as I wish.  I was not very fond of sweet potatoes when I was growing up.  Everyone puts orange juice and orange peel in them and I just didn’t like that flavor combination much.  I ate them only baked into pies, cakes and muffins.  But ever since finding this particular recipe, I just love them and can’t get enough of these!  I bake this recipe OFTEN, and with a wide variety of meats and seafood!

This is NOT your granny’s sweet potatoes!  Chipotle peppers are highly smoked jalapenos and taste nothing like green jalapeno peppers, in my opinion.  They, in combination with the lime zest, add a most unique “twist” to the ever-popular vegetable during the holidays. 

My brother was an Executive Chef at one time and just raved about this dish when I served it to him!  He went on to serve it often to his own dinner guests in Seattle, where he lived, saying he always got the same reaction about this dish.  FANTASTIC!  It has become tradition in our house at the holidays when fresh pumpkin is so plentiful.  When I can’t get fresh pumpkin, I have been known to use butternut squash in this recipe in a pinch, but in all honesty, it’s not quite as good.  This recipe does not work well with acorn squash, as I tried that one time and didn’t care for it at all.

I find this dish is particularly tasty with baked, fried or grilled seafood, grilled meat, especially wild game, Texas BBQ and of course that Christmas or Thanksgiving turkey or ham.  The flavor combination of lime, smoky chipotles and maple extract (¼ c. very high carb packed brown sugar in the original recipe) is a real winner!  To make this dish Atkins Induction acceptable, I have substituted 100% fresh cooked pumpkin flesh for the sweet potatoes.  Could hardly tell a difference, other than the color is more golden than orange, thus the addition of red food coloring to correct color aesthetics.  Absolutely DO NOT SUBSTITUTE CANNED PUMPKIN or you are going to be extremely disappointed.  Just not the same dish.  Once you reach the starchy veggie rung of OWL and can afford a few more carbs,  I would recommend using just 1½ lb. pumpkin and adding 1 lb. cooked, mashed sweet potato (2 medium) for both flavor, color and a much creamier texture.  You will of course need to adjust nutritional info if you make that change as my numbers are for pumpkin only.

This dish does not freeze well with pumpkin in it (the original with real sweet potatoes froze very nicely).  As a matter of fact, in my opinion, pumpkin flesh does not freeze well in many dishes, as its water separates out in the bottom of your baking pan upon thawing.  That can really ruin the texture and appearance of some dishes for me.  No matter if you try to drain that water off, it just seems to keep bleeding out more water!  Totally spoils it for me, so I never freeze pumpkin, EVER. Pumpkin baked goods, on the other hand, freeze beautifully.  Go figure!

This recipe appears in Vol. 1 of Jennifer Eloff’s latest cookbook series, LOW CARBING AMONG FRIENDS.   I hope you’ll click the link to their Facebook page and take a look at a sampling of the recipes that await you in these cookbooks.  Any hostess would be proud to serve the recipes shared by these very talented chefs…..some of the best on the web, including George Stella!  You can order the entire set or individual volumes at Amazon or here:  http://amongfriends.us/order.php

INGREDIENTS:

2½ lb. cooked fresh pumpkin (DO NOT USE CANNED PUMPKIN)

½ c. heavy cream

4 T. butter

¼ tsp. salt

2 T. fresh lime juice

zest of 1 large lime (2 if they are small)

½ c. granular Splenda

1 tsp. maple extract (or 2 T. sugar-free maple syrup)

1 tsp. cinnamon

1-2 chipotle peppers (canned, in adobo sauce) seeded, rinsed & chopped

few drops red food coloring to achieve orange color of sweet potatoes (optional)

DIRECTIONS:  Remove stem and cut a small 4-4½ lb. pumpkin in half.  Remove seeds (you can roast them for snacks) and turn cut side down into baking pan.  Fill pan with 1″ water and bake pumpkin at 350º until tender when fork is stuck into it (about 45 minutes).  Remove and cool enough to handle.  Scoop/scrape  the pumpkin flesh out of skin/shell and weigh. Should yield about 2-2½ lb. flesh.  (freeze any overage for future use).  Whip pumpkin with electric mixer or food processor to get it as smooth as possible.  Add all remaining ingredients except chipotle peppers. For the holidays or very special occasions, I will bake 2 medium sweet potatoes, scoop out flesh, mash and add also for richer flavor, but I don’t do this for everyday consumption as it ups the carbs.  I have not included the sweet potatoes in the numbers below.

These little chipotle peppers (smoked jalapenos) are very HOT, so special handling is recommended.  Either wear plastic gloves (homemade  “sandwich bag gloves” will do) or be sure you wash your hands well after handling.  Take 1 chipotle pepper (about 1½” long) out of the can.  Rinse, and remove seeds and ribs with a knife.  Finely mash/chop the pepper almost into a puree on a flat wooden board.  Add to pumpkin mixture, stir well and taste to see if this is hot enough for you.  You don’t want to get this dish too hot, but a little tingle on the tongue is what you’re looking for.

If you want even more smoky taste or a hotter dish, carefully repeat, adding only ½ pepper at a time, re-tasting after each addition.   If you add pepper in stages like this, you won’t ever ruin the whole batch getting it too hot (I did one time).  Never forget that not everyone at your dinner table or social occasion will like things as hot/spicy as you may.

Stir well and pour into buttered ceramic/glass baking dish.  Sprinkle with a dash more cinnamon and bake at 350º for 20-30 minutes.

NUTRITIONAL INFO:  8 Servings, each contains: (does not include sweet potatoes added on special occasions)

114 cals, 7.6g fat. 12g carbs, 4g fiber, 8g net carbs, 2 g  protein, 121 mg. sodium

Cran-Orange Acorn Squash

I’m trying to use just fresh fruit for the occasional sweets craving.   I’ve never been a big sweets eater, so this works just fine for me.  I like to bake an acorn squash from time to time, especially at the holidays, both as a side dish and as a dessert.  It goes so well with pork and roast turkey.  Including holiday flavors like cranberries and orange, seems like you can’t go wrong. 

I traditionally used maple syrup or brown sugar in this recipe, but maple extract can fill that brown sugar taste.  Splenda or Stevia will have to do to sweeten up the squash a bit.  This is a pretty high-carb vegetable, so it should not be enjoyed until Atkins Pre-maintenance or Maintenance phases.  It is also suitable for Paleo-Primal dining.  This was lovely with pork!  This is also very good with a holiday turkey or wild game.

INGREDIENTS:

1   5″ diameter acorn squash

½  naval orange, peeled and chopped

1/3 c. fresh cranberries, chopped

½ tsp. cinnamon

Sweetener of your choice (I used liquid stevia extract)

¼-½ tsp. maple extract

4 tsp. unsalted butter or ghee

VARIATION:    Sprinkle on a few chopped pecans before baking.  

DIRECTIONS:   Preheat oven to 350º.  Using a large knife, cut the squash in half.  Scoop out and discard seeds. Place a little water (1/4″) in a shallow quiche dish.    Place squash cut side down in the water and microwave on HI for about 8-10 minutes or until it is beginning to get tender inside but is not falling-apart mushy.  Remove from oven and drain off water.  Turn squash cut side up and set aside while you make the filling.  In a small bowl, place the chopped orange, chopped cranberries, cinnamon and if using, the sweetener and maple extract.  Stir well.  Fill each squash cavity with half the mixture.  Top with 2 tsp. butter/ghee each and bake in preheated 350º oven for about 20 minutes.  

NUTRITIONAL INFO:   Makes 2 servings, each contains: (not including any nuts used on top)

188 cals, 8.4g fat, 30.7g carbs, 5.8g fiber, 24.9g NET CARBS, 2.3g protein, 8 mg sodium

Ham & Veggie Terrine

I include this terrine with my vegetable extravaganza, but I did add ham to this dish, making it a complete meal.  Omit the ham for a veggie side dish.  These are kind of fun to make and so pretty and colorful! 

I don’t own a ceramic loaf pan anymore, so I just use my metal 8″x4″ loaf pan lined with parchment to make my terrines.  This dish is delicious, not to mention nutritious with all those veggies.  A quick cutting of the vegetables, a brief sauté, fill the mold and it’s in the oven in no time!  You could serve this tasty dish for breakfast, brunch gatherings, lunch or dinner.  This recipe is suitable for all phases of Atkins and other Keto diets.  Paleo and Primal followers will want to sub in coconut milk for the cream here.  Omit the ham and you vegetarians can even enjoy this one!

INGREDIENTS:

1 large carrot, peeled, sliced thin

2 5″ zucchini (about 10 oz.), sliced thin

1 leek, washed well of dirt and sliced thin

3 T. olive oil

Dash sea salt and coarse black pepper

¼ tsp. garlic powder or 1 small clove garlic, minced

4 extra large eggs, beaten (or 5 large eggs)

2 T. coconut flour

3 T. oz. heavy cream, divided

5 T. water, total

1½ c. cooked, cured ham (omit for a vegetarian version)

VARIATION:  Substitute cooked bacon for the ham

CHEESE SAUCE:  5-10 minutes before terrine is done, mix 3 T. of the water, 2 T. of the cream in small saucepan set into larger saucepan (or use double boiler) and heat.  Add 4 slices American Deluxe or Cheddar Cheese.  Stir and blend until cheese is melted and all is incorporated into a smooth sauce.  Pour into serving bowl when terrine is out of oven, sliced and ready to serve.  Sauce will thicken fast, so do not dip it up one minutes before you need it.

DIRECTIONS:  Preheat oven to 350º.  Line a metal or ceramic 4×8″ loaf pan with parchment.  I don’t line the ends of the pan and just oil there lightly.  Set aside for now.  Stem and slice up all veggies.  I used a food processor for uniform, thin slice. Heat olive oil in wok or large skillet.  Add veggies, salt, pepper and garlic powder. Sauté stirring often over medium-high heat until veggies are tender but not mushy.  Stir in sliced/diced ham.  Turn off heat.

In a small bowl, beat the eggs, remaining 1 T. cream and remaining 2 T. water until smooth.  Add coconut flour.  Stir again.  Pour over veggies and stir well to blend.  With rubber spatula, scrape mixture into parchment-prepared pan.  Trim off excess paper above top of pan but leave a bit for “handles”. Pop into 350º oven for about 40 minutes.  Check at 30 min. as ovens do vary.  Top will be lightly golden and center should be firm (not damp) when touched.  Do not over brown as terrine will be dry if overcooked.  Remove from oven, run knife along ends of pan and lift out  of pan holding the paper, tipping onto your platter.  Slice into 6 slices (about 1″-1¼” thick).  Serve with cheese sauce (or some other favorite sauce if you prefer)

NUTRITIONAL INFO:   Makes 6 servings, each contains (including 1½ T. sauce):

288 cals, 21 g fat, 6.88g carbs, 1.48g fiber, 5.4g NET CARBS, 18.6g protein, 689mg sodium

Green Bean Casserole

Green Bean Casserole

This is as close to the classic, ever-popular holiday green bean casserole as I’ve been able to achieve as a low-carb alternative.  My husband liked it so much, he said “This one is your best version of this to date!” and dipped up seconds.   So I’ll be making this version from now on, it would appear.

I owe many thanks to Jennifer Eloff for her inspirational recipe:  Casserole Topping, to which I made a few additions.  I finally got around to trying it, Jen, and it really does work with cheese and bake mix!  I had visions of it sinking down into the bean mixture during baking, but it didn’t sink at all!  I added even more crunch with the addition of crushed pork rinds, which I couldn’t taste as such in the final dish.  🙂

I also used her Condensed Cream of Mushroom Soup for this dish, which I adore for so many things.  If you haven’t tried it yet, you simply MUST!    This delicious recipe is not suitable until you have gotten to Atkins Pre-Maintenance or Maintenance because of the grain in the bake mix.  Sub in coconut flour in the mix if you avoid grains.

INGREDIENTS:

3 c. frozen green beans, regular or French style

½ recipe Jennifer Eloff’s low-carb  Condensed Cream of Mushroom Soup

1  can (6-oz.) sliced mushrooms, drained (about ½ c.)

Dab olive oil to grease dish

1 recipe crumble topping (see below)

CRUMBLE TOPPING:

½ c. shredded Monterrey Jack cheese

1/3 c. Jennifer Eloff’s Splendid Low Carb Bake Mix

2 T. cold unsalted butter

10 medium pork rinds

1 T. toasted, dehydrated (or fresh) shallots (or red onion)

¼ tsp. my Cajun Seafood Spice Blend

1 T. hemp hearts (optional, adds a nutty flavor)

DIRECTIONS: Lightly oil a 2-qt. baking dish.  Preheat oven to 350º.  Place defrosted beans (uncooked), soup and mushrooms in a large bowl and toss well to coat.  Scrape the mixture into your lightly oiled baking dish.

To make topping, toss all ingredients but shallots or red onion into a food processor or blender and pulse a few times to make a crumbly mixture.  Sprinkle topping over the green bean mixture.  Sprinkle over shallots/onion and pop into 350º oven for about 20 minutes for French-style beans, 30 minutes for regular cut beans until golden brown on top.  Serve at once.

NUTRITIONAL INFO:  Makes 5 servings, each contains:

237 cals, 18.3g fat, 9.52g carbs, 3.32g fiber, 6.2g NET CARBS, 10.3g protein, 294 mg sodium

Baked Sweet Potato Halves

Another holiday treat at my house.  My mom just loved baked sweet potatoes with nothing but butter on them.  Me, I like to dress them up with a hint of cinnamon and brown ‘sugar’ flavor.  So I have blended her favorite way to cook them along with mine for this creation.  This method of preparation is effortless, fast and you can make a lot of them for a crowd at one time using a larger baking pan!   I just love to have any leftover halves for breakfast the next day, dotted with more butter and cinnamon. 🙂  Shown above with pork chop and delicious kale with bacon.  But tonight, I’m serving these potatoes with some baked ham leftover from the holidays.

Now sweet potatoes aren’t something a low-carber should be eating daily, mind you, but I have a couple left in the house from the Holidays, so I’m springing for higher carbs to finish them off.  Sweet potatoes are so nutritious and have a fiber deduction on the carb count as well, something white potatoes can’t boast about.  These are not suitable until you are in Pre-Maintenance or have reached goal weight.  Added note:  these are wonderful with baked fish, shrimp, pork, ham, BBQ beef or JUST BY THEMSELVES!

INGREDIENTS:  

1    medium 6-oz sweet potato, washed

2 T. melted butter

1/8-¼ tsp. cinnamon (I use Vietnamese cinnamon from Penzey’s)

OPTIONAL:  few drops maple extract stirred into the melted butter for brown sugar flavor

DIRECTIONS:  Wash potato and cut tips off each end.  Cut in half lengthwise.  Turn oven on to 400º.  Melt the butter in pan as the oven preheats, right in your metal baking pan. Remove pan from oven and stir in the cinnamon and maple extract.   Now rub the cut side of the potato in the cinnamon-y butter.  With cut side of the potatoes still down, place pan back in oven and bake at 400º for about 30 minutes (longer for larger potatoes).  When a knife tip can be inserted easily, they are done.  Remove, serve and enjoy!

NUTRITIONAL INFO:  Makes 2 servings, each contains:

175 calories, 11.5 g  fat, 17.35 g carbs, 2.7 g fiber, 14.6 g  NET CARBS, 1.54 g  protein, 48 mg sodium

Smoked Gouda Cauliflower

I thought I’d focus on holiday vegetable recipes today to wrap up my “it’s-not-a-boring-diet ” recipe extravaganza.  This recipe has proven to be one of the most popular ones on my website.  It was a real hit with my brother, at one time an executive chef at Top-of-the-Mark in San Francisco.  My husband just loves it!  It also has hundreds of thousands of fans on Facebook (I used to post there) so I thought I should definitely include it today.  It’s one of my all-time favorite cauliflower creation! 

Smoked Gouda doesn’t melt in dry heat easily, but if shredded, it usually melts acceptable when surrounded by moist heat, above and below.  In this dish, it takes an ordinary cheesy cauliflower casserole and transforms it into the sublime.  The Smoked Gouda truly sets this one apart from all the other cauliflower casseroles you have tasted.  It’s Atkins Induction friendly, too! 

I buy my Smoked Gouda at Sam’s Club and have discovered, not all stores carry quality Smoked Gouda.  The brand I bought in San Antonio at my mother’s grocery store was just awful….totally tasteless. This recipe appears in Volume 1 of Low Carbing Among Friends by best-selling author Jennifer Eloff and other talented chefs, including George Stella!  There are 5 volumes already released and two more due out soon!  More info on their Facebook page linked above.   You can order our cookbooks here or at Amazon.com.  These cookbooks are filled with easy, gluten-free, tasty low-carb creations by a group of very creative cooks. You’re going to WANT your very own set of these cookbooks, folks.  They are currently on sale at the lowest price ever, so get yours TODAY!

INGREDIENTS: 1 medium-large head cauliflower

6 oz. cream cheese, softened

4 oz. smoked Gouda cheese, grated or shredded

¼ tsp. coarse black pepper

chopped chives or green onion to garnish

DIRECTIONS: Cut up cauliflower into manageable pieces and boil or steam until tender.  Drain off any water and mash the chunks up slightly with a fork (do not puree, however).   Stir in softened cream cheese until it is melted and blended well.  Grease glass casserole dish and spoon half the cauliflower mixture in.  Sprinkle with half the grated smoked Gouda (I do not recommend using slices for this.  Grate it to facilitate melting).  Spoon remaining cauliflower into dish and top with rest of Gouda cheese.   Sprinkle with just a dash of salt and pepper if desired, but cheese has a lot of sodium.  If you are sodium sensitive, I wouldn’t add ANY salt.   Sometimes I add some chopped chives or green onion to the top, but this is not in the nutritional info below.  Bake at 350º for 20-30 minutes or until bubbly.

NUTRITIONAL INFO: Serves 6, each serving contains:  (you may get 8 servings, lowering carbs even more)

190 cals, 15.22g fat, 6.17g carbs, 2.4g fiber, 3.77g NET CARBS, 8.77g protein, 312 mg  sodium

Twice-Baked Portobello Mushrooms

I’m going to make these again as soon as I can get some more Portobellos.  These are yummy beyond words with grilled steaks.  We just love them!  So glad I tried this veggie combo so I can feel like I’m eating “high on the hog” as my Dad loved to say.  Of course, you can cook homemade mashed cauliflower, but the Birdseye frozen cauliflower rice is so good, and so convenient, why would you bother?  😉  This side dish is suitable for all stages of Atkins, Keto plans, Paleo and Primal as well.

INGREDIENTS:

3  Portobello mushrooms (around 3-oz. each)

3 T. olive oil

12 oz. pkg. frozen Mashed Cauliflower (Birdseye or homemade)

1 T. unsalted butter

¼ c. green onion or chives, chopped

¼ c. Cheddar Cheese shreds

DIRECTIONS:  Preheat oven to 350º.  Line a baking sheet pan with parchment.  Using a spoon, scoop out and discard the dark gills out of the mushrooms.  With a basting brush, lightly cot both sides of the mushrooms with olive oil.  Set them curve side down on the pan.  Pop them in oven for about 8-9 minutes.

While they are pre-cooking, cook the cauli-mash as instructed on the packaging.  I microwaved mine.  Remove film from tray and stir in the butter to mix and melt.  Remove mushroom pan from oven and spoon 1/3 of the mixture into each of the 3 mushrooms.  Top each with 1/3 of the Cheddar cheese shreds.  Finally, sprinkle the green onion or chives evenly on all 3 servings.  Return the mushroom pan to the oven and bake about 10 minutes, just until cheese is melted.

NUTRITIONAL INFO:   Makes 3 servings, each contains:

297 cals, 22.3g fat, 7.06g carbs, 2.33g fiber, 4.73g NET CARBS, 4.6g. protein, 261 mg sodium

Spinach Parmesan Bake

This has been a very popular side dish on my recipe blog.  Once you taste it, you’ll see why.  Facebook shares were amazing on this recipe.  This dish is simple to make and I’m very please with the resulting flavor profile.  The concept came to me one night when I thought about making a spinach soufflé, but wanted something a little denser and cheesier. 

This pairs nicely with roast pork and was delicious with our rosemary-onion pork steaks the night I created it.  I did put 3 large sliced mushrooms in this, but they added absolutely nothing to the flavor impact.  I won’t bother to include them again and I’m not including those in my recipe here.  This dish is Atkins  Induction suitable.  

INGREDIENTS:

2 T. olive oil

2 oz. onion, chopped

Dash salt

10 oz. box frozen spinach, thawed and drained

2 oz. cream cheese

2 oz. heavy cream

1/3 c. homemade mayonnaise

2 large eggs

3/4 c. grated Parmesan cheese

With Chicken Added for a meal!

VARIATION:   Add 2 c. chopped raw, boneless chicken meat to the skillet with the onion and turn this side dish into a delicious meal.

DIRECTIONS:  Preheat oven to 350º.  Heat olive oil in non-stick skillet over med-high heat.  Add onion and salt and sauté the onion until tender.  Add the drained spinach and cook a few minutes, stirring several times.  Lower heat to medium.  Cut the cream cheese into little chunks and melt and stir it into the warm spinach.  Add mayonnaise and stir well.  Turn off heat.  Beat the eggs in a bowl with the cream and pour it evenly over the top of the spinach.  Top with Parmesan and bake for 20-25 minutes at 350º.

NUTRITIONAL INFO:  Makes 4 servings, each contains:

420 calories, 38 g  fat, 6.78 g  carbs, 2.75 g  fiber, 4.03 NET CARBS, 15.28 g  protein, 622 mg sodium

Spaghetti Squash Parmesan with Bacon

This side dish is simply delicious, considering how little is in it!  The bacon and onion really GO together in this one!  It’s so good it had over 200,000 Facebook fans over time back in the day I posted there.  If you don’t overcook the squash and are careful when removing the threads, you can serve this right in the shell for its own “bowl” for festive occasions!   One reader suggests roasting the squash traditionally in the oven for added flavor if you have the time.  This one is definitely a must try.  This is suitable for all phases of Atkins and other Keto diets.

INGREDIENTS:

½ large spaghetti squash (yields about 4-5 c.)

4 slices bacon, chopped fine

3 oz. chopped onion

1/3 c. grated Parmesan cheese

Dash salt

¼ tsp. pepper

DIRECTIONS:  Cut a large spaghetti squash in half.  Remove seeds with a spoon and discard them. Place one half of the squash face down in glass baking dish, reserving the second half for some other use.  Surround with with ½” water and microwave 13-15 minutes.  Drain off water, invert, remove/discard seeds (or feed to the birds in your yard 🙂 ) and fork out the threads into the same dish.  If you prefer to roast your squash:  after you cut and seed the squash, add 2 cups water (1/2 inch deep) to a ceramic casserole dish; add squash face up and place in a 375º F oven for 45 minutes.  Then cover for 10 minutes with foil.  Fork out the threads onto a plate. Meanwhile, in a non-stick skillet, brown bacon bits and onion until bacon is done and onion is tender.   Sprinkle salt, pepper and Parmesan on top of squash.  Then spoon into the empty squash shell.  Spread onion/bacon mixture evenly on top.  Microwave 5 minutes on high, or bake in oven at 350º for 20 more minutes.

NUTRITIONAL INFORMATION: Makes 4 servings each containing:

107 cals, 6.7 g fat, 4.8 g carbs, 0.8 g fiber, 4 g NET CARBS, 7.1 g protein, 429 mg sodium

Twice-Baked “Potatoes”

I have made this delicious side dish probably hundreds of times throughout my 14 years of low-carbing.  I can make them blind-folded now, no recipe in front of me needed.  You just can’t beat an all-time favorite food!  Comfort food for sure at our house.  This dish is suitable for all phases of Atkins and Keto diets.  It is not suitable for Primal-Paleo due to all the dairy.

INGREDIENTS:

24 oz. raw cauliflower (about 2/3 of a large head)

1 oz. heavy cream

1 oz. cream cheese

1 oz. sour cream

4 T. melted butter, unsalted

4 oz. Cheddar cheese, shredded

2 large green onions, chopped

1 tsp. or less olive oil to grease dish

VARIATION:   Use American Deluxe cheese instead of Cheddar.

DIRECTIONS:  Cut cauliflower into smaller pieces and boil or steam until tender.  Drain well.  Stir in the cream cheese and butter to melt.  Add the sour cream and heavy cream and whip with a stick blender or hand mixer until smooth or nearly smooth.  Spread into a greased medium baking dish and top with half the cheese, then the onions and finally the rest of the cheese.  Bake in a preheated 350º oven for about 20 minutes or until lightly browned on top.

NUTRITIONAL INFO:  Makes 6 servings, each contains:

209 cals, 18 g  fat, 7.85 g  carbs, 2.98 g fiber, 4.87 g NET CARBS, 6.98 g protein, 257 mg sodium

Mom’s Roasted Candied Carrots

This was always a favorite of my mother, as her mother before her baked carrots this way.  At least 3 generations rest behind this recipe.  Of course, Mom always made them with real brown sugar, but my low-carb version tastes just as good as Mom’s!  These are seriously delicious and you will want to try them some time.  Your family will love you for doing so, especially if they’re not carrot fans, like my husband (who LOVES these carrots).   These are almost like a desert and not a vegetable dish.   You can bank on that reaction!    

Mom loved these carrots with baked ham, pork chops. baked chicken and seafood (just about anything, in other words).  We had them often with our turkey at Christmas, or alongside baked chicken and pork roasts throughout the year.  They shrink some during the baking/roasting process, so be sure to make plenty for your crowd.  🙂  These are a bit higher in carbs than the green beans on the plate above, but can be enjoyed once in awhile after you’ve graduated from the initial 2-week Induction Phase of your Atkins journey.  

INGREDIENTS: 

5-6  medium carrots (5-6″ long), peeled, each sliced in  3-4 long strips

2 T. melted butter

1 T. erythritol or sweetener of choice equivalent to 1 T. sugar

¼ tsp. quality maple extract

Dash salt (optional)

Dash pepper (optional)

VARIATION:   When she made big batches for company & holiday feasts (stacked thick in the pan) Mom would always lay 4 or more slices of bacon atop the carrots.  The bacon basted the carrots with a smoky taste and crisped up as the carrots finished baking.  Man, the sweet from the carrots blended into the bacon; the smoke blended into the carrots.  Flavor layers to beat the band.  If you do this variation, be sure to allow 1 slice of bacon per person to avoid fights over who gets the bacon.  Just sayin’.  🙂  

DIRECTIONS:   Preheat oven to 350º.  Peel and slice the carrots lengthwise (3-4 slices per carrot, or about 3/16″ thick). Melt the butter in a 9×13 baking pan (I used metal).  Needs to be this large for easy tossing during cooking and to be sure they lay in a single layer.  Remove from oven and add maple extract, sweetener, salt and pepper if using.  Stir well.  Lay the carrots in a single layer at the bottom, flipping them to coat both sides with the butter mixture.  Pop into oven and bake around 40 minutes, tossing/flipping them once at the 20 minute mark.  They should be fairly tender when done, but if thicker slices are slightly underdone, no problem.  They will be just be a little chewier, which I kind of like, personally. 🙂  Enjoy with your favorite meat and green entree!

NUTRITIONAL INFO:   Makes 3 adult servings, each contains:

119 cals, 7.9g fat, 11.76g carbs, 3.43g fiber, 7.33g NET CARBS, 1.23g protein, 190mg sodium

Smoked Gouda Brussels Sprouts

I created this tasty veggie dish for people like me, quite frankly, who are NOT very fond of this vegetable.  The Smoked Gouda seems to dominate the bitterness I and others find this vegetable to have.   It will make a lovely addition to your holiday table.  I love smoked Gouda cheese and this rendition of this nutritious vegetable even I like!  I just don’t say that very often about Brussels sprouts.  We both thoroughly enjoyed this and make it often now.  This veggie dish is suitable for all phases of Atkins, Keto diets and Primal Blueprint as well.

INGREDIENTS:

14 oz. frozen Brussels sprouts (cut in halves)

4 slices coarsely chopped bacon

2 oz. yellow onion, chopped

4 oz. smoked Gouda cheese, shredded/grated

VARIATION:  Omit the bacon for the cheese flavor to be more dominant.

DIRECTIONS:  Boil Brussels sprouts for 3 minutes.  Cut them in halves or smaller if you prefer.  In skillet, brown bacon.  Add chopped onion and saute together until onion caramelized.  Toss in the Brussels sprouts and stir, cooking for just a few minutes.  Transfer to baking dish if you prefer.  Top with grated cheese and bake at 350º for 15-20 minutes.

NUTRITIONAL INFO:   Serves 4, each serving contains:

322 calories,  13.2 g  fat, 9.68 g  carbs. 3.9 g  fiber, 5.78 NET CARBS, 25.38 g  protein, 508 mg sodium

Scalloped Rutabaga

This dish was inspired by Low-Carbing Among Friends team member Kent Altena.  He makes delicious Low-Carb Scalloped “Potatoes” using jicama.  Many of you are already familiar with Kent’s (Bowulf) low-carb recipe videos.  Kent’s inspirational recipe also uses some chopped ham for a complete meal, which is a very tasty dish.  Here is his recipe:  http://www.youtube.com/user/bowulf?feature=playlist-comment

But after trying his recipe, I decided to see what scalloped potatoes would be like made with sliced rutabaga (known as “swedes” in some parts of the world).  Rutabaga is closer to potato in texture when cooked, to me.  I also leave out the ham to make a simple side dish.  This was one of my earliest low-carb faux-potato dishes after I started following Atkins eating plan.

This dish came out fantastic!  My thanks to Kent for putting this idea into my head.  I also reduced the chicken broth and added chopped green onion to the ingredient list because I love green onion in anything potato-like.  Mmmm. This dish isn’t suitable until the starchier vegetable rung of the Atkins OWL ladder, but the difference in carbs for 2 oz. of either is just 0.6g net carbs……..so nearly negligible in my opinion.   My recipe is half the volume of his original recipe as there are only two of us.  But you can double my recipe if you have a big family.  I would not recommend freezing this dish as the cream cheese will likely break down a bit when frozen, which can be visually off-putting.  Flavor, however, will not be harmed by freezing.

INGREDIENTS:

12 oz. rutabaga, peeled and thinly sliced

3 green onions, chopped

4 oz. cream cheese, softened

¼ c. sour cream

1/3 c. chicken broth

Dash each salt and black pepper

5 oz. grated Cheddar cheese (or mixture of Cheddar and Deluxe American cheese)

DIRECTIONS:  Preheat oven to 350º.  Grease an 8″ square baking dish with a dab of butter or coconut oil. Peel the rutabaga with a carrot peeler.  This will work even if it has been wax coated by the grocer.  Slice it wafer thin.  I use a mandoline to do this, or you can use a food processor’s slicing blade.  Mix softened cream cheese and sour cream in a large bowl.  Stir in chicken broth, seasoning and cheese.  Finely chop and add the green onion and rutabaga.  Stir in 3 oz. of the grated Cheddar cheese, reserving the other 2 oz. for later.  When well-mixed, scrape it all into the greased baking dish and pop into a 350º oven for initially 30 minutes.  Remove and add remaining cheese evenly on top and put back into oven to bake for another 40 minutes.  Cool and serve with your favorite meats.

NUTRITIONAL INFO:  Makes 6 servings, each contains:

192 cals, 15.43g fat, 6.63g carbs, 1.45g fiber, 5.18g NET CARBS, 7.52g protein, 372 mg sodium

Broccoli and Mushrooms

CreamyBroccoli & Mushrooms

Broccoli and mushrooms just seem to go together for me.  Love that combination flavor.  This particular creation is a variation on a theme:  a broccoli dip a friend of many years served at get togethers.  When making the dip, I use chopped broccoli as fine as she chopped hers.  For this side dish, I leave it in small flowerets.   There was no cheese in her dip, just the mushroom soup.  Mine instead is made with a delicious homemade low-carb version of the canned classic condensed mushroom soup.  It came out delicious!  Just as good as her dip, maybe even better with my addition of cheese!  This recipe is suitable for all phases of Atkins, Keto diets but not acceptable for Primal or Paleo.

VARIATIONS:  Add 1 c. cooked leftover chicken or 1 cup cooked shrimp for a complete meal.  Substitute fresh or cooked frozen green beans for the broccoli.  Use Smoked Gouda cheese instead of the Monterey Jack.

INGREDIENTS:

½ bunch broccoli, stems and flowerets cut into medium chunks (about 3 cups)

1 oz. onion, chopped

6 large mushrooms, sliced (or a 4-oz can sliced mushrooms, drained)

1 T. olive oil

½ recipe Jennifer Eloff’s low-carb Condensed Cream of Mushroom Soup

½ c. shredded Monterey Jack Cheese

¼ c. heavy cream

Dash black pepper

DIRECTIONS:  Preheat oven to 350º.  Lightly grease a medium casserole or vegetable dish and set aside. Make a recipe of the mushroom soup.  You will only use half of it for this recipe.  The remaining soup should be reserved for some other use.  It will keep a week in the refrigerator.  Chop and steam the broccoli over water or in your microwave just until tender crisp.  Heat the olive oil in a medium skillet and brown the onion and mushrooms until nearly tender.   Turn off heat.    Toss the broccoli into the skillet and toss lightly.  Stir the cream into the soup mixture and blend well.   Spoon it over the broccoli-mushroom mixture, add the cheese and stir gently with a spoon to mix. Sprinkle with black pepper and bake at 350º for 30 minutes or until hot and bubbly.  ENJOY!

NUTRITIONAL INFO:    Makes 4 servings, each contains: (does not include optional meat)

215.5 cals, 18.35g fat, 7g carbs, 2.22g fiber, 4.78g NET CARBS, 6.45g protein, 348 mg sodium

Creamed Kale and Spinach

This little creation got a resounding two thumbs up from both of us. I’ve creamed spinach a bazillion times, but wanted to see what a little kale added to the picture would bring.  Well, I knew it would bring a marvelous macronutrient profile, but flavor wise, did not want the kale to dominate the final dish.  I wanted the onion and bacon to come through.  By blending the green vegetables, they were a a nice complement for the bacon-onion flavor layers.

I added a secret ingredient, one of my favorite condiments, and THAT is what made this dish so special!  Truly!  I keep telling my readers how I love my homemade Shawarma Mayo , how it is almost addictive, and man, it really is!  It brings a creaminess and flavor layer to recipes that to my way of thinking, is just indescribable.  It scored again in this new dish in my collection.  For those who say they don’t like kale abut like spinach, this one is a musts try.  I think you’ll be quite surprised at how good this is.  🙂

This recipe is suitable for all phases of Atkins, Keto diets and Primal eating plans.

INGREDIENTS:

4 oz. thick slice bacon (4 slices, coarsely chopped)

3 oz. red onion, shopped

1 large kale leaf, stemmed and chopped (2 c. total)

8 oz. frozen leaf spinach, thawed

2 T. my Homemade Shawarma Mayo

4 oz. cream cheese

DIRECTIONS:   Preheat oven to 325º.  Lightly grease/oil a medium baking dish and set aside.

In a large skillet over high heat, fry the chopped bacon until done but not crisp.  Drain on paper toweling.  In the grease, sauté  the onion until tender.  Add the chopped kale and sauté for 2-3 minutes or until it is getting limp.  Add the spinach and stir to blend the mixture well.   Reduce heat to medium and add the Shawarma mayo and cream cheese, stirring to melt and evenly distribute the cream cheese.  Spoon the mixture into the baking dish and top with the browned bacon.  Pop into 325º oven and bake 15-20 minutes to allow flavors to blend. Serve with your meat entree and sit back and listen to them rave about it. 🙂

NUTRITIONAL INFO:   Makes 4 servings, each contains:

328 calories, 31 g fat, 8.75 g carbs, 2.8 g fiber, 5.95 g NET CARBS, 8.9 g protein, 494 mg sodium

Carrots in Tarragon Cream

Carrots in Tarragon Cream

My grandmother on my Dad’s side was very fond of creamed vegetables.  She was a country girl raised in a very poor farm family but was a very good cook.  My great-grandmother, who I also knew, taught her well.  She grew her own vegetables and love, love, LOVED creamed soups and creamed vegetables.  Over the years, I guess she served me creamed peas, new potatoes, mushrooms, asparagus, baby onions, spinach, corn………. You name it and she probably creamed it.  🙂  She had 2 dairy cows on her property, some chickens and a nice garden.  She produced her own milk, cream and even taught me to churn butter.  This defrayed the grocery costs of a single mom raising 9 children during The Depression.    She was quite the gardener and sold vegetables at the local curb farmer’s market in Texarkana.

My non-green vegetable tonight was created in honor of her love of all things creamed.  She wasn’t big on spices, so I doubt she ever even heard of tarragon, but I think she would have  liked these and been proud to serve this dish.  My husband isn’t too fond of carrots and even he liked this new dish of mine!  His thumbs up on an un-favorite vegetable speaks volumes to me.  This recipe is not suitable until the Atkins OWL phase, as carrots are a bit carb-y.  It is suitable for Paleo-Primal followers also.

INGREDIENTS:

4 medium carrots, peeled and cut into ½” pieces

Water to cover carrots

1 T. unsalted butter

Dash each sea salt and pepper

¼ c. heavy cream (or coconut milk)

Optional: 1/8 tsp. xanthan gum or your preferred thickener

1/4 tsp. dried tarragon

DIRECTIONS:  Bring carrots and water to slow boil and cook until just barely tender.  Drain off all but about ½ c. of the cooking water.  Add butter to the carrots and remaining water.  Lower heat and add cream.  Sprinkle with xanthan gum and simmer on low until it begins to slightly thicken. The cream sauce will turn slightly yellow from the beta carotene in the carrots, but that doesn’t impact flavor.  Sprinkle with the dried tarragon and toss.    Dip up into serving dish.

NUTRITIONAL INFO:  Makes 4 servings, each contains:

103 cals, 8.55g fat, 6.55g carbs, 1.95g fiber, 4.6g NET CARBS, 0.9g protein, 89 mg sodium

Creamed Brussels Sprouts

We low carbers are perhaps more open to the notion of trying new recipes for vegetables because they make up the majority of our eating plant.  We all talk about our love of creamed spinach, but did you ever think about creaming Brussels Sprouts?  Well I did last night and WOW!  So glad I had this idea, as it took this vegetable I’ve never liked much to a whole new level.  I have always found Brussels sprouts to be bitter (and I love cabbage, so go figure!).  Creaming them solves my bitterness dislike of this vegetable.    

My husband’s response with “Be sure to put this one on your blog!”  It was not only the rich creaminess, but the bit of Parmesan, bacon and onion that took this one over the top!  This recipe is suitable for all phases of Atkins, Keto diets and Primal blueprint.  The dairy makes this unsuitable for Paleo.

INGREDIENTS:

3 thick slices bacon, chopped coarse

4 oz. red onion (or yellow), chopped coarsely

1 lb. fresh Brussels sprouts (or frozen)

2 oz. cream cheese

½ c. heavy cream

2 T. Parmesan grated cheese

DIRECTIONS:  Preheat oven to 350º.  Cut stems off sprouts and slice each into ½” slices.  Place in ceramic dish with 1/2″ water and microwave 1 minute, stir and then 1 min. longer.  Remove from microwave (all water will be evaporated, or discard any water left in the dish).  Set aside. 

In a skillet over high heat fry bacon until browning.  Add onion and sauté until tender.  Lower heat and add cream cheese to melt and blend in evenly.  Add cream.  Now toss in sprouts and toss gently.  Grease the baking dish you used before.  Pour the sprout mixture into the dish.  Sprinkle with the Parmesan cheese.  Pop the dish into a 350º oven and bake 15 minutes to allow flavors to blend.  Serve at once.

NUTRITIONAL INFO:  Makes 6 servings, each contains:

154 cals, 11.8g fat, 8.85g carbs, 3.06g fiber, 5.79g NET CARBS, 7.3g protein, 121 mg sodium


Spicy Zucchini Cakes

Spicy Zucchini Cakes

Sometimes I like to turn my vegetables into croquettes!  That way I can introduce whatever seasonings into the mixture I want before searing them off to create a flavorful browned surface.  I created these with zucchini, but have done similar things with broccoli.  I have even made croquettes of my calabacita recipe (omitting the cheese).   Anything I think I can form into the right thickness of batter, well it’s highly likely I’ve tried to turn it into croquettes over the years.  What can I say?  I love fried food like so many of us do.  🙂

I created these to serve with baked ham, but have since learned they are pretty good with all meats.   I even varied these once for a complete lunch. by adding 2 oz. tuna to them (which was quite good).  These are so delicious for so little effort and ready in no time!  This would therefore be a good recipe for your busy week nights.  Over 100,000 people on Facebook thought so when I posted this recipe debuted there on our ‘Low Carbing Among Friends’ page.

These lovelies are not suitable for Atkins Induction unless you use an Induction-friendly One Minute Muffin for the breadcrumbs instead of the biscuit listed.  They are a go for Keto, Paleo and Primal eating plans if you use plan-suitable bread and skip the hot sauce (use more cayenne instead).

INGREDIENTS: 

15 oz. grated zucchini (3 small zucchini)

1½ oz. onion, grated fine

2 eggs, beaten

1 plan suitable biscuit or piece of bread, crumbled (or ½ c. crushed pork rinds)

Dash of salt

Dash each black pepper and cayenne pepper

2 tsp. Sriracha chile sauce (or plan-suitable hot sauce)

1 T. oil of your choice

DIRECTIONS:  Grate the zucchini over a clean kitchen towel.  Lightly salt with the dash of salt and let it sit there while you work.  The salt will draw out the water from the zucchini while you are mixing everything else.

In a medium mixing bowl, beat the eggs.  Grate the onion into the eggs and add the black pepper, Sriracha sauce and bread crumbs (or crushed pork rinds, if using).    Stir to mix well.

Roll the zucchini in the towel so you can wring/squeeze out any remaining water over your sink.  Open towel over the bowl and scrape the zucchini into the egg mixture.  Stir well with a spoon.

Heat the oil in a non-stick skillet over high heat.  Using a ¼-cup as a scooper, scoop ¼ cup mixture into the hot oil and let it spread a bit so it is flat.  Cook until first side is golden brown.  Do not disturb these excessively as they are cooking.  When the first side is brown, flip with a spatula and cook the other side to a golden brown.  Remove to a paper towel to drain excess grease.  Transfer to serving platter and serve at once.

NUTRITIONAL INFO:   Makes 9 cakes, each contains: (will vary slightly with your choice of bread or crumbs)

68.4 cals, 5.46 g fat, 2.58 g carbs, 0.78 g fiber, 1.8 g NET CARBS, 3.55 g protein, 70 mg sodium

Okra Fritters

Click to enlarge

Sometimes I’m too lazy to cook individual coated and fried okra.  I find fritters so much easier.  This little experiment came out quite tasty!  In fact, they are so good, I had trouble stopping eating them.  No matter how low the carbs, too many will still do you in.  Just being honest, letting you know portion control on these is difficult.

This recipe, however, is not suitable until you reach the grains rung of the Phase 2 OWL (Ongoing Weight Loss) carb re-introduction ladder.  Those still on Induction might try subbing flax meal for the bake mixes and then it would be suitable for Induction.  I RARELY deep fry (mostly oven fry now), as I don’t like using oil this way, but I will occasionally make these when I get a craving for them.

My Oven-Fried Okra is good, but just not as easy as making these little lovelies.  🙂  If you prefer, you can use all CarbQuik or all Jennifer’s bake mix.  Your call on that one.  I just like the synergy the two mixes combined bring to the final result.

You can have many more tasty low-carb recipes like this one at your fingertips with your very own copy of the team’s cookbooks.  See a sampling of the recipes in store for you: LOW CARBING AMONG FRIENDS.  Order any of our cookbooks at Amazon or here: http://amongfriends.us/order.php

INGREDIENTS:

8 oz. frozen sliced okra, coarsely chopped even smaller

2 oz. onion, finely minced

1 T. Jennifer Eloff’s Gluten-Free Bake Mix

1 T. CarbQuik bake mix (or 1 T. more Jen Eloff’s GF bake mix for gluten-free version)

1 egg

2 T. heavy cream

Pinch each of salt, black pepper and cayenne pepper

2 c. frying oil of your choice

DIRECTIONS:   Thaw, drain, and chop okra.  Place in mixing bowl.  Add remaining ingredients and stir well.  Heat oil to VERY hot and drop batter by soup spoons into fat.  Allow to fully brown before attempting to flip to second side or these will fall apart on you.  When both sides are nicely browned, remove and drain on paper towels.

NUTRITIONAL INFO:   Makes twelve 2″ fritters, each contains:

25 cals, 1.67 g fat, 2.09 g carbs, 0.73 g fiber, 1.36g NET CARBS, 1.34 g protein, 24 mg sodium

Spicy Onion Rings

Click to enlarge

Taking that coating shown on my last post of Oven-Fried Summer Squash, I took this coating to a Nirvana level for my husband.  I am not as crazy about onion rings as my husband is.  He has always just LOVED them!  That’s all he keeps talking about this week, so I think I’m going to have to cook him a batch of these soon.  😉  These are actually oven-baked instead of fried, so there’s no greasy mess on the stove to deal with after preparing these.  Such deliciousness, so I hope you’ll try these soon.  I think you will like them!

I will admit up front they are not as easily hand-held as traditional batter-fried rings.  No surprise there with an overall thinner coating used….but that’s how I keep them low-carb.   On the up side, the coating does brown nicely and is very crunchy.  Only the smallest diameter rings cut from the ends of the onion can be picked up by hand easily.  You just have to place the larger ones onto your plate and use a fork to eat those.  For me, that beats adding coconut flour to the picture, which I am NOT fond of at all.  I’ll have to test adding some other lower carb flour or maybe a few bread crumbs to the coating to see if that improves the “holdability” of these rings.  So many ideas; so little time, I think is the saying.  These tasty rings are Atkins Induction friendly!

INGREDIENTS:

8 oz. onion cut into ½” rings

2 oz. plain pork rinds, crushed very fine

3/4 tsp. my Seafood Spice Blend

4 T. my homemade mayo

DIRECTIONS:  Preheat oven to 450º.  You will need a large, preferably non-stick baking sheet to bake these.  Slice onion and separate rings until you have 8 oz.  That’s about 16 medium ½” rings.  Parboil for 1 minute in boiling water and lift out onto paper towels to totally dry. Crush pork rinds very fine in processor, blender or by hand.  Remove any larger, hard bits that are invariably in pork rinds when you crush them.  Mix spice into crushed rinds in a small bowl.  In a shallow dish or pie plate, pour the 4T. mayo.    Slowly dip an onion ring into the mayo, coating the outside and the inside (with your finger if necessary.  Then drop them into the pork rinds and coat well outside and inside.  Lay each onto the baking sheet.     Repeat until all rings have been coated.  Pop into 450º oven for about 25 minutes.  They tend to brown more and faster on the bottom where they touch the pan, so you will want to turn them over at the 15 minute mark.  Not much grease so no draining is necessary.  Lift onto serving platter and ENJOY!

NUTRITIONAL INFO:   Makes 4 servings of 2 0z. each.  Each serving contains:

196 cals., 15.6g fat, 5.1g carbs, 0.53g fiber, 4.57g  NET CARBS, 9.5 g  protein, 271 mg sodium

Oven-Fried Summer Squash

fried sauzh

This dish has become one of the most popular recipes on my website with over 100,000 fans now.  It is super easy to make and super good!  We Americans just seem to love fried foods……the crunchier the better.  I think that love affair started out with onion rings and just evolved into a “frying makes everything better” craze.

My recipe here requires no standing over a skillet of hot, popping grease either!  This came out so good, it was impossible to refrain from seconds!  🙂  This recipe works with yellow squash, Italian zucchini or the Mexican calaba squash that looks like a paler green zucchini.  Some call it Mexican zucchini.  Calaba has less water content than its darker green “cousin” and is very nice for baking because of this quality.  The flesh inside is a yellower color than Italian zucchini, but I don’t detect the flavor different from the darker green variety of zucchini.  The inside gets fully cooked in 20 minutes without par-boiling first.

The pork rinds make this crunchy on the outside and will sure “scratch that itch” for crunchy food.  This dish is Atkins Induction friendly.  It’s nice to know that I have tested this coating on a variety of other vegetables as well:  eggplant, okra, onion rings and even chicken fried steak!  Put your experimenting hat on and have fun!

DO NOT USE A SILICONE SHEET OR PARCHMENT when baking this squash or it will get soggy and sweat on the bottom (I already tried that out.).  Bake these slices directly on non-stick or lightly oiled metal pan. 

INGREDIENTS:

16 oz. zucchini, calaba (its cousin) or yellow squash

2 oz. pork rinds, plain, finely crushed

1/3 tsp. my Seafood Spice Blend

6 T. my Homemade Mayonnaise

DIRECTIONS:  Preheat oven to 450º.  Crush rinds and add spice blend on a paper plate or saucer and mix well.  Dip out mayo onto another paper plate or saucer.  Cut stems and bottom tip off squash and cut into ¼” slices lengthwise.  Lay the squash slices on paper towels.  After 15 minutes or so, blot off all water they bleed with dry paper towels. When they are no longer bleeding their water, holding the very tip of each piece with one  hand, with a basting brush in your other hand, baste both sides of the squash slices with a coating of mayo.  Set brush down and  with your now free hand, sprinkle rinds on both sides of the squash and then place on a non-stick sheet pan.  Repeat for each piece.  I’ll tell ya up front, if you just dip these babies down into the rinds, more will stick on, but you ARE going to run out of rinds before you’ve coated all the squash.  Been there; done that;  🙂   So trust me on this one…….just sprinkle it onto each side, letting the excess fall back into the plate and you should have enough for the entire batch.  Place each coated piece of squash on a lightly oiled metal pan. Pop into a 450º oven for 20 minutes or until nice and brown.  No need to turn during baking as the bottoms get nicely browned where they touch the pan. ENJOY!

NUTRITIONAL INFO:  Makes 4 servings, each contains:

245.3 cals, 21.3g fat, 4.18g carbs, 1.25g fiber, 2.93g NET CARBS, 10.8g protein, 250 mg. sodium

Sweet Steamed Cabbage

What’s there to NOT like about cabbage?  The smell of it boiling on the stove, quite frankly.  I love the TASTE of cabbage, but have never liked the SMELL of it slow cooking in that ham pot……..that is until I discovered how to cook it in the microwave.  If you’ve never been particularly fond of cabbage, you may just want to give this one a try.  I do hope all my cabbage haters out there will give this one a go before they write off cabbage forever, like my husband once did.   

This method of cooking is my attempt to replicate a cabbage dish a little Chinese restaurant in Texas City used to serve.  It was slightly sweet and cooked just until slightly soft wilted with a heavy dose of butter.  I’ve gotten pretty close to their flavor now with this dish.  I think you will REALLY like this method of cooking cabbage.  For me, two key added pluses is 1) not having to heat up the house with slow boiling and 2) not having that odor in the house for hours on end either.  This recipe is suitable for all phases of Atkins, Keto diets, Primal and Paleo.

VARIATION:  Add crumbled, cooked, crisp bacon on top right before serving. 

INGREDIENTS:

3 c. green cabbage, cut into 2″ pieces (leaves separated)

½ c. water

2 T. butter

2-3 drops liquid Stevia, liquid Splenda or sweetener of choice

Optional:  salt & pepper to taste

DIRECTIONS:  Cut cabbage into 2″ chunks and separate the leaves.  Place in glass dish.  Add water, butter and Splenda.  Microwave 4-5 minutes only on HI, stirring once during cooking at 2 minutes.  Test for doneness as microwaves vary.  You want the cabbage just wilted and tender but not very soft really.  If properly done, this dish has none of the strong cabbage flavor or smell cooked cabbage usually leaves behind for hours.  It’s one of the few cooked cabbage dishes my husband will eat, in fact, for this reason.  Serve at once.  As I like the sweetness of this particular cabbage dish, I don’t usually add salt or pepper, but each to his own preferences.

NUTRITIONAL INFO:  Makes 3 servings, each contains:

90 calories, 7.7 g.  fat, 5.12 g  carbs, 2.23 g  fiber, 2.94 g  NET CARBS, 1.2 g  protein, 19 mg sodium

Judy’s Parmesan Baked Yellow Squash

I just love yellow summer squash (the straight-neck, soft-skinned variety) and have cooked it a ton of different ways over the years.  But honestly, this recipe is by far the best way I’ve ever eaten it.   It’s so good, I make it often during the Holiday Season!  It goes so nicely with turkey and dressing in my opinion.  This is a recipe of a friend I used to work with years ago in Galveston, TX.  Parmesan is not usually the cheese people put on yellow squash dishes, but I’m here to tell ya this has an OUTSTANDING flavor.   I brought this dish to a round-robin dinner one time and people were flooding me with requests for the recipe.  It garnered over 100,000 Facebook fans when I once posted there.  The sweet caramelized onions just bring so much pizazz to the flavor profile, I do hope you will all try this out sometime.  It’s that special!  This recipe is suitable for all phases of Atkins, Keto and Primal Blueprint programs.

INGREDIENTS:

6 yellow summer squash (medium, about 6″ long)

6 oz. yellow onion

1 Flax Sandwich Bun, crumbled (or 1 slice other low-carb bread)

1/2 c. grated Kraft Parmesan cheese

Dash of Salt and Pepper

3 T. butter

DIRECTIONS:  Slice onion into thin slivers and sauté in butter in no-stick skillet.  Cook until they begin to brown, as the caramelizing is essential to the flavor of this dish.  Turn off heat and let them cool.

Now grease a 9×13 glass casserole pan with butter.  Slice the squash laterally/lengthwise into 1/4″ slices (or thinner if you want to speed this dish up a bit).  This goes together in lasagna-type layers.  First sprinkle 1-2 T.of the flax bun crumbs on the bottom of the pan.  These will soak up moisture that bleeds out of the squash during cooking.  Now place a single layer of squash slices in the pan.  Jimmie them around, switching ends of slices so the pan is pretty much filled without gaps.  Top with 1/4 of the browned onions.  Next sprinkle 1-2 T. Parmesan cheese.  Repeat these steps until all ingredients are used, ending with onion on top.   Cover pan tightly with foil and bake 30-40 minutes at 350 º.  Uncover, add 2-3 T. water if there is no moisture left in the bottom of the pan.  Bake another 20-30 minutes (uncovered) or until squash feels tender when knife is stuck into it and onions on the top are toasty brown.  Toast top in broiler if need be.  You want the top layer of onion to be attractively toasted. This dish is a big hit every time I make it and it goes nicely with your holiday turkey dinners.

NUTRITIONAL INFO: Makes 6 servings, each containing:

150 calories, 10.35 g  fat, 9.88 g  carbs, 3.0 g  fiber, 6.88 NET CARBS, 7.2 g  protein, 26 g sodium

Jicama Hash Browns

Hash browns made with jicama (diced or grated) are very similar to those made with potatoes.  A little crunchy, but the taste is very close.   These literally were one of the steadfast recipes that helped to get me through the difficult 2-week Atkins Induction Phase.  They are pretty good with scrambled eggs and bacon/sausage.  Do give them a try sometime.  The difference in texture is well worth the carb “savings”.  

INGREDIENTS:

1 c. peeled jicama, diced or shredded (I like shredded best)

1 oz. chopped yellow onion

2 tsp. bacon grease

Dash salt and pepper

DIRECTIONS:  Grate the jicama (or dice into 1/2″ pieces).  Drain and pat dry with paper towels.  Chop onion.  Melt grease in no-stick skillet and brown the two together, stirring often, until jicama is well-browned.   Serve at once.

NUTRITIONAL INFO: Makes 1 serving which contains:

136 cals, 8.7g fat, 13.6g carbs, 6.6g fiber, 7g  NET CARBS, 1.2 g protein, 175 mg. sodium

Red Radish Cottage Fries

Red Radish Cottage Fries

I’ve been making hash browns with onion fried in bacon grease pretty much all my life.  Of course, back in the day, I used real potatoes.  My Southern roots grow deep and this is how my mother and her family fried potatoes.  But many years later, I worked for a boss that had been stationed in Vietnam who was always talking about how he loved to cook Asian stir fries.  He invariably mentioned using red radishes in his stir fries, which astounded me.  I had used kohlrabi before, but never radishes.  He said they weren’t at all bitter when cooked like that.  I tried them and was pleasantly surprised.  Just like he said:  no bitterness/hotness at all!    Then a light bulb went off.  Daddy’s hash browns!!  Once I tried them, I’ve done them hundreds of times like this now.  They’re GREAT with breakfast eggs and bacon.  These are another of the dishes that got me through the difficult Induction Phase of Atkins.  I even enjoy these now as a ‘potato’ side at dinner, like the Chicken-Fried Steak shown above!

You will just be amazed how close to red potatoes red radishes taste when fried this way.  For me, the key here is the onion and bacon grease.  They’re just not as good done in olive oil in my opinion.  🙂  Do try this some time if you have not yet had the pleasure.  The carb count is astounding compared to real potatoes!  This recipe is suitable for All phases of Atkins, Keto diets and Primal-Paleo followers as well.

INGREDIENTS: 

15 medium radishes, cut in large pieces

2 oz. yellow onion, sliced

2 T. bacon grease

Dash each salt and coarse black pepper

DIRECTIONS:  Heat skillet over medium-high heat.  Add bacon grease.  Toss in the onion and saute until it begins to get soft and brown/caramelize on the edges.  Add radishes, salt and pepper and continue stir-frying until radishes are no longer opaque.  You want them to just begin browning so the skins will stay a pretty reddish color.  🙂

NUTRITIONAL INFO:   Makes 3 servings, each contains:

87 cals, 8.9g fat, 2.26g carbs, 0.56g fiber, 1.7g NET CARBS, 0.3 g protein, 75 mg sodium

“Potato” Cakes

We low-carbers know you can’t eat white potatoes on a low-carb plan.  However you can get creative with jicama and other vegetables and get that potato taste craving satisfied when they are fried nice and brown.  These “potato” cakes stay crunchy as jicama is quite crunchy even after cooking.  The flavor is VERY close to real potatoes when cooked this way.  This recipe is OK for Induction Phase, too!  You can also make these with grated, peeled turnip or rutabaga, but recalculate carbs if you change the base veggie.  When you get to the OWL starchy vegetable rung, using rutabaga is the best choice for these, in my opinion. 🙂 

I have, since original publishing, added the flax meal and resistant wheat starch.  These are optional, but really improve these in flavor and texture for me and I intend to include them always, so I have included in the nutritional info numbers below.  Those 2 added ingredients only increase net carbs by 0.17 g.

INGREDIENTS:

12 oz jicama, grated (or daikon radish, or turnip, or rutabaga)

1/4 c. onion, grated

1 whole egg + 1 small egg white (I used 2 T. carton egg whites)

1/8 tsp. sea salt

Dash black pepper

2 T. bacon grease, or oil of your choice

1 T. flax meal (optional)

1 T. resistant wheat starch (optional, and discontinued product now)

DIRECTIONS:  Skin/peel back the brown outer coating of your jicama. Weigh out 12 oz. and grate. Pat out any moisture with paper towels and place grated jicama into a medium bowl.  Add all other ingredients and stir well. Put unused jicama in a ziploc plastic bag in your fridge for some other use.   Melt grease/oil in non-stick skillet over high heat.   Using fork or spoon, dip half the mixture into 5 portions onto the hot skillet, spreading it out fairly thin into 2½” patties patties.  Brown nicely on both sides.  I serve with my morning eggs and bacon/sausage or as a dinner side.  Enjoy with a clean conscience!

NUTRITIONAL INFORMATION: Makes 10 potato cakes, each has:

53 cals, 3.55 g fat, 4.19 g. carbs, 2.27 g. fiber, 1.92 g NET CARBS, 1.39 g protein, 30 mg. sodium

Sofrito Zoodles

Early along in my Atkins journey, I learned that zucchini noodles not only made a great support for spaghetti sauce and to create a new twist on mac and cheese, but they could also be pretty delicious with not much added to the picture.  One of my favorite ways to serve them is just sautéed in butter and a good dousing of Parmesan cheese.  It reminds me of risotto.

When I created my version of sofrito sauce, I found it to be delicious on just a plate of zoodles.  These healthy “noodles” are delicious alongside a variety of meats and seafood.   Their flavor profile is most adaptable to what you are serving.  Last night I served them with broiled shrimp.  They will also serve as a foundation for a number of delicious meat stir-fries, Bolognese sauce, as well as numerous seafood dishes like my Clam Sauce.    They are exceedingly easy to make, cook and are Atkins Induction friendly.  This recipe is also acceptable for other Keto plans, Primal or Paleo regimens as well.

INGREDIENTS:

2 large zucchini (about 16 ounces)

2 T. unsalted butter

2 T. my Sofrito sauce

2 T. Parmesan cheese (finely grated)

VARIATION:  Use yellow summer squash instead of zucchini (or any combination of the two).  For added color impact, you could add some carrot you have run through the noodler.

DIRECTIONS:   Form the zucchini noodles in your preferred noodling tool.  I used my hand-held Vegetti® for this task as my larger Spirooli® broke irreparably not long ago.  I like the little Vegetti®!  I understand they make an electric Vegetti® now, but I’ve not seen them in the stores yet.  Saw it on the internet.  But the hand held model works just fine.  You will end up with about 3½-4 c. zucchini noodles.  Depending on your tool, you may want to cut them shorter with a knife (I did).    Place on a clean kitchen towel and pat/press to absorb all the water.  Wait a few minutes and press again to dry them well of their water.

Heat a non-stick skillet and melt the butter.  Add the noodles and with a large kitchen fork, stir them gently just until they go limp and translucent.  Add the Sofrito sauce and mix well.  Remove from heat and dip into a serving dish or onto plates.  Sprinkle Parmesan on top either in your serving dish or allow your diners to add it themselves at the table.  Enjoy!

NUTRITIONAL INFO:    Makes 4 servings (about 3/4 c. each after shrinkage).  Each serving contains:

108 cals., 8g fat, 5.95g carbs, 1.9g fiber, 3.05g NET CARBS, 3.1g protein, 60 mg sodium

Mashed Cauliflower (Foolproof!)

mashed-cauliflowerOne spring day back in 2009, I saw a magazine article about Atkins Low-Carb Diet.  I’d always been intrigued and heard testimonials from people who said it worked for them.  But I wasn’t willing to give up my mashed potatoes, rice and noodles.  Then I saw a recipe for making a mock mashed potato dish from cauliflower on their user forums and the rest is history.   Bought the book, was sold, discovered you can even make a mock rice from cauliflower………..and noodles from zucchini and spaghetti squash.

I only recently discovered a way to really firm up the ever-popular mashed cauliflower (called cauli-mash) to my my stiffness test.  I love all vegetables (except beets) so doing a diet that focuses on lots of vegetables with only moderate amounts of meat is my kind of diet, as I’ve never been a big meat eater.   I no longer even think of Atkins Low-Carb as a “diet”.  It’s just the way I eat.

The secret ingredients are cream cheese and glucomannan powder, derived from the konjac tuber, another low-carb kitchen miracle.   Although a bit pricey initially, a bag of this lasts me a year (or longer!), as you use such tiny amounts in cakes, cookies/puddings for thickening, texture enhancing or stiffening up your cauli-mash.  In this recipe, only ¼-½ tsp. is needed to do the job.  When mine clumps up in storage, I just run it through my small food/coffee grinder to powder it again.  🙂

Glucomannan is what shirataki noodles are made from, if you do not know this factoid.  I purchase my glucomannan on-line at Netrition.com, but there are other sources.  Bob’s Red Mill line carries it I believe.  Glucomannan is pure fiber so it doesn’t impact the carb count in your recipes.  It will firm up your mashed cauliflower if you have problems with moisture bleeding out of the cauliflower after whipping, resulting in a “soupy” batch of cauli-mash.  There is some literature that declares glucomannan also helps maintain healthy blood glucose levels, so a win-win in more ways than one!  This recipe is suitable for all phases of Atkins and Keto diets.

INGREDIENTS:

1 medium head cauliflower

4 T. butter

2 T. cream cheese

1/8-¼ tsp. sea salt

¼-½ tsp. glucomannan powder

VARIATION:   Add 2-4 T. heavy cream for even richer results

DIRECTIONS:   Stem and cut up cauliflower into flowerettes.  Place in 4-qt. saucepan, cover with water and bring to boil.  Lower heat to medium and cook until very tender when poked with a knife or fork.  Drain off water in a colander or sieve.  After water is drained, using the back of a spoon, press the cauliflower against the wall of the colander or sieve to press out even more water until most appears to be released.  Spoon back into the saucepan.

Add the butter cheese and salt and whip with a hand mixer or stick blender until very smooth.  Add ¼ tsp. of the glucomannan and pulse the blender/mixer a few seconds.  If still a pretty loose mixture add the rest of the gluc powder, whipping once again to incorporate it throughout the mixture.  The mixture will continue to firm up a little more more as it sits on your table.  You don’t want to overdo gluc powder, as it will REALLY get stiff if you put too much!  Any leftovers on this dish are fantastic great reheated with a bit of chopped green onion and cheese on top. 😉

NUTRITIONAL INFO:   Makes 6 servings, each contains: (not including heavy cream)

109 calories, 11.36 g fat, 5.26 g carbs, 2.45 g fiber, 2.81 g NET CARBS, 2.35 g protein, 96.33 g sodium

Ranch® Buttermilk Dressing (or dip)

Ranch Buttermilk Dressing

I came up with a homemade version of Ranch® Dressing for my husband, who just loves it on salads.  I think my version tastes better than what is sold in the bottle (which I actually don’t like), so it’s clearly not exactly the same.  But it’s pretty good and has no unhealthy ingredients.  It’s lighter on salt, too, which I like.

I’m not too fond of dill, so I tend to reduce it in most recipes.  But my husband LOVES dill and likes more in recipes, thus the range of dill shown in the Ranch® Powder recipe linked below.  I basically used equal amounts of the herbs I selected except the dill and thyme.  A tablespoon of thyme would have been way too much!   This dressing is super yummy!  Try it and see if you don’t agree it’s even better than the famous bottled stuff!  As you well know, this also makes an excellent dip for raw vegetable party trays.  All you have to do for the dip is increase the sour cream to make it thicker.  You’ll have to recalculate carbs to add in the extra sour cream.  This recipe is suitable for all phases of Atkins and Keto diets.

INGREDIENTS:

1 c. homemade mayonnaise

3/4 c. sour cream (add ¼ c. more if using as a veggie dip)

¼ c. buttermilk (only 2 T. if using as a veggie dip)

1 T. my Ranch Dressing Powder Blend

2 tsp. red wine vinegar

1/8 tsp. salt

OPTIONAL:  1/8 tsp. glucomannan powder if you like a thicker dressing

DIRECTIONS:  Measure the first 3 ingredients into a medium bowl.  Whisk well to blend to a smooth mixture.  Add my Ranch Dressing Powder Blend, vinegar and salt and whisk a couple minutes until the herb mixture is thoroughly blended in.  If using the glucomannan thickener, whisk it in last.  Transfer to a saved empty plastic dressing bottle (I always keep and wash them for homemade dressings) if you have one, or a lidded jar.  Close tightly and chill.  Serve on crisp green salads or as a dip for raw veggies.

NUTRITIONAL INFO:   Makes two cups or eight ¼ c. servings, each contains:

251 cals, 26.8g fat, 1.81g carbs, 0.1g fiber, 1.71g NET CARBS, 1.72g protein, 66 mg sodium

Lobster Salad

We bought a huge box of lobster tails at Sam’s at Christmas.  We’re down to the last two tails in the box.  Going to make a nice lobster salad for our dinner this evening.   Neither of us are terribly hungry and we’ve been at doctor’s appointments and physical therapy all day long.  Needless to say I forgot to defrost any meat and can thaw these tails fast.

This salad is visually appealing and its flavor matches its attractiveness on the plate.  With avocado added to the plate, it is also extremely filling, so I would definitely call this one a main dish.  This recipe is suitable for all phases of Atkins and other Keto diets.  Paleo and Primal folks can enjoy this one as well!

INGREDIENTS:

4 c. mixed salad greens

10 leaves baby spinach

4 San Marzano mini tomatoes, sliced crosswise (or use 8 cherry tomatoes)

2 oz. red bell pepper, sliced thin

½ green onion, chopped into ½” pieces

1 ripe avocado, skin & seed removed, sliced

4 T. homemade mayonnaise, seasoned with your fav blend (I used my Shawarma Mayonnaise)

2 lobster tails (10 oz. in shell, 8 oz. meat yield total)

VARIATION:  Add some finely diced celery and a dash of cayenne pepper to the lobster salad mixture.

DIRECTIONS:  Bring a 4-qt. saucepan of water to a boil.  Drop in lobster tails and boil for about 7-8 minutes.  Remove, cool a bit and holding with a pot holder, cut the tail shell down the “belly” side and remove the meat from the shell.  Cut meat into 1/2″ bite-sized pieces and set aside for now to cool further.

While the lobster is boiling, plate your base salad greens, dividing the above vegetables equally between two serving plates.  In a small bowl, toss the cooled down lobster meat with the homemade mayo and spoon half of the mixture onto the center of the greens on each plate.  You can use a plain, unseasoned homemade mayo, but I like to use a seasoned mayo for salad dressings, particularly good that way with lobster.  Serve salads at once.

NUTRITIONAL INFO:   Makes 2 servings, each contains:

414 cals., 35.4g fat, 13g carbs, 7.25g fiber, 5.75g NET CARBS, 26.45g protein, 415 mg sodium

Chicken Waldorf Salad

Once Atkins followers get to the OWL (Ongoing Weight Loss) carb re-introduction ladder, they can occasionally have a bit of fruit.  I only allow myself to indulge a couple times a month, but it sure is nice.  Sometimes we like to have salads as our main course, and my favorite is a good Waldorf Salad.  

If you use mostly (or all) peeled jicama for the apple in a classic Waldorf Salad, the carbs will be less.  But quite honestly, a little real apple greatly helps in taste.  The nutritional stats below reflect the apple as stated in the recipe.  As a result, this dish isn’t Induction friendly, but it isn’t half bad with just jicama, if you want to try it that way until you graduate out of the Induction Phase.  🙂

INGREDIENTS:

1        13 oz. can chicken meat (water pack only), well-drained and flaked apart

1        red apple, UNpeeled and diced

3/4 c. walnuts, coarsely chopped

1 c.      diced celery

¼ c.   homemade mayo

DIRECTIONS: Mix all ingredients in a mixing bowl with a spoon and serve in a pretty serving dish (over lettuce if you like).

NUTRITIONAL INFO: Makes 3 servings, each contains:

551 cals, 44.9g fat, 11.9g carbs, 3.6g fiber, 8.3g NET CARBS, 31.6g protein, 152 mg sodium

Bacon Salad

shawarma-bacon-saladThis salad is one of my favorites.  It was the only salad I would eat when I was a child.   It combines two of my very favorite flavors:  bacon and creamy tangy onion.  This yummy salad makes a delightful, light lunch can be enjoyed during all phases of Atkins, Keto diets and Primal-Paleo regiments as well!  Nutritional numbers are approximate, as I can’t know how much of the greens you will put into each salad bowl.   Salads aren’t an exact science in my opinion. Most of the calories and fat are, as you might expect, in the dressing.

INGREDIENTS:

6 oz. raw bacon, cut into 1/2″ pieces

Enough greens for 4 salads:  romaine or lettuce of choice, green onion, celery, bell pepper

1 small carrot, peeled and slivered with peeler

8 cherry tomatoes, sliced in halves

6 slices cucumber, sliced again into halves

4 T. my Homemade Mayonnaise or my Shawarma Salad Dressing

3 T. hot bacon grease

DIRECTIONS:  Prepare the salad greens in a large salad serving bowl.  Set aside.  In a skillet, brown the bacon until fully done to your liking.  Dip bacon onto paper towels to drain.  Turn off heat and let skillet cool a few minutes.  Drain off for some other use all but 3 T. of the bacon grease. You only want 3 T.  left in the skillet.  Add the shawarma mayo to the skillet grease and stir quickly.  Pour over the salad greens and top with the cooked bacon.  Serve at once as this salad is supposed to be slightly warm at serving.

NUTRITIONAL INFO:   Makes 4 salads, each contains approximately:

409 calories, 43 g fat, 6.45 g carbs, 2.75 g fiber, 3.7 g NET CARBS, 4 g protein, 380 mg sodium
Spicy Purple Coleslaw

Everyone has their own favorite regular coleslaw recipe.  Mine is here.  But I developed a NEW spicy take on an old favorite, adding jalapeño to the  picture.  The final salad has a bit of a bite, but not too much for me, and you know I don’t like things too spicy.    We just love this slaw!  And it’s so colorful!  Goes great with fried seafood or BBQ fare.  This delicious salad is suitable for Atkins Induction and all Ketogenic diets.  It also fits into a Primal-Paleo lifestyle.

INGREDIENTS:

2 c. sliced purple cabbage, cut real fine

1 lg. or 2 small, whole jalapeños, seeded (or not), slivered into thin strips

1 oz. red onion, slivered very thin (or 1 whole green onion, chopped)

4 T.  homemade mayo

¼ tsp. seasoned salt, Emeril’s Cajun Blend or my Shawarma Spice Blend

1/8 tsp. coarse black pepper

Dash granulated onion powder

DIRECTIONS:   Cut up the cabbage as you usually would for coleslaw and place in a mixing bowl.  You can use a food processor to slice it, but I don’t like mine as fine as my processor blade grates/chops it.  Add all remaining ingredients, adding the jalapeño gradually to achieve your family’s taste tolerance for spicy.   Toss all well to coat all cabbage.  I like to chill for an hour before serving.  

NUTRITIONAL INFO:  Makes 3 servings, each contains:

202 calories, 18.6 g  fat, 6.87 g carbs, 1.6 g fiber, 5.27 g NET CARBS, 76 mg sodium

Jicama Mint Salad

I’ve had this salad dressing on cucumbers many a time and loved it.  Tonight I decided to try it on jicama and it was WONDERFUL!  Very refreshing salad for summer.   The crispness and slightly sweet quality of the jicama is perfect with mint!   This salad is suitable for all phases of Atkins, Keto diets and Primal-Paleo as well.

INGREDIENTS: 

2 T. of my Mint Sauce

1 c. jicama, peeled, cut in strips about 1″ long (or grated if you prefer)

Sprinkle of salt to taste

Splash rice wine vinegar (optional)

DIRECTIONS:  Mix up the Mint Sauce recipe linked above and set aside.  Peel and cut up jicama and place in bowl large enough to toss easily.  Add 2 T. of the mint sauce and toss.  Taste to see if you want to add salt.  If you prefer your salads tart, add a sprinkle of rice wine vinegar (available in most grocery stores in the Chinese Food section) to the jicama as you toss it.  Plate and serve with tomato slices.

NUTRITIONAL INFO:  Makes 1 serving which contains:

78 calories, 2.4 g  fat, 13.2 g carbs, 7.1 g fiber, 6.1 g NET CARBS, 1.7 g protein, trace of sodium in vinegar

Purslane Salad

Click to enlarge

Does it get any prettier?  I have seen the occasional recipe that called for purslane over the years, but was never inclined to try any.  Quite honestly, I wasn’t very familiar with what it was.  But I have begun growing it on my patio in huge pots.  It is so hardy and has such lovely blooms!  The entire plant is edible, leaves and flowers!  I decided I was going to finally taste it today.  To me, the flavor of all three parts of the plant (flower, leaf and stem) I would liken to a lemony bib lettuce.  Purslane is a powerhouse of nutrition!  I no longer live at the house with the ginormous pots of multi-colored Purslane, so I include a photo of my current small pot of yellow purslane below:  http://www.naturalhealth-solutions.net/healthy-eating/powerhouse-of-nutrition-purslane.

Puslane

To harvest purslane, just pinch off individual stems from the mother plant, grab the end of the stem with one hand, and in one quick motion with your other hand’s thumb and index finger, strip the leaves off the stems like you would strip rosemary leaves off the stems.  Place the leaves (and blooms,, if using) into a colander or sieve.  Rinse under cold water to remove any dirt or insects hiding there.  Purslane wilts fast in dressing, so wait and prepare and dress your salad right before serving.  Below is a pic of what edible purslane looks like growing:

CAUTION:  If you find and gather what looks like wild growing purslane, be sure to snap the stem.  If it oozes a white, milky-looking substance, BEWARE! What you have found IS NOT edible purslane!!  The plant that oozes the white milky substance when pinched is an inedible impersonator known as spurge that just happens to look like purslane!  Its blooms are tiny and barely visible.  The edible purslane, when a stem is snapped has clear fluid in it.  Another difference, is the leaves are ‘alternate’ along the stem on the edible purslane.  Leaves are ‘opposite’ along the stem of wild spurge.  If eaten by mistake, wild spurge will make you very sick!  It’s leaves are also less thick and fleshy than the leaves of edible purslane.  Edible purslane has a clear fluid when squeezed.  Toxic wild spurge has a milky white liquid and is shown photo right:  creeping-spurge

The inspiration for this recipe is a Middle Eastern salad I’m familiar with known as Fattoush.  It has toasted torn pita bread pieces in it.  Well, I decided to just omit the bread because I sure don’t need to be eating bread in my salads.  But you could break up toasted low-carb bread into this salad if you like.

INGREDIENTS:

1 c. purslane shoots and leaves, stripped off stems (I only use the very tips of the stems)

2 c. romaine lettuce, broken into pieces

1/4 c. fresh mint, coarsely chopped

½ c. cucumber, peeled and diced

6 grape tomatoes (I cut mine into halves)

½ oz. red onion, slivered as thinly as possible

2 T. extra virgin olive oil

1 oz. fresh lemon juice

1 tsp. balsamic vinegar

1 clove garlic, minced

1/8 tsp. sumac (optional, but traditional in Fattoush)

Dash each salt and black pepper

Couple purslane blooms (also edible)

OPTIONAL:  Toasted, broken up bits of 1 slice of low-carb bread

DIRECTIONS:  Harvest the purslane leaves and rinse under cold water and pat dry with paper toweling.  Add the torn lettuce, mint, cucumbers, red onion, tomatoes and salt/pepper.  In a small dish mix the measure out and stir the oil, lemon juice, balsamic vinegar, garlic and sumac.  Drizzle over the salad greens and toss.  Serve at once.

NUTRITIONAL INFO:  Makes 3 servings, each contains:

101 calories

9 g  fat

4.66 g  carbs, 1.43 g  fiber, 3.23 g  NET CARBS

1.1 g  protein

61 mg sodium

258 mg potassium

16% RDA Vitamin A, 25% C, 10% E, 16% iron, 11% manganese

Tomato-Mushroom Salad

Click to enlarge

We’re dining outside the box tonight for our Easter Sunday dinner tonight.  I’m serving my tasty Lobster & Shrimp Dien Bien on real rice (I always treat myself for holiday dinners) with this tasty Tomato-Mushroom salad above.  We’re also having a side of butter-sautéed garden-picked spinach with it.  Yum!

This Atkins Induction, Keto and Primal-Paleo friendly salad is ever so good with seafood and colorful, too!  I just love this stuff!

INGREDIENTS:

1 Portobello mushroom, cut into ¾” dice

3 T. olive oil

2 Roma tomatoes, seeded and chopped large

10 black olives, cut into halves or thirds

2 fresh basil leaves chopped

¼ c. green onion, chopped

1 tsp. yellow onion or shallots, chopped

1 T. balsamic vinegar

1 clove minced garlic

Sprinkle of black pepper and salt

DIRECTIONS: Sauté cubed mushrooms in olive oil with onion/shallots and green onion.  Remove when mushroom is done.  Allow to cool on counter.  Add dressing ingredients and toss well.  Chill 30 minutes or so before serving.  I serve this in a Romaine lettuce leaf if serving to guests.

NUTRITIONAL INFO: Makes 2 servings, each containing:

251 cals, 23g fat, 10.7g carbs, 3.1g fiber, 7.6g  NET CARBS, 3.75 g protein, 190 mg sodium

Spinach Salad with Olive Dressing

Click to enlarge

Whenever I make up a batch of my Olive Tapenade, I love to use part of it for a lovely salad dressing.  My husband is an olive addict if there ever was one.  This salad came about in just such a scenario.  We had enjoyed the tapenade I made this week on my Almond-Arrowroot Crackers and there were just a few tablespoons left.  I had an open bag of fresh spinach, with just enough left for two salads, so I took the balance of the tapenade and created a tasty spinach salad to go with our dinner tonight.  This salad is delicious and suitable for all phases of Atkins, Keto diets and Primal-Paleo as well.

INGREDIENTS:

3 c. fresh spinach leaves

12 slices cucumber

8 tiny San Marzano tomatoes (or cherry tomatoes), sliced in half

2 T. my Olive Tapenade

3 T. olive oil

3 T. red wine vinegar

Dash each salt and pepper

Sprinkle of Parmesan Cheese (optional)

Few thin slivers of red onion (optional)

DIRECTIONS:  Plate half the spinach in each of 2 salad bowls or plates.  Top each decoratively with 6 slices of cucumber and 4 of the tomatoes.  Add red onion if using.  Sprinkle with Parmesan if using.  Drizzle each salad with half the dressing and serve at once.

NUTRITIONAL INFO:   Makes 2 salads, each complete salad contains:  (does not include Parmesan or red onion)

254 cals, 26.3g fat, 4.15g carbs, 2.2g fiber, 1.95g NET CARBS, 1.75g protein, 239 mg sodium

DRESSING ALONE:  half recipe contains: 239 calories, 26 g  fat, 1.2 g  carbs, 0.5 g  fiber, 0.7 g NET CARBS, 0.2 g  protein

Shawarma Mayo or Salad Dressing

Click to enlarge

One of tastiest salads with grilled steak

If you are a fan of Middle Eastern Shawarma meat wraps, you need to try this flavor on a salad!  Pretty amazing!  This creamy salad dressing uses homemade mayonnaise as its base.  The Shawarma spice does the rest!  It’s imbued with the flavors of Middle Eastern gyros or kebabs.  It a delightful flavor to change up chicken or turkey sandwiches.  It’s equally delicious atop green salads and spinach salads.  This recipe is suitable for all phases of Atkins, Keto diets and Paleo-Primal diners as well.  Just thin with an extra splash of vinegar, some cream or coconut cream to turn this thick mayo into a lovely salad dressing.  It is also doubles as a Bernaise Sauce stand-in (just use tarragon instead of shawarma spice mix) to serve with grilled meats, fish and even some veggies!  Yum!!

INGREDIENTS:

½ c. my Homemade Mayonnaise

1 T. my Shawarma Spice Blend

Dash salt and pepper

DIRECTIONS:   Mix ingredients, stirring well and chill until ready to use for sandwiches.  To use it as a salad dressing or sauce for meats or seafood, thin it with a splash of more vinegar, a little heavy cream, sour cream or yogurt.  Keeps about 7-10 days in the refrigerator.  It will get an off odor when it has gone bad.

NUTRITIONAL INFO:   Makes 8 T. of mayo (4 servings).  Each 2T. serving contains:

200 cals, 22 g fat, 0.16 g carbs, 0.02 g fiber, 0.14 g NET CARBS, 0.64 g protein, 32 mg sodium

Kale-Orange-Walnut Salad

Click to enlarge

We’ve covered my favorite soups thoroughly this week.  Now I’d like to shift my readers thoughts to the next meal course:  salads.  As a child I didn’t much care for salads.  It wasn’t the greens that I didn’t care for, but rather the dressings.  The sourness of vinegar, nor mayonnaise-based dressings were my cup of tea.   When I discovered how to make homemade mayonnaise after I got married…….well my world flipped on its head.  I loved the homemade variety of this famous condiment.  And man, oh, man did it ever lend itself to endless variations for salad dressings!

And once I tasted balsamic vinaigrettes, well the world of tart dressings expanded immensely for me.  That edge of sweetness was apparently what I craved on a salad.  So I’d like to re-share some of my all-time favorite salad creations with these two foundational dressings.  My favorite was created from a lovely bunch of kale.  Rather than cook it all, which was my traditional approach to this leafy green, I decided to try a raw kale salad one night.  I’d seen in magazines people eat it raw, so I thought why not?

Since kale is a bit stronger than other greens when cooked, I thought a bit of fruit might round out any bitterness of the vegetable when eaten in its raw state.  And it did!  The earthy taste of the walnuts and walnut oil playing off the citrus in the orange vinaigrette are pure heaven in this salad.  It is delicious and perhaps my favorite salad of all time now, to be quite honest.  I serve it often.  Even my husband loves this one, and he’s not fond of walnuts or nuts period!  I do hope all my readers will try this one on your less-than-enthusiastic salad eaters.  It will change them I’m convinced!

This recipe is not suitable until you reach the the higher fruit level of the Atkins OWL carb ladder (Phase 3).  It is perfectly OK for Ketogenic diets (although you may want to use lower-carb berries rather than oranges).  It is also suitable for Primal and Paleo as well.

You will find many more delicious salads and dressings like this in the hottest selling Low Carbing Among Friends cookbooks.  International author Jennifer Eloff has pulled in the most incredible talent on the the low-carb cooking scene.  Together they bring to you a bevy of tasty recipes you will be proud to serve to friends or family.  Order your personal set (or individual volumes) today from Amazon or here:   http://amongfriends.us/order.php 

BASE SALAD:

1½ oz. kale leaves, stems removed, sliced thinly  (this was 2 large leaves for me)

2 oz. raw onion, sliced thinly (I only had white on hand, but red onion would be perhaps even better)

½ oz. walnuts, coarsely broken apart  (about 7 halves)

2   ½”-slices of orange, cut into thirds

ORANGE VINAIGRETTE:

1 medium orange (you will only use part of it for this recipe)

2 T. walnut oil (important not to substitute other oils here)

2 tsp. balsamic vinegar

2 T. orange juice (fresh squeezed)

Dash each salt and coarse black pepper

Dash garlic powder (optional)

DIRECTIONS:  Cut the orange in half across the segments.  Peal one half of the orange with your knife.  Cut away 2 slices about the size of two large sections and cut the two into about 6 bite-sized pieces.  Set aside.  In a small bowl, squeeze out 2 tablespoons of orange juice from the uncut half.  to the orange juice, add the walnut oil, balsamic vinegar, salt, pepper and if using, the garlic powder.  Stir and set aside.

Remove the tough stems from the kale.  Wash and dry the leaves.  Julienne slice the kale (thinly) and place into a medium salad serving bowl (unless you plan to plate the salads individually). In that case, you can use any old bowl large enough to toss this in.  Add the thinly sliced onion, walnuts and pieces of orange.  place the bowl of greens and fruit in your refrigerator until ready to serve.

The final step right before serving is to pour the orange vinaigrette over the greens and toss well to coat.  If you wish to plate it, place half the salad onto each of two individual serving plates. Garnish with a slice of orange if desired.  I didn’t have any tonight, but a sprinkle of pomegranate kernels would be delicious as well as pretty on this salad.  🙂

NUTRITIONAL INFO:   Makes 2 servings, each contains:

206 cals, 18.4g fat, 9.85g carbs, 3.2g fiber, 6.65g NET CARBS, 2.3g protein, 90 mg sodium

Baked “Potato”

Baked Potato

Shown with an achiote (a Latin American spice blend) seasoned beef patty (thus the red-orange color), steamed summer squash and onions (my husbands favorite)

Although baked potatoes in their skin (called Jacket Potatoes in Britain) are certainly not unique to America.  But I have always thought of them as American comfort food, so I’m including them in our exposé on American classic foods.

I wish I could take credit for this “recipe”, but another low-carber brought this up on one of my low-carb forums.  I finally was able to find a moderately large turnip in the grocery store and tried this tonight.  Man, oh man!  Upon tasting, I was in baked potato heaven for sure!  This tastes JUST like a baked red skin potato, slightly sweet and not mealy like most types of white bakers!  No taste of turnip at all!  Now this comment is coming from someone who for YEARS picked the turnips out of the turnip greens pot; who didn’t care for turnips stir-fried, boiled or oil fried.  Always found them bitter.  My husband likes them even less than me!  But I tell you, the way to cook these things is to microwave them!!!  No taste of turnip at all!   Just the creamy, sweet taste of a buttery red-skin potato!

The skin is textured about like a potato skin, but it will not get crispy and is quite bitter, so DO NOT EAT TURNIP PEELINGS.   Just eat the soft inner flesh.  My husband even agreed these do not taste like turnips cooked this way!  It’s pure magic what happens in that microwave!  So now I can have my baked “potato” with grilled steaks once again!  I’m so delighted to have learned about this method of cooking turnips!  This “potato” recipe is Induction friendly!

INGREDIENTS:

4  whole 4-5 oz. turnips (larger ones if you can find them)

8 tsp. butter (2 tsp. per “potato” serving)

DIRECTIONS:  Wash and scrub the turnips under running water.  Trip the stem end flat and cut the point off the tip of the turnip as well.  Poke the turnip skin several times to avoid rupturing during cooking.  Place on microwave turntable.  Cook on HI for about 3 minutes.  Turn over and cook on HI for about 3 more minutes.     They should be thoroughly soft when done.  Split and place 2 tsp. butter on each turnip.  Feel free to add the traditional baked potato toppings like sour cream, cheese, bacon bits and chives, however those are not calculated in the nutritional info below.

NUTRITIONAL INFO: Serves 2, each whole “potato” serving contains:

230 cals, 20.5 g fat, 11.2 g  carbs, 4.4 g fiber, 6.8g NET CARBS, 1.7 g protein, 60.2 mg sodium

Jicama “Fries”

Jicama Fries

Man, who eats a hamburger without some fries?  But low-carbers don’t eat potatoes!  Oh My!  Whatever shall I do?

I tried these on a whim early on in my low-carb journey and they were truly  FANTASTIC!  Best of all, you don’t have to stand over a skillet of hot grease popping on you!  The Seafood Spice blend in the coating takes away the sweet edge jicama has, without dominating the final fries.  So don’t side-step this part of the recipe.  It’s essential for the best results.  Other spices and blends could be substituted in if you prefer.  The coating really browned nicely and stayed crispy even as the fries cooled off!  Even my picky hubby gave these a thumbs up, and at first, he wasn’t even going to taste them!  These are Atkins Induction friendly, too!

Many low-carbers swear by turnip fries, but I find they don’t get crisp enough for my liking.  Eggplant fries will get crisp enough, but the center is too slippery to taste anything like classic pommes frites (French fries).  Jicama sort of tastes like potatoes……..especially when fried hard, so I thought my experiment worthwhile.  In fact, many people call the Mexican potatoes!  I’ve even made breakfast hash browns and potato cakes (latkes) out of jicama with success!  Don’t poo-poo these until you’ve given them a try for a potato substitute.  Only thing they won’t do is get soft simmered in soups.  Although some say freezing peeled jicama before using in soups will allow them to soften up, I have not tried that personally.  For soups, I tend to use diced daikon white radish or turnips for a potato substitute.

Some of you may be tempted to take a shortcut and use spicy/BBQ pork rinds and omitting the seasoning blend in the recipe.  Please don’t forget flavored pork rinds are laden with sugar and sometimes modified food starch as well……not acceptable ingredients for us low-carbers.  So don’t sabotage your diet efforts with such a shortcut.  Read the ingredients listed on the packaging if you don’t believe me.  In fact, as a matter of routine, low-carbers should ALWAYS read ingredients listings, for ALL processed food packages.  It’s the only way to get the WHOLE picture of what you are or are not putting in your mouth.  Trust me, the net carb count just isn’t the whole picture when it comes to food!  The math works, but the ingredients sabotage you.

INGREDIENTS:

8 oz. jicama, peeled and cut into fries

What a Jicama looks like

What a Jicama looks like

2 T. homemade mayo

2 oz. plain pork rinds, crushed

1/2 tsp. my Seafood Spice Blend

Oil to coat baking pan if not using non-stick sheet pan

DIRECTIONS:

Preheat oven to 450º.  Cut jicama and place in bowl.  Brush well with mayonnaise, making certain you haven’t missed any spots. You want total coverage for the pork rinds to adhere to.  Crush the pork rinds in processor/blender.  Add spice blend to crushed pork rinds in a small bowl.  Now drop mayo-coated jicama (a few at a time) into the seasoned rinds and shake to coat well.   Place directly on oiled or non-stick baking sheet.  Bake for 20 minutes until tops are nicely browned.  I like to turn them mid-baking for more even baking, but that is not necessary.  Bottoms will be even browner than the tops!  A word of experience, DO NOT BAKE THESE ON SILICONE SHEETS, as they will not brown and crisp up properly on the bottom.  I found this out the hard way.

VARIATION:   Substitute turnip for the fries.  Brown them a bit more than shown for crisper turnip fries as turnips have more moisture in them.

NUTRITIONAL INFO: Makes 4 servings each contains:

165 Cals, 11.4 g fat, 5.50 g carbs, 2.78 g fiber, 2.22 g NET CARBS, 11.2 g protein, 276 g  sodium

Eggplant in Garlic Sauce

Click to enlarge


This is my version of a dish that we used to order regularly at Szechuan East, a Chinese restaurant that was once (and may still be for all I know) at the Galleria on Westheimer in Houston, TX.  It was truly one of the very best Chinese dishes I’ve ever eaten in my life.  I admit, up front, eggplant can be visually off-putting, but the flavor on this dish is just amazing!  All at the same time it is sweet–sour–and spicy.   One night while enjoying dinner in this particular restaurant, we saw Debra Paget (well-known 50’s actress who played Indian princesses in more than one film) enjoying a meal across the room, all alone at her table.  My husband told me her last husband was a wealthy, business Asian, but reading his bio , he was well-known in his own right.  Being children of this film era, we were quite excited to see someone who had been so famous at one time and my husband went quietly over to her table after her meal concluded and asked for her autograph.  She seemed genuinely pleased she had been recognized and was delighted to do so.  Sorry, I digress.  🙂

Though this dish is also off-putting texturally (pieces are quite slippery when properly cooked and sauced), the flavor is so delightful it continues to be a favorite in many Chinese restaurants.  Both my husband and I can get past the look and texture to appreciate the subtle flavor nuances of this dish.  It is typically eaten atop rice, but it’s not bad eaten alone or incorporated into a simple shrimp-stir-fry.  It is outstanding with grilled Asian Marinated meat.  If you like eggplant and are not bothered by its sometimes slippery texture, you will REALLY like this dish.  🙂

VARIATION:  This is also good with RED bell pepper strips sauteed and added to the mix.  Colorful, too.

INGREDIENTS:

1   1-lb. eggplant, peeled and cut into ¼” strips

4 T. olive oil

½ tsp. HOT sesame oil

½ pkt. Splenda or Stevia   

1 T. rice wine vinegar (no substitions)

1½ T. low sodium soy sauce or coconut aminos

3 small cloves garlic, minced

½ c. chicken broth

1/2-1 tsp. oriental chili paste like Sambal Oelek (or use crushed red pepper flakes)

1/8 tsp. xanthan gum to thicken

1 tsp. sesame seeds (optional and not included in numbers below)

DIRECTIONS:   Peel eggplant and cut into ¼” strips.  Heat olive and hot sesame oil in non-stick skillet or wok.   Add eggplant strips and gently stir fry.  Keep gently tossing them around on the hot pan surface and they WILL eventually get limp and soft.  When they are all starting to look translucent, add all remaining ingredients and simmer 1-2 minutes.  Add a tiny bit of your favorite thickening agent and stir well until slightly thickened.  Serve at once.

NUTRITIONAL INFO:  Makes 3 servings, each containing:

214.7 cals, 19.8g fat, 9.37g carbs, 4.77g fiber, 4.6g NET CARBS, 2.23g protein, 355 mg sodium