Banana-Peanut Butter “Twinkies®”

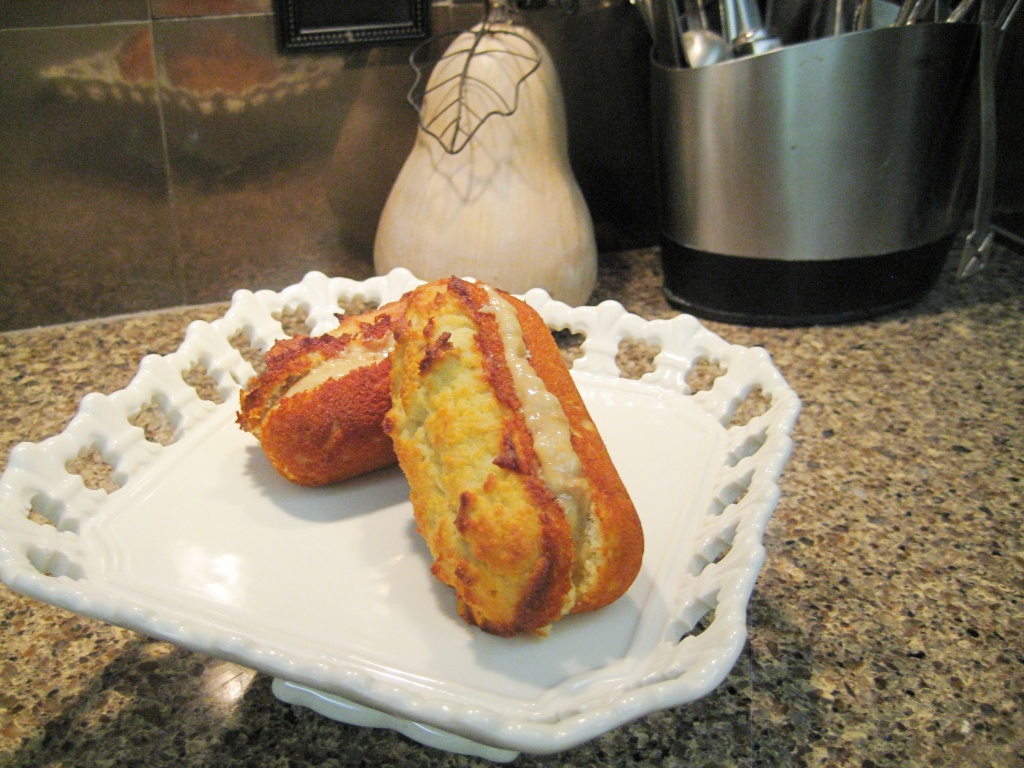
One of my Mom’s regular afternoon snacks to offer us when I was growing up was half a banana sandwich with a smear of peanut butter dotted on the bananas.  If there were animal crackers in the house, she’d place a slice of banana on top of one of those with a dot of PB on top.  Well, I took those memories to a new little creation…….a banana-PB  muffin of sorts.   These were tasty beyond words. 

My Twinkies® are a little carb-y, so obviously not for daily consumption, but a tasty treat once in awhile.  🙂  These are not suitable until you have reached the higher-carb fruits level of the Atkins carb reintroduction ladder and are nearer to maintenance.  These are too high carb for most Keto followers, but those at goal weight might indulge occasionally.  Totally not suitable for Primal-Paleo followers.

VARIATION:  If you don’t have a Twinkie® pan, just make as muffins.  They’ll be just as good.

INGREDIENTS:

1 recipe my Banana Muffin batter

1 ripe banana, mashed

2 T. natural peanut butter (I use Laura Scudder)

DIRECTIONS:  Preheat oven to 350º.  Lightly grease a non-stick Twinkie® pan (or use a regular muffin pan if you don’t have a Twinkie® pan).  Make the recipe of banana muffin batter in a medium bowl.  Stir until smooth.  Spoon into the 12 slots of the pan equally (will be quite full as they don’t rise much).  Bake at 350º for about 22-25 minutes.  I’m still learning to use a new oven in a new house so these came out a little browner than I like, but the oven performed pretty well for me.  Remove when firm to the touch and cool off.  Slice in half and set aside.  Stir the mashed whole banana and peanut butter together until well-blended.  Makes 3/4 c. filling or exactly 12 tablespoons.  Fill each “Twinkie”® with 1 T. of the filling, spreading somewhat evenly.  You can, if you prefer, just “frost” the tops of the Twinkies® with the filling, if you find this easier.  🙂  ENJOY!

NUTRITIONAL INFO:  Makes 12 Twinkies®, each contains:

244.7 calories, 19.76 g  fat, 13.15 g  carbs, 4.29 g  fiber, 8.86 g  NET CARBS, 6.83 g  protein

Apricot Trail Mix

0023

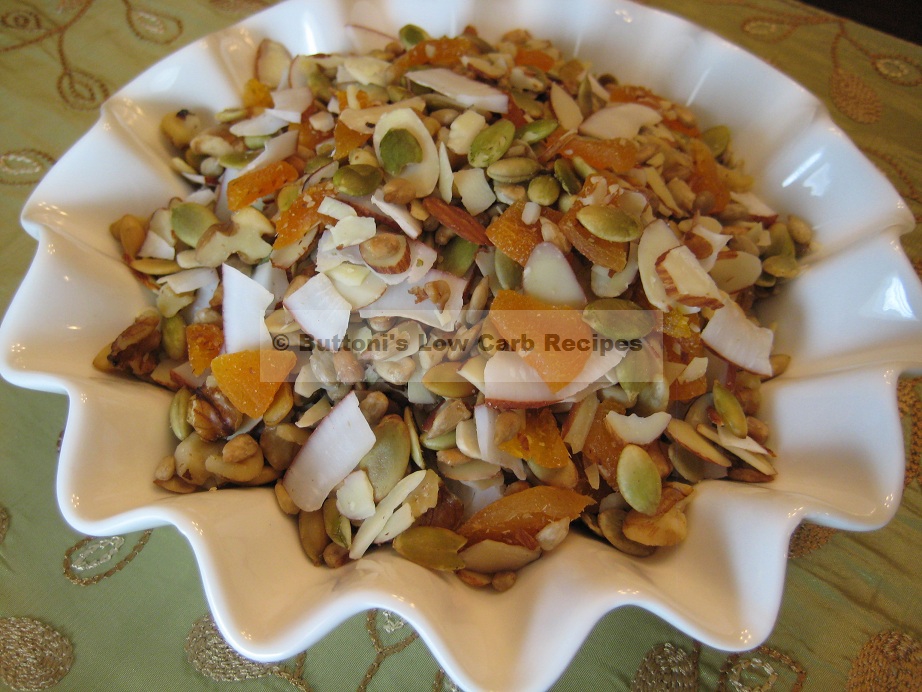
I absolutely LOVE trail mix.  And such a healthy snack!  It has the added bonus of being very transportable, for hiking, biking, camping, or taking to the office in a little baggie.  This apricot-coconut mix was a Christmas favorite of a relative.  She always brought some to the holiday gatherings.  The pumpkin seeds are my addition to her recipe.  The stuff is so good I have to dip my ½ cup portion out and put the bag away, or I’ll just keep eating and eating it.  Wrapped prettily with a ribbon, this makes a lovely gift when going to parties or for the holidays.  Just place in a pretty clear glass container and affix a pretty bow on top!  This very nutritious dessert/snack is not suitable until the highest fruit rung of the Atkins OWL carb re-introduction ladder (pre-maintenance or maintenance).  This recipe is suitable for Paleo-Primal eaters.

VARIATION:  Substitute pieces of dried prunes (Delmonte has no added sugar) for the dried apricots. I also have a Cranberry Trail Mix recipe you might like.

INGREDIENTS:

5 oz. pumpkin seeds, hulled, roasted (unsalted)

5 oz. sunflower seeds, hulled, roasted (unsalted)

2 oz. walnuts (about 28 halves), coarsely chopped/broken up

6 oz. fresh coconut meat, slivered thinly

4 oz. sliced almonds

6 oz. dried apricots, no sugar added (I buy them at Sam’s)

DIRECTIONS:  Preheat oven to 200º and spread thinly sliced coconut onto a sheet pan. Dry for about 1½-2 hours, stirring occasionally.  Remove from oven before coconut begins to brown and cool.  You don’t really want to toast it for this recipe, just dry it out a bit.  In a large mixing bowl, toss all ingredients together.  Using kitchen shears, cut apricots into small pieces and add to the bowl.  Stir to mix well.  Store in a zipper plastic bag in your pantry.

NUTRITIONAL INFO:   Makes about 6 cups or twelve ½ cup servings.  Each ½ cup serving contains:

301.6 cals, 23.5g fat, 18g carbs, 5.3g fiber, 12.7g NET CARBS, 9.8g protein, 53.6 mg sodium

Spicy Onion Rings

Click to enlarge

Taking that coating shown on my last post of Oven-Fried Summer Squash, I took this coating to a Nirvana level for my husband.  I am not as crazy about onion rings as my husband is.  He has always just LOVED them!  That’s all he keeps talking about this week, so I think I’m going to have to cook him a batch of these soon.  😉  These are actually oven-baked instead of fried, so there’s no greasy mess on the stove to deal with after preparing these.  Such deliciousness, so I hope you’ll try these soon.  I think you will like them!

I will admit up front they are not as easily hand-held as traditional batter-fried rings.  No surprise there with an overall thinner coating used….but that’s how I keep them low-carb.   On the up side, the coating does brown nicely and is very crunchy.  Only the smallest diameter rings cut from the ends of the onion can be picked up by hand easily.  You just have to place the larger ones onto your plate and use a fork to eat those.  For me, that beats adding coconut flour to the picture, which I am NOT fond of at all.  I’ll have to test adding some other lower carb flour or maybe a few bread crumbs to the coating to see if that improves the “holdability” of these rings.  So many ideas; so little time, I think is the saying.  These tasty rings are Atkins Induction friendly!

INGREDIENTS:

8 oz. onion cut into ½” rings

2 oz. plain pork rinds, crushed very fine

3/4 tsp. my Seafood Spice Blend

4 T. my homemade mayo

DIRECTIONS:  Preheat oven to 450º.  You will need a large, preferably non-stick baking sheet to bake these.  Slice onion and separate rings until you have 8 oz.  That’s about 16 medium ½” rings.  Parboil for 1 minute in boiling water and lift out onto paper towels to totally dry. Crush pork rinds very fine in processor, blender or by hand.  Remove any larger, hard bits that are invariably in pork rinds when you crush them.  Mix spice into crushed rinds in a small bowl.  In a shallow dish or pie plate, pour the 4T. mayo.    Slowly dip an onion ring into the mayo, coating the outside and the inside (with your finger if necessary.  Then drop them into the pork rinds and coat well outside and inside.  Lay each onto the baking sheet.     Repeat until all rings have been coated.  Pop into 450º oven for about 25 minutes.  They tend to brown more and faster on the bottom where they touch the pan, so you will want to turn them over at the 15 minute mark.  Not much grease so no draining is necessary.  Lift onto serving platter and ENJOY!

NUTRITIONAL INFO:   Makes 4 servings of 2 0z. each.  Each serving contains:

196 cals., 15.6g fat, 5.1g carbs, 0.53g fiber, 4.57g  NET CARBS, 9.5 g  protein, 271 mg sodium

Beef Jerky

Peggy's Beef Jerky2

Jerky has been around for centuries and in all parts of the world.  It goes as far back as Egyptian times.  It was such an integral part of earliest America’s days, particularly frontier life.  I can’t imagine the Lewis and Clark Expedition surviving without it, can you?      I do think of it as American food, but it most assuredly not just American.  It is loved around the world.  Many like my husband are almost addicted to the stuff and replenishes the pantry supply the minute it is gone.  So I think it deserves a place in our American food ‘classics’ discussion.

I just love my 10-tray Guide Gear food dehydrator.  All metal parts so none crack from heat over time.  🙂  It cranks out the most beautiful, tasty batch of beef jerky in 4 hours flat!! I love beef jerky!!  This has always been my husband’s favorite snack as well.  And the perfect low-carb snack indeed!  At a range of $26-$29 per pound now (beef has skyrocketed recently), this is a very expensive little snack!  For years I made my own jerky on regular sheet pans in the oven at 155-170º for 5-6 hours, basting and turning the meat a couple times during the drying process.  A dehydrator allows the strips of meat to dry on open racks, with forced warm air circulation around all sides of the meat simultaneously, eliminating the need to turn the meat, as well as speeding up the time required.

This recipe can be done with other cuts of beef, but sirloin will be the lowest in calories and fat (except for skirt meat) and probably the best meat value for jerky, followed by lean round or rump roast.  I began with 4 nice pieces of sirloin (about 6# raw meat total) that when trimmed of all visible fat, sinew, and gristle, yielded exactly 5# of lean strips of raw beef.  That dried out to exactly 2# of finished jerky.  See why it’s so expensive now?  Since I can’t possibly know how much you will eat at a sitting, I’m giving you nutritional info for a 1 oz. serving, which is probably 2-3 pieces.

When slicing your meat, it is important to slice it uniformly thick (FYI, longer strips are best for dehydrator trays.  If oven cooking, the length of the strips is unimportant).  I aim for 3/16″-1/4″ thick slices.  HANDY TIP:  Slicing partially frozen meat is easiest, if you can take the time to partially freeze it.  Any thinner than 3/16″ will reduce your final jerky to crispy critters faster than the thicker pieces (must remove those from cooking sooner); thicker than 1/4″ will take a long time to fully dry out.

I like to marinate my meat for at least 6 hours (or overnight) in the refrigerator in a covered plastic pan before dehydrating.  You will get better flavor results with longer marinating time. 🙂  For those that like a sweeter, teriyaki jerky, you can add 1 tsp. of maple extract and a dab of your favorite sweetening agent.

INGREDIENTS: 

6-6½ lbs. boneless sirloin (will yield about 5 lb. trimmed meat)

1 T. tomato paste (Walmart Great Value brand is pure tomato pulp, no added sugar)

3/4 c. red wine or water

1/3 c. soy sauce (or tamari or coconut aminos)

1 tsp. onion powder

1 tsp. garlic powder

2 tsp. coarse black pepper

1 pkt. stevia, Splenda or other sweetener (optional)

DIRECTIONS:   Trim all fat, membrane, sinew and gristle off the meat.  Any left on will expedite spoilage during storage. Partially freeze meat to facilitate slicing.  Slice the partially frozen meat 3/16″ thick.  In large plastic/glass marinating pan,  blend tomato paste with soy sauce until smooth.  Add water and remaining ingredients and stir well.  Add meat to the marinade and using hands, toss meat several times to coat well.  Cover and marinate 6 hours or overnight, covered, in refrigerator.  You can also marinate the meat in gallon zipper plastic storage bags.  I recommend placing them into bowls/marinating pan, in case of leakage you won’t want to mess up the refrigerator 😉  Stir once or twice during marinating (or manipulate the bag with your hands to be sure all the meat is touching the marinade.

When ready to dehydrate, lift meat pieces out of marinade and lay on dehydrator trays or non-stick baking sheets, leaving a ¼” space between pieces.  You do not want them to touch each other as this will block air/heat circulation. Set dehydrator to meat setting (155º-160º) for 4-6 hours.  I check mine every hour, in case small/thin pieces are over drying. No matter how hard you try, some pieces will slice out thinner than others.  It just happens!

My jerky takes 4 hours in my dehydrator, but it used to take me 8 hours, for several reasons, mostly tray overcrowding in my old smaller dehydrator.  If oven cooking on pans, set oven between 160º-170º. Turn meat every hour (usually 1 or 2 times is enough).  Take pieces out of the dehydrator/oven as they appear to be fully dried.  It goes without saying, any thick pieces will take longer to fully dry out.  Discard any marinate remainders as it is contaminated with raw meat juices.  When jerky has cooled, ENJOY!!

To store jerky, wrap in small batches in foil and then place the foil packs into a large ziploc bag.  Though they can be stored on the counter for 1-2 months, if not 100% dried, it can mold/spoil quickly.  Refrigerating therefore, is always the safest way to store jerky that has not been done commercially.  I actually keep most of mine in the freezer and just thaw 1 foil pack as needed, keeping the open one in the fridge until that pack is fully consumed.

NUTRITIONAL INFO:  Makes 32 oz. (2 lb) finished jerky, or 32 servings of 1 oz. each.  Each serving contains:

94.59 cals, 2.52g fat, 0.58g carbs, 0.09g fiber, 0.49g NET CARBS, 16g protein, 128 mg sodium
Asian Pork Riblets

I’m a Baby Boomer, raised in the 50’s and 60’s.  My first memories of Chinese food were of Chicken Chow Mein, with those fun curly noodles on top, and the Pu-Pu Platter all the Chinese restaurants offered as appetizers.  No discussion of Chinese food would be complete without mentioning the Pu-Pu appetizer platter.  Besides, it’s just fun to say the name, non?  🙂 

It was the little, slightly sweet ribs I remember off those appetizer platters that were my favorite.  I was never a fan of the crab toast or cheese stuffed fried noodles.  If you love those ribs half as much as I did, you will want to give this recipe a try.  They are not too sweet or sticky, but do have a slight sweet edge.  There’s just the right amount of Asian spice on them for a nice flavor addition to serve alongside your next stir-fry dinner!  Or have them as snacks or appetizers at your next party!  These are suitable once you get past the first 2-week Induction Phase of Atkins and are OK for most Keto diets if the numbers will fit into your daily macro limits.

INGREDIENTS:

1½ lb. pork spareribs, cut apart into separate ribs/pieces 

10 drops liquid smoke

2 cloves garlic, minced

1 tsp. ginger root, peeled & minced

2 T. low sodium soy sauce

1/8 tsp. coarse black pepper

1 tsp. rice wine vinegar

1/8 tsp. dry mustard

1 T. molasses

1 T. my homemade Hoisin Sauce

¼-½ tsp. Sriracha sauce

1 T. dry sherry or white wine (tenderizes)

2 T. tap water

¼ tsp. Chinese 5-Spice Powder

DIRECTIONS:  Cut ribs along bones to separate.  If using the point end of a rack of ribs, that is almost totally boneless, cut any wider strips of boneless meat into strips about 3/4″ wide, or roughly the  size of the bone-in ribs.  Set them aside for a few minutes.  In a large mixing bowl, measures out all other ingredients.  Stir to blend well.  Add meat and toss well to coat.  Cover and chill for 1-2 hours.  When ready to cook, preheat oven to 400º.  Line a baking sheet with foil and place marinated meat strips onto pan making sure they are not touching.  With a brush baste lightly with marinade.  When oven is hot, place in oven and cook for about 20 minutes.  Turn and baste the other side of the meat pieces and cook another 15-20 minutes.  When browned nicely on both sides, remove meat to a platter and serve with whatever other Asian fare you like or enjoy these as an appetizer.  Be forewarned this is finger food and can be a wee bit sticky.  Have plenty of napkins on hand. 🙂

You can also grill these for even more flavor!  They would also cook up nicely in an air fryer cooking at 360º for about 15-20 min. turning at the 10 min. mark.  Fryers vary, so be sure to keep an eye on them the first time you try them in your air fryer.

NUTRITIONAL INFO:   Makes 4 servings, each contains:

515 cals, 40g fat, 6.17g carbs, 0.27g fiber, 5.9g NET CARBS, 29.7g protein, 428mg sodium

Mini Bean “Soft Tacos”

Although not an authentic Mexican dish, these have become quite popular at my house!  Therefore I thought I’d include them in my Mexican Food celebration.  Doesn’t get more Mexican than beans, cheese and jalapenos!  These finger treats are just a new way to enjoy those key ingredients!

This “wrap” is soft yet substantial enough to pick up and eat with your hands.  These are not at all crisp.  These are great for snacks or to serve at parties.  If you don’t eat pork rinds, you could substitute in some low-carb bake mix instead, but carb count would go up and wrapper texture as well.  The only way I can afford the carbs in beans and keep these pliable to fold is by using 0-carb pork rinds in these. 

Boy, oh, boy, were these ever good!  Ended up the jalapeno pepper I used was too hot for me and I had to pull some of it off mine, but this was a nice snack served warm.  You should be able to reheat these quite nicely, too.  This recipe is not suitable until you reach Atkins Phase 2 and are at the starchy vegetable rung of the carb-reintroduction ladder in that phase.

INGREDIENTS:

1½ c. shredded Cheddar cheese

2 T. cream cheese

½ tsp. chili powder or Taco seasoning

1 egg, beaten

1½ c. pork rind flour

2/3 c. canned refried pinto beans

¼ c. Monterey Jack Cheese

1 medium jalapeno, seeded and sliced into very thin rounds

VARIATION:  Add 1 T. taco-seasoned browned ground beef atop the beans before finishing construction.

DIRECTIONS:   Line a sheet pan with parchment paper and set aside.  Preheat oven to 375º.  In your microwave, melt the Cheddar cheese, cream cheese and chili powder in a glass bowl for about 1 minute on HI.  When fully melted, remove and stir once.  Add the beaten egg and pork rind flour.  Quickly stir together vigorously with a fork until ingredients appear to be uniformly distributed and it forms a uniform ball of dough that pulls away from the sides of the bowl.  Divide into 10 equal portions, slightly roll into a ball and with fingers, press onto parchment in 2″ circles that should be slightly thinner than 1/4″. If sticky to work with, dampen your fingers with a bit of water.

Pop into 375º oven for about 7 minutes or until dry in the center to your finger touch.  Remove from oven and spoon 1 T. beans onto each dough round.  Spread beans out a bit but not all the way to the edges of the dough circles.  Carefully do this as the dough is still very soft and not fully cooked.  Place 2 slices of jalapeno on each one (or 1 if you don’t like things spicy).  Garnish each dough round with about 1 tsp. Jack cheese.  Pop pan back into oven and bake these for about 10 minutes more or until beans have had a chance to warm up and the Jack cheese is melted.  Remove from oven and fold them in half.  Press slightly in middle so they will stay folded.  Serve warm.  I suspect these would reheat nicely in your oven set at 350º.

NUTRITIONAL INFO:  Makes 10.  Each mini taco contains:

126 calories, 10.96 g fat, 3.85 g carbs, 0.99 g fiber, 2.86 g NET CARBS, 8.95 g protein, 353 mg sodium

Indian Samosas (with meat)

I made Indian food for dinner tonight, which consisted of my Indian Creamed Spinach (Saag Paneer), Indian Baked Chicken (done in my air fryer) and I tried my hand at samosas.  My husband just loves samosas, so I put my thinking hat on.  Traditionally they are made with vegetable mixtures, but I decided to use some leftover Kheema Matar for mine today.  Thought I could use my Mozzy Dough as it’s pretty flexible to be manipulated.  For the filling, my Kheema Matar meat mixture will do nicely, as it has veggies and meat.

These came out wonderful!  I used a little of my Sofrito mixed with a little chopped mint in olive oil for a dipping sauce.  They are traditionally dipped into a tamarind sauce.  I have tamarind on hand, but haven’t picked a recipe for that sauce yet.   Here is a link to a Youtube video on how to make a tamarind dipping sauce.  Samosas to me, don’t really need a sauce at all, really, if the filling is a good one.

INGREDIENTS:

1 recipe my Mozzy Dough

1 recipe my ground meat Kheema Matar

DIRECTIONS:  Make the Kheema Matar meat mixture by that recipe’s instructions and set by your work area.  Make the dough by that recipe’s instructions.  After final kneading, roll into a log and divide into 12 equal parts.  For easier construction, you may prefer to make just 6 larger samosas.  But I wanted small ones tonight as I’m eating a lot less these days.

Roll each of the 12 (or 6) portions of dough into a ball and set on a silicone sheet or plastic wrap.  Press the dough into a 4″ round with your fingers and the but of your palm.  Fill each round of dough with 2 T. meat filling and press it firmly into a mound.  Gently lift opposite sides up over the filling (all four) and to the center to cover the meat completely, pinching the dough at the top to seal well.  If dough tears, dump the meat back into the skillet, roll and press the round of dough out again and refill.  Heck, the dough is a little delicate.  Even I had to redo one myself.  Place the samosas onto a parchment-lined baking sheet.  Continue until all 12 (or 6) samosas are made.  Preheat oven to 350º and pop pan into oven.  Bake for about 15 minutes until just browning on the tops.  Remove and serve as a snack, appetizer or with a full Indian meal as a first course.  If you want a little dipping sauce, mix 2 T. of my Sofrito (and 2 T.fresh mint, if you have some) in 2 T. olive oil.

NUTRITIONAL INFO:  Makes 12 small or 6 large samosas.  A serving, 1/6 recipe) consists of 2 small samosas (1 if making just 6 larges ones) and has:

258 cals, 23.8g fat, 13.8g carbs, 7.7g fiber, 6.1 NET CARBS, 27.1g protein, 808 mg sodium (mostly from the cheese in the dough)

Greek Olive Tapenade

Greek Olive Tapenade

This is my take on the olive spread often served with the bread and salad course at Greek Restaurants.  We just love this stuff and it disappears sooooo fast at my house.   I am absolutely in love with spreading it on my Almond-Flax Crackers or my Almond-Arrowroot Crackers for a delicious snack.  Just made a fresh batch this afternoon!  🙂  Other ways to use this tasty spread:   stuffed inside slit chicken breasts before baking along with a dab of Boursin or cream cheese, spread on top of broiled fish filets when serving, atop tomato slices for a unique salad, or with a little more oil and balsamic vinegar, it’s great as a Greek salad dressing!  This recipe is Induction friendly and the flavor is totally addictive if you like kalamata olives.  

INGREDIENTS:

6 oz. pitted black olives (I use a mixture of canned black olives & kalamata olives)

1 small clove minced garlic

¼ c. olive oil

2 T. chopped parsley

DIRECTIONS:  Pulse all ingredients in a food processor until uniformly coarse texture, smooth but not reduced to a paste.  You want it very finely chopped.  You can pulse in a blender if you do not have a food processor.  Serve with your favorite low-carb crackers or Greek bread (for those not on Atkins).

NUTRITIONAL INFO: Makes about 3/4 cup or serves 6, each 2 T. serving contains:

111.5 cals, 11.7g fat, 2.2g carbs, 1g fiber, 1.2g NET CARBS, 0.4g protein, 200 mg sodium

Einkorn Tuna Pimiento Cheese Muffins

Tuna is always in my pantry, so I reached for some to make lunch today.   These two-bite mini-muffins I created today, honestly……..my husband had trouble stopping at SIX of them!  But he’s a big eater.  I stopped at four. 🙂  These go together fast and only took 13 minutes to bake.  I highly recommend slightly cooling before attempting to loosen them from even a non-stick pan, as baked egg tends to stick to whatever pan you use.   I’ve not had good luck baking tuna items in silicone pans.  Tuna likes browning.  I used a 24 ct. metal pan to bake these.  This recipe is not suitable until Phase 2 Atkins  when you are nearing maintenance, due to the Einkorn Bake Mix.   You can lower the carb count per muffin even more using a lower carb bake mix than mine, which has Einkorn Flour in it.  But the count is already pretty darn low in my opinion.  Those still in the initial 2-week Induction Phase of Atkins need to eliminate the bake mix entirely and increase the eggs to about 6.  The muffins will naturally have a different, and somewhat eggier texture than mine here, but should taste about the same.  These should freeze nicely for about a month.  If you do the Induction version, adding 1-2 T. flax meal to that variation would add a little firmer structure to them.

Many delicious low-carb recipes can be at your fingertips with your very own cookbooks from LOW CARBING AMONG FRIENDS, by Jennifer Eloff and low-carb friends (me included).  Chef George Stella also brings to the table a wealth of delicious recipes added to the collection!  You’ll LOVE these recipes!  Order your copy today from Amazon  or our direct order site: amongfriends.us/order.php.

INGREDIENTS:

4 beaten eggs

3 small pouches (7.8 oz. total) water-pack tuna

1½ c. my Einkorn Bake Mix

3/4 tsp. my Seafood Spice Blend

¼ tsp. sea salt

1 lg. 4-0z. jar chopped pimiento, drained

1 lg. green onion, chopped fine

2 2/3 slices American Deluxe or Cheddar cheese, 2 cut into 9 squares, 1 cut into 6 squares

VARIATION:   Add a few drops of Tobasco or a few shakes of cayenne pepper to the batter for a spicier muffin.

DIRECTIONS:   Preheat oven to 350º.  Beat the eggs in a medium bowl.  Add all other ingredients but the cheese.  Oil 24 slots of a mini-muffin pan.  Using a 2 T. scoop, add one level scoop to each slot.  They will be nearly full and there should be just enough batter for 24.  Place 1 square of cheese atop each and push it down slightly into the batter.  Pop into hot 350º oven.  Bake for 13-15 minutes or until they puff up and the cheese just begins to brown on top.  Remove and cool slightly.  If you try to remove while too hot, they will tear up on you.  Gently loosen with a knife tip or fork and enjoy.  A modest serving would be 4 mini-muffins.  A big eater will want 6 of these minis.

NUTRITIONAL INFO:    Makes 24 muffins, each contains:

22 calories, 0.9 g fat, 0.35 g carbs, 0.08 g fiber, 0.27 g NET CARBS, 3.22 g protein, 74 mg sodium

Asian Pork Riblets

I’m a Baby Boomer, raised in the 50’s and 60’s.  My first memories of Chinese food were of Chicken Chow Mein, with those fun curly noodles on top, and the Pu-Pu Platter all the Chinese restaurants offered.  But it was the little, slightly sweet ribs I remember off those appetizer platters.  If you love those ribs half as much as I did, you will want to give these a try.  They are not too sweet but have a slight sweet edge.  There’s just the right amount of Asian spice on them for a nice flavor addition to serve alongside your next stir-fry dinner!  Or have them as snacks or appetizers at your next party!  These are suitable once you get past the first 2-week Induction Phase of Atkins and are OK for most Keto diets if the numbers will fit into your daily macro limits.

INGREDIENTS:

1½ lb. pork spareribs, cut apart into separate ribs/pieces 

10 drops liquid smoke

2 cloves garlic, minced

1 tsp. ginger root, peeled & minced

2 T. low sodium soy sauce

1/8 tsp. coarse black pepper

1 tsp. rice wine vinegar

1/8 tsp. dry mustard

1 T. molasses

1 T. my homemade Hoisin Sauce

¼-½ tsp. Sriracha sauce

1 T. dry sherry or white wine (tenderizes)

2 T. tap water

DIRECTIONS:  Cut ribs along bones to separate.  If using the point end of a rack of ribs, that is almost totally boneless, cut any wider strips of boneless meat into strips about 3/4″ wide, or roughly the  size of the bone-in ribs.  Set them aside for a few minutes.  In a large mixing bowl, measures out all other ingredients.  Stir to blend well.  Add meat and toss well to coat.  Cover and chill for 1-2 hours.  When ready to cook, preheat oven to 400º.  Line a baking sheet with foil and place marinated meat strips onto pan making sure they are not touching.  With a brush baste lightly with marinade.  When oven is hot, place in oven and cook for about 20 minutes.  Turn and baste the other side of the meat pieces and cook another 15-20 minutes.  When browned nicely on both sides, remove meat to a platter and serve with whatever other Asian fare you like or enjoy these as an appetizer.  Be forewarned this is finger food and can be a wee bit sticky.  Have plenty of napkins on hand. 🙂

You can also grill these for even more flavor!  They would also cook up nicely in an air fryer cooking at 360º for about 15-20 min. turning at the 10 min. mark.  Fryers vary, so be sure to keep an eye on them the first time you try them in your air fryer.

NUTRITIONAL INFO:   Makes 4 servings, each contains:

515 cals, 40g fat, 6.17g carbs, 0.27g fiber, 5.9g NET CARBS, 29.7g protein, 428mg sodium

Indian Samosas (with meat)

I made Indian food for dinner tonight, which consisted of my Indian Creamed Spinach (Saag Paneer), Indian Baked Chicken (done in my air fryer) and I tried my hand at samosas.  My husband just loves samosas, so I put my thinking hat on.  Traditionally they are made with vegetable mixtures, but I decided to use some leftover Kheema Matar for mine today.  Thought I could use my Mozzy Dough as it’s pretty flexible to be manipulated.  For the filling, my Kheema Matar meat mixture will do nicely, has it has veggies and meat.

These came out wonderful!  I used a little of my Sofrito mixed with a little chopped mint in olive oil for a dipping sauce.  They are traditionally dipped into a tamarind sauce.  I have tamarind on hand, but haven’t picked a recipe for that sauce yet.   Here is a link to a Youtube video on how to make a tamarind dipping sauce.  Samosas to me, don’t really need a sauce at all, really, if the filling is a good one.

INGREDIENTS:

1 recipe my Mozzy Dough

1 recipe my ground meat Kheema Matar

DIRECTIONS:  Make the Kheema Matar meat mixture by that recipe’s instructions and set by your work area.  Make the dough by that recipe’s instructions.  After final kneading, roll into a log and divide into 12 equal parts.  For easier construction, you may prefer to make just 6 larger samosas.  But I wanted small ones tonight as I’m eating a lot less these days.

Roll each of the 12 (or 6) portions of dough into a ball and set on a silicone sheet or plastic wrap.  Press the dough into a 4″ round with your fingers and the but of your palm.  Fill each round of dough with 2 T. meat filling and press it firmly into a mound.  Gently lift opposite sides up over the filling (all four) and to the center to cover the meat completely, pinching the dough at the top to seal well.  If dough tears, dump the meat back into the skillet, roll and press the round of dough out again and refill.  Heck, the dough is a little delicate.  Even I had to redo one myself.  Place the samosas onto a parchment-lined baking sheet.  Continue until all 12 (or 6) samosas are made.  Preheat oven to 350º and pop pan into oven.  Bake for about 15 minutes until just browning on the tops.  Remove and serve as a snack, appetizer or with a full Indian meal as a first course.  If you want a little dipping sauce, mix 2 T. of my Sofrito (and 2 T.fresh mint, if you have some) in 2 T. olive oil.

NUTRITIONAL INFO:  Makes 12 small or 6 large samosas.  A serving, 1/6 recipe) consists of 2 small samosas (1 if making just 6 larges ones) and has:

258 cals, 23.8g fat, 13.8g carbs, 7.7g fiber, 6.1 NET CARBS, 27.1g protein, 808 mg sodium (mostly from the cheese in the dough)

Shrimp-Stuffed Portobello Mushrooms

Next time you’re having grilled, baked or fried fish, you are going to want to try these delicious stuffed mushrooms I cooked tonight to accompany our salmon.  The cheeses and spices made these so yummy.  They are simple to make as well, so what more could you ask for to serve such deliciousness?!  These are suitable once you reach Phase 2 of Atkins and will fit into most ketogenic diets.

INGREDIENTS:

18 oz. medium Portobello mushrooms (about 2¼” diameter)

¼ c. olive oil

1 T. unsalted butter

2 medium green onions, chopped

8 large raw shrimp, peeled, deveined and chopped

2 oz. cream cheese

1/3 c. shredded cheddar cheese

Dash each salt & pepper

½ tsp. my Seafood Spice Blend

1 low-carb roll or slice low-carb bread (I used this one)

1 T. more butter

DIRECTIONS:  Wipe mushrooms of any dirt.  Remove stems with small knife without destroying the mushroom caps.  Pour the olive oil into a medium bowl and drizzle the olive oil over them.  Toss to coat them well.  Place mushroom caps onto a baking pan and set aside while you make the filling.

Melt 1 T. butter in small non-stick skillet.  Chop the mushroom stems and add to the pan.  Chop green onion and also add to pan.  Add chopped shrimp.  Saute until they are all done.  Sprinkle a dash of salt, pepper and the seafood spice blend over the mixture.  Now add the cream cheese and mash/stir until melted and blended well.  Add cheddar shreds and stir/fold the mixture well allowing it all to heat, melt and bind together.   Turn off heat.  Now preheat your oven to 375º.

Stuff each mushroom cap with about 1 T. of the mixture to fill them to capacity using up all your filling with as even a distribution as your can.

Crumb the low-carb bread/roll with the remaining 1T. butter in a food processor, blender or crumb by hand & melt/stir them into the melted butter in a skillet.  Sprinkle the crumb topping over the 10 mushrooms.  Pop the pan into a hot 375º oven for about 20-25 minutes (watch then as ovens vary).  Larger mushrooms will take up to 30-35 minutes to get fully heated and golden on top.

NUTRITIONAL INFO:   Makes 10 pieces, each contains:

151 calories, 12.9g fat, 4.15g carbs, 1.26g fiber, 2.89g NET CARBS, 6.29g protein, 142mg sodium

If making appetizers, use 20 smaller mushrooms.  Just divide the above numbers by to to calculate the values for the smaller ones.


Cheese Puffs

I decided to modify my Cheese Thin Buns recipe by adding some Carbquik to the ingredient line-up.   What a marvelous change that makes!  These tasty little bite-size snacks are less than 1 net carb per puff!  We both love snacking on cheese bread, but that isn’t exactly on a low-carb diet.  This is my answer to a late night snack that is suitable on a very low-carb diet.  These are easy to make and I’m certain they’ll be a hit with your family.  If you don’t like things spicy, omit the cayenne; if you do like things spicy, you may even want to increase the amount of cayenne!  🙂  These are suitable once you get to the end of Phase 2 Atkins.

INGREDIENTS:

3 eggs, beaten

½ c. water

2 T. olive oil

2 c. shredded Cheddar cheese

1 T. + 1 tsp. glucomannan powder (there is no substitute for this)

¼ c. whey protein powder (plain, unsweetened)

1 T. (3 tsp) baking powder

¼ tsp. garlic powder

¼ tsp. onion powder

¼ tsp. cayenne pepper (optional but greatly enhanced the flavor layers)

1/8 tsp. sea salt

1 c. Carbquik (use gluten-free bake mix for a gluten-free version)

DIRECTIONS:  Preheat oven to 350º.  Measure out the dry ingredients in a small mixing bowl and stir well to evenly mix.  In a separate medium mixing bowl, beat the wet ingredients with an electric mixer or whisk.  While you are whisking the egg mixture, slowly add in the dry ingredients until all is well blended into a batter resembling pancake batter.  Stir in the cheese and mix it well.  Let the dough stand a few minutes as it will thicken/stiffen up a bit.

I used a non-stick mini-muffin pan.  The cheese will bleed out some oil, so you shouldn’t have to oil a non-stick pan.  But if yours is NOT non-stick, oil the cups of your mini-muffin pan lightly with a brush.  Using a measuring spoon, put 1 level tablespoon of batter into each cup raking it out with a finger to get it all.  Will make exactly 34 muffins, so a second baking will be necessary unless you own two mini-muffin pans.  Pop into 350º oven and bake for 17 minutes or until browning on top.  We found browning enhances flavor, so you may want to even bake yours a bit longer.  Remove from oven and cool a couple minutes.  If cooled a bit, they will come out of the pans with a knife tip’s help without tearing apart.  If removed too hot, you are going to tear them up.

NUTRITIONAL INFO:    Makes 34 Cheese Puffs, each contains:

50.6 cals., 4.52 g fat, 2.13 g carbs, 1.43 g fiber, 0.70 g NET CARBS, 3.06 g protein, 138 mg sodium

Chicken Spread Crunchies


This quick appetizer for parties made a delicious lunch today.   Had a small amount of cream cheese to use up and decided to onion it up a bit and make a spread for serving with crunchy pork rinds.  I don’t usually like dips and such on pork rinds, but THIS onion-y combo with chicken really did it for me!  The crunch came though without so much pork rind taste.  This recipe is a keeper for us.  I will definitely make this again.  For parties, just triple the recipe (using the entire can of chicken meat) to make approximately 60 taste bites for your guests.

Our latest three volumes of LOW CARBING AMONG FRIENDS cookbooks are calling you. Volume 8 and Volume 9 are almost exclusively comprised of my recipes! Included in both editions are a few tasty new creations of my dear friends George Stella and Jennifer Eloff.   Volume 10 is hot off the press with more delectable goodies. Special discount prices being offered right now on the set! Hurry and place your order today for one or more of our cookbooks at https://amongfriends.us/sale.php or at Amazon. After your book(s) arrive, and you’ve had a chance to try a recipe or two, we hope you’ll stop by and leave a review at Amazon here.

INGREDIENTS:

2 oz. cream cheese, softened

¼ c. sour cream

1/3  can (13 oz.) chicken breast (water + salt pack only, I use Sam’s brand)

1 T. dehydrated minced onion flakes, toasted

¼ tsp. onion powder

1/8 tsp. each: turmeric, paprika, and garlic powder

½ tsp. granular Splenda or other sweetener (optional)

20 small bite-size pork rinds

DIRECTIONS:  Preheat oven to 350º.  Place onion flakes on baking pan and bake about 8 minutes just long enough to lightly toast.   Remove from oven and add the flakes to a medium mixing bowl.  Drain chicken broth off the meat into a dish for another use.  I like to drizzle it on my dog’s kibble, which she just loves!  Spoon out 1/3 of the chicken meat into your mixing bowl (reserve rest for another use).   Flake meat a bit with a fork.  Add softened cream cheese and sour cream.  Add all spices and sweetener (if using).  Stir mixture well and let sit 5-10 minutes to allow onion flakes to soften a bit and flavors to blend.  Spoon about 1 tsp. of the mixture onto the cupped “bowl” side of the 20 pork rinds, placing the tasty treats on your serving platter.  Enjoy!

CAUTION:  Do not try to be efficient and fill these ahead of time or the pork rinds will get soggy! 

NUTRITIONAL INFO:   Makes 20 chicken appetizers, each contains:

26 cals, 1.98g fat, 0.50g carbs, 0.04g fiber, 0.45g NET CARBS, 1.55g protein, 41 mg sodium

Crustless Skillet Pizza

Click to enlarge

Skillet Pizza (for 1)

I’m currently revisiting Atkins Induction for a “reset” and remembered this delicious recipe that literally got me through Atkins Induction 10 years ago.  I’ve tried so many of the popular low-carb pizza crust recipes and just don’t like but a few that I have developed or tried in the interim.  A lot of sodium in pizza toppings.  Even this amount of sausage and cheese packs a whopping amount of sodium, as seen in the nutritional stats below!  But hey, when you’re still on Induction and craving pizza, this’ll do occasionally.  Best of all, it can be ready in 10-15 minutes!  Moreover, I don’t end up with “sausage fingers” and swollen ankles the next day from water retention due to the sodium in most low-carb crust recipes.  I’m so sodium sensitive, I leave off pepperoni from my pizzas as a rule.  Just increase ingredients accordingly if you need more servings.

Now this “pizza” isn’t one you can pick up and eat with your hands.  Even as it cools a bit and the cheese firms up, you’ll still have to eat with a fork.  So I don’t do this recipe for company.  🙂  But I find not being able to pick it up and eat by hand doesn’t bother me one bit.  This tastes just like the best sausage, mushroom, bell pepper pizza I ever had in any Italian restaurant or pizza parlor!  You may prefer to use all sausage or all beef, your call, but nutritional info is for the recipe as written.  If watching your sodium intake on doctor’s orders, using all ground beef and also lowering the cheese to 2 oz. would be wise choices.

More delicious low-carb recipes can be at your fingertips with your very own set of Jennifer Eloff and friends’ best-selling cookbooks LOW CARBING AMONG FRIENDS.  She has collaborated with famous low-carb Chef George Stella and several other talented chefs to bring you a wealth of delicious recipes you are going to want to try.  Order your set TODAY! Special pricing going on right now, too!  Books are always available individually or as a set from Amazon or: http://amongfriends.us/order.php

INGREDIENTS:

001

Ready to dig in!

2 oz. pork sausage (breakfast or Italian)

1 oz. ground beef (or more pork sausage)

¼ tsp. fennel seed

Dash oregano

Sprinkle of garlic and onion powder

1/3 can drained, canned mushrooms (or 2 fresh, sliced)

2 oz. bell pepper

3 T. low carb spaghetti sauce (I use Bello Vita)

2 oz. grated mozzarella cheese

DIRECTIONS: Brown meat in no-stick skillet on medium heat.  Add veggies and continue to cook until pretty tender, about 5 minutes.  Add spices and stir.  Using spoon or spatula, neatly push ingredients away from the edges of the skillet as shown in picture.  Dot the surface with the tomato sauce but no need to stir.  Top with the cheese, trying to keep it pretty much on the ingredients.  Cover and lower heat to lowest setting and heat long enough to melt cheese.   Should be ready in just a few minutes.  Allow to cool a couple minutes so cheese will firm up a tad before attempting to “slice” into two slices.  Using a broad spatula, slide a portion out of the skillet onto the serving plate (or toasted French bread, for non-Atkins eaters). Enjoy!

NUTRITIONAL INFO: Serves 1 and contains:

531 cals, 39.3g fat, 11.2g carbs, 2.9g fiber, 8.1g NET CARBS, 34 g  protein, 1312 mg sodium

Chicken-Pizza Logs

I created a delicious lunch today with half a baked chicken breast that was leftover from dinner last night.  Man, did these come out ever so good!  I basically took my Cheese Thin Buns recipe, subbed in mozzarella cheese for the Cheddar and added just a pinch of crushed oregano to the batter.  Added my flavorings and baked 12 minutes!  These are so filling with glucomannan (pure fiber) just 2 will be an ample serving for most people.  Men might be able to eat 3, but I could not.  All I can say is lunch tasty, filling and not as heavy as regular pizza can be to me.  You could also make these as bite-size  treats using a mini-muffin pan.  Just spread out into 24 slots and using ½ slice pepperoni atop each mini.  This recipe is suitable for all phases of Atkins, Keto and gluten-free diets.  Clearly it is not suitable for Paleo due to the cheese.

INGREDIENTS: 

4 T.  plain whey protein powder (I use isolate)

1 T.+1 tsp. glucomannan powder

1 T. baking powder

1/4 tsp. garlic powder

3 eggs, beaten

1 T. olive oil

1/4 c. tap water

1 c. shredded mozzarella cheddar cheese for the batter

4 oz. cooked chicken meat, cut into 12 strips (or 24 bits for minis)

12 slices pepperoni

1/3 c. shredded mozzarella to top (more if you add carbs to numbers below)

DIRECTIONS:  Preheat oven to 350º.  Oil a Twinkie® or baking log pan with your preferred oil (or line large baking sheet with parchment paper).   If you don’t have a Twinkie® pan, but you still want to try this, just make round ones using a regular muffin pan.   They just won’t be “logs”. 😉

On a paper plate, measure out dry ingredients and stir.  Set aside a moment.  Break eggs into medium bowl and add oil and water.  Beat with whisk to blend well.  Using a rubber spatula next, slowly dust in or sprinkle the dry ingredients over the top and stir rapidly to blend.  Add the 1 cup mozzarella shreds, stirring and folding batter over and over to allow the glucomannan to thicken up.  It will be a pretty thick like bread batter in just a couple minutes.  When all nice and thick, spoon about 1½ T. batter into each of 12 oiled Twinkie® pan slots.

If batter seems a bit thin, let it set up a couple minutes longer.  Stir several times more.   If still too thin, I fear you’ve added too much water and need to add a teensy bit more glucomannan powder.   When batter is fairly thick, use the side of your rubber spatula to dip into the Twinkie® slots of your pan, or into your muffin cups.  Or you can spoon batter into 24 oiled mini-muffin cup slots for a bite-sized version of these that would be nice for entertaining.   Top each “log” with a small strip of the chicken meat (around 2″x½” strip or equivalent morsels of meat) until all meat is used up.  Then top with a slice of pepperoni (I sliced mine in half to spread it out).  If not sodium sensitive like we are, you may want to increase pepperoni to 2 slices per log, but alter numbers below accordingly.  Last, sprinkle a few of the extra mozzy shreds atop each log.  Pop pan into hot oven and bake for 9-12 minutes or until lightly browned on top.  Keep an eye out so you don’t over brown these or they may dry out.  To avoid tearing them up, slightly cool before removing from pans to a serving plate.  I used a mini rubber spatula to help lift mine out of the pans.

NUTRITIONAL INFO:  Makes 12 pizza logs, each log will contain:

137.25 cals, 10.6g fat, 1.75g carbs, 0.71g fiber, 1.04g NET CARBS, 9.93g protein, 397mg sodium

(Divide numbers by 2 if you make the mini-muffin version)


Cheese Puffs

I decided to modify my Cheese Thin Buns recipe by adding some Carbquik to the ingredient line-up.   What a marvelous change that makes!  These tasty little snacks are less than 1 net carb per puff!  We both love snacking on cheese bread, but what we buy at the store isn’t exactly low-carb.  This is my answer to a late night snack that is suitable on a very low-carb diet.  These are easy to make and I’m certain they’ll be a hit with your family.  If you don’t like things spicy, omit the cayenne; if you do like things spicy, you may even want to increase the amount of cayenne!  🙂  These are suitable once you get to the end of Phase 2 Atkins.

INGREDIENTS:

3 eggs, beaten

½ c. water

2 T. olive oil

2 c. shredded Cheddar cheese

1 T. + 1 tsp. glucomannan powder (there is no substitute for this)

¼ c. whey protein powder (plain, unsweetened)

1 T. (3 tsp) baking powder

¼ tsp. garlic powder

¼ tsp. onion powder

¼ tsp. cayenne pepper (optional, but greatly enhances flavor profile)

1/8 tsp. sea salt

1 c. Carbquik (use a gluten-free bake mix if needed)

DIRECTIONS:  Preheat oven to 350º.  Measure out the dry ingredients in a small mixing bowl and stir well to evenly mix.  In a separate medium mixing bowl, beat the wet ingredients with an electric mixer or whisk.  While you are whisking the egg mixture, slowly add in the dry ingredients until all is well blended into a batter resembling pancake batter.  Stir in the cheese and mix it well.  Let the dough stand a few minutes as it will thicken/stiffen up a bit.

I used a non-stick mini-muffin pan.  The cheese will bleed out some oil, so you shouldn’t have to oil a non-stick pan.  But if yours is NOT non-stick, oil the cups of your mini-muffin pan lightly with a brush.  Using a measuring spoon, put 1 level tablespoon of batter into each cup raking it out with a finger to get it all.  Will make exactly 34 muffins, so a second baking will be necessary unless you own two mini-muffin pans.  Pop into 350º oven and bake for 17 minutes or until browning on top.  We found browning enhances flavor, so you may want to even bake yours a bit longer.  Remove from oven and cool a couple minutes.  If cooled a bit, they will come out of the pans with a knife tip’s help without tearing apart.  If removed too hot, you are going to tear them up.

NUTRITIONAL INFO:    Makes 34 Cheese Puffs, each contains:

50.6 cals., 4.52 g fat, 2.13 g carbs, 1.43 g fiber, 0.70 g NET CARBS, 3.06 g protein, 138 mg sodium

Apricot Trail Mix

0023

I absolutely LOVE trail mix.  And such a healthy snack!  It has the added bonus of being very transportable, for hiking, biking, camping, or taking to the office in a little baggie.  This apricot-coconut mix was a Christmas favorite of a relative.  She always brought some to the holiday gatherings.  The pumpkin seeds are my addition to her recipe.  The stuff is so good I have to dip my ½ cup portion out and put the bag away, or I’ll just keep eating and eating it.  Wrapped prettily with a ribbon, this makes a lovely gift when going to parties or for the holidays.  Just place in a pretty clear glass container and affix a pretty bow on top!  This very nutritious dessert/snack is not suitable until the highest fruit rung of the Atkins OWL carb re-introduction ladder (pre-maintenance or maintenance).  This recipe is suitable for Paleo-Primal eaters.

VARIATION:  Substitute pieces of dried prunes (Delmonte has no added sugar) for the dried apricots. I also have a Cranberry Trail Mix recipe you might like.

More delicious low-carb recipes can be at your fingertips with your very own set of Jennifer Eloff and friends’ best-selling cookbooks LOW CARBING AMONG FRIENDS.  She has collaborated with famous low-carb Chef George Stella and several other talented chefs to bring you a wealth of delicious recipes you are going to want to try.  Even a few of my recipes are in her cookbooks! Order your 5-volume set TODAY! (available individually) from Amazon or: http://amongfriends.us/order.php

INGREDIENTS:

5 oz. pumpkin seeds, hulled, roasted (unsalted)

5 oz. sunflower seeds, hulled, roasted (unsalted)

2 oz. walnuts (about 28 halves), coarsely chopped/broken up

6 oz. fresh coconut meat, slivered thinly

4 oz. sliced almonds

6 oz. dried apricots, no sugar added (I buy them at Sam’s)

DIRECTIONS:  Preheat oven to 200º and spread thinly sliced coconut onto a sheet pan. Dry for about 1½-2 hours, stirring occasionally.  Remove from oven before coconut begins to brown and cool.  You don’t really want to toast it for this recipe, just dry it out a bit.  In a large mixing bowl, toss all ingredients together.  Using kitchen shears, cut apricots into small pieces and add to the bowl.  Stir to mix well.  Store in a zipper plastic bag in your pantry.

NUTRITIONAL INFO:   Makes about 6 cups or twelve ½ cup servings.  Each ½ cup serving contains:

301.6 cals, 23.5g fat, 18g carbs, 5.3g fiber, 12.7g NET CARBS, 9.8g protein, 53.6 mg sodium


Pigs in a Blanket

I haven’t made Pigs in a Blanket in literally years.  So when I passed by the center-aisle display of Little Smokies at the store yesterday, I picked up a package.   I decided to use some of my Mozzy Dough to blanket them and they came out so good.  But man, oh, man, I had no idea how much sodium are in those little sausages!  My fingers swelled up after just eating three of these!  These are NOT suitable for the sodium sensitive, so as my husband’s doctor just put him on a low-sodium diet, he could only taste one of them.  Be sure to drink lots of water after eating these piggies.  They were so tasty I ate three!  A flavor from parties past!  These are suitable for Atkins Phase 2 or beyond and other Keto diets.

Our latest two LOW CARBING AMONG FRIENDS cookbooks, Volume 8 and Volume 9 are almost exclusively comprised of my recipes!  Included in both editions are a few tasty new creations of my dear friends George Stella and Jennifer Eloff.   EARLY BIRD SECRET SALE!!  Special pricing and limited time free shipping so hurry and place your order.  Or you can order these or any of our cookbooks at https://amongfriends.us/Secret-SALE.php.

When you purchase our books, we would sure appreciate you stopping by Amazon to leaving a review at this site

INGREDIENTS:

1 recipe my Mozzy Dough

28 Oscar Mayer beef Little Smokies sausages

DIRECTIONS:  Make the Mozzy Dough per that recipe’s instructions.  Line a sheet pan with parchment paper and preheat oven to 350º.  Pinch off 1″ balls of dough and form a ball and then with your fingers form a small oval of dough slightly less wide than the sausages are long.  Place a sausage in the middle of the dough and roll the ends up over to the center, overlap a bit and press the seam.  Place onto parchment-lined pan and repeat with the rest of the dough and sausages.  I had enough dough for 28.  Pop into 350º oven and bake until golden or about 17 minutes.  Keep an eye out as ovens vary and this cheese-laden dough can brown very fast once it begins to brown.  Remove and cool slightly.  The dough seems to improve when they are cooled off a bit.

NUTRITIONAL INFO:   Makes 28 pieces, each contains:

180 cals, 16g fat, 1.96g carbs, 1.35g fiber, 1.61g NET CARBS, 9.1g protein, 496 mg sodium (Sodium is mostly in the meat, not the dough.  A lower-sodium sausage might be a better choice)

BBQ “Potato” Chips

Click to enlarge

UPDATE:  I have concluded I must have sliced these just perfectly the first time, as on subsezuent fryings, many did not stay crisp after cooling.  If you don’t get them VERY brown (just short of burned), slice them incredibly thin up front and also  eat them right out of the grease, they are inclined to soften up in the centers.  Only those sliced so thin you can almost read a book through the jicama slices will get/stay crisp.  Since that kind of thin uniformity is nigh on to impossible with anything short of a professional slicer or quality mandolin (neither of which do I own, as can both can be very dangerous to use) you may want to wait until you can get a mandolin.

These crispy little chips came out extremely close to the flavor of commercial BBQ potato chips!   We LOVED them!  So crisp, too.  The natural sweet edge in this vegetable lends itself to BBQ flavoring, as the commercial chips actually have unhealthy sugar added to their spice seasoning.  And best of all, these little snack chips are an Atkins Induction friendly recipe.  The dehydrated tomato powder I use is Goya brand in the Mexican section of your grocery store.  They make it in tiny cubes and blocks.  Of course, you can omit the spice blend for plain “Potato” Chips.  I also have a Nacho Cheese “Corn” Chip recipe you might like.

I have often wondered if you could deep fry jicama.  Honestly I just didn’t believe you could hide the sweet quality jicama has, which is actually a plus for BBQ seasoning here.  I also didn’t think I could ever slice it thin enough to work for something like this.  Well, I recently bought a little folding Rival slicer and it slices jicama VERY thin, but I do believe a mandolin would slice them even thinner.   These are delicious with burgers or by themselves!

These can also be made plain and those taste like real potato chips to me!   At 8 net carbs for this entire batch not bad all in all.  The plain ones even hold up to sour cream and yogurt dips.

For more delicious crackers, chips and snacks, you really should visit the LOW CARBING AMONG FRIENDS Facebook page and see what a marvelous collection of recipes are in these best-selling cookbooks.  International author Jennifer Eloff has collaborated with several other talented low carb cooks, including George Stella, well-known to the low-carb community!  You can order individual volumes or the entire 5-volume set at Amazon or http://amongfriends.us/order.php.

INGREDIENTS:

6 oz. jicama, peeled

Oil of your choice 1″ deep or more for frying (1T. is calculated into nutritional info below as absorbed, but I suspect less than that is actually absorbed)

Dash sea salt

¼ tsp. my Seafood Spice Blend

1/8 tsp. dehydrated tomato powder (optional)

DIRECTIONS:  Mix seasoning (and the crumbled tomato powder if using) into a paper plate (I poured mine into an empty salt shaker I keep for such purposes).  Set some paper towels on old newspaper by your cook top for draining purposes.  Peel and slice the jicama VERY thin, 1/16″ or less or they will not get crisp when cooked.

I use a Rival slicer set on the thinnest setting, but a mandoline set thin would also work.  It will take a very adept slicer to get thin enough slices with a knife, cutting by hand.  My food processor doesn’t slice this thin with either of the 2 slicing blades I have, but maybe you have a thinner blade than I and will try that method.

Heat oil in a deep skillet or deep fryer over high heat.  Drop one slice of jicama in the oil for a test fry.  If it browns too fast or burns, turn the fire down a wee bit to lower oil temp.   Drop about 6-8 slices in the oil next so as not to crowd and cool off the oil.  The bottoms brown first, so keep flipping them during frying for the most even browning.  If any areas in the center are white, those areas will NOT be crispy! White areas will be tough/chewy and nothing like a potato chip.  If browned throughout, they will stay crisp even after they cool off, an impressive fact for such a moist vegetable.  As soon as they are brown, lift them out of oil with a slotted spoon onto awaiting paper towels. While still hot and oily, sprinkle with salt and the spice blend on both sides.  Fry in batches until finished.  These are delicious!

NUTRITIONAL INFO:   Makes about 20-25 chips.  The entire batch contains:

190 calories, 13.7 g  fat, 16.7 g carbs, 8.4 g  fiber, 8.3 NET CARBS  (for the entire batch), 1.3 g  protein, 196 mg sodium


Mini Bean “Soft Tacos”

Although not an authentic Mexican dish, these have become quite popular at my house!  Therefore I thought I’d include them in my Mexican Food celebration.  Doesn’t get more Mexican than beans, cheese and jalapenos!  These finger treats are just a new way to enjoy those key ingredients!

This “wrap” is soft yet substantial enough to pick up and eat with your hands.  These are not at all crisp.  hese are great for snacks or to serve at parties.  If you don’t eat pork rinds, you could sub in some low-carb bake mix instead, but numbers below would change and texture as well.  The only way I can afford the carbs in beans is by using 0-carb pork rinds to make these. 

Boy, oh, boy, were these ever good!  Ended up the jalapeno pepper I used was too hot for me and I had to pull some of it off mine, but this was a nice snack served warm.  You should be able to reheat these quite nicely, too.  This recipe is not suitable until you reach Atkins Phase 2 and are at the starchy vegetable rung of the carb-reintroduction ladder in that phase.

INGREDIENTS:

1½ c. shredded Cheddar cheese

2 T. cream cheese

½ tsp. chili powder or Taco seasoning

1 egg, beaten

1½ c. pork rind flour

2/3 c. canned refried pinto beans

¼ c. Monterey Jack Cheese

1 medium jalapeno, seeded and sliced into very thin rounds

VARIATION:  Add 1 T. taco-seasoned browned ground beef atop the beans before finishing construction.

DIRECTIONS:   Line a sheet pan with parchment paper and set aside.  Preheat oven to 375º.  In your microwave, melt the Cheddar cheese, cream cheese and chili powder in a glass bowl for about 1 minute on HI.  When fully melted, remove and stir once.  Add the beaten egg and pork rind flour.  Quickly stir together vigorously with a fork until ingredients appear to be uniformly distributed and it forms a uniform ball of dough that pulls away from the sides of the bowl.  Divide into 10 equal portions, slightly roll into a ball and with fingers, press onto parchment in 2″ circles that should be slightly thinner than 1/4″. If sticky to work with, dampen your fingers with a bit of water.

Pop into 375º oven for about 7 minutes or until dry in the center to your finger touch.  Remove from oven and spoon 1 T. beans onto each dough round.  Spread beans out a bit but not all the way to the edges of the dough circles.  Carefully do this as the dough is still very soft and not fully cooked.  Place 2 slices of jalapeno on each one (or 1 if you don’t like things spicy).  Garnish each dough round with about 1 tsp. Jack cheese.  Pop pan back into oven and bake these for about 10 minutes more or until beans have had a chance to warm up and the Jack cheese is melted.  Remove from oven and fold them in half.  Press slightly in middle so they will stay folded.  Serve warm.  I suspect these would reheat nicely in your oven set at 350º.

NUTRITIONAL INFO:  Makes 10.  Each mini taco contains:

126 calories, 10.96 g fat, 3.85 g carbs, 0.99 g fiber, 2.86 g NET CARBS, 8.95 g protein, 353 mg sodium

Spicy Onion Rings

Click to enlarge

Taking that coating shown on my last post of Oven-Fried Squash, I took this coating to a Nirvana level for my husband.  I am not as crazy about onion rings as my husband is.  He has always just LOVED them!  That’s all he keeps talking about this week, so I think I’m going to have to cook him a batch of these soon.  😉  These are actually oven-baked instead of fried, so there’s no greasy mess on the stove to deal with after preparing these.  Such deliciousness, so I hope you’ll try these soon.  I think you will like them!

I will admit up front they are not as easily hand-held as traditional batter-fried rings.  No surprise there with an overall thinner coating used….but that’s how I keep them low-carb.   On the up side, the coating does brown nicely and is very crunchy.  Only the smallest diameter rings cut from the ends of the onion can be picked up by hand easily.  You just have to place the larger ones onto your plate and use a fork to eat those.  For me, that beats adding coconut flour to the picture, which I am NOT fond of at all.  I’ll have to test adding some other lower carb flour or maybe a few bread crumbs to the coating to see if that improves the “holdability” of these rings.  So many ideas; so little time, I think is the saying.  These tasty rings are Atkins Induction friendly!

INGREDIENTS:

8 oz. onion cut into ½” rings

2 oz. plain pork rinds, crushed very fine

3/4 tsp. my Seafood Spice Blend

4 T. my homemade mayo

DIRECTIONS:  Preheat oven to 450º.  You will need a large, preferably non-stick baking sheet to bake these.  Slice onion and separate rings until you have 8 oz.  That’s about 16 medium ½” rings.  Parboil for 1 minute in boiling water and lift out onto paper towels to totally dry. Crush pork rinds very fine in processor, blender or by hand.  Remove any larger, hard bits that are invariably in pork rinds when you crush them.  Mix spice into crushed rinds in a small bowl.  In a shallow dish or pie plate, pour the 4T. mayo.    Slowly dip an onion ring into the mayo, coating the outside and the inside (with your finger if necessary.  Then drop them into the pork rinds and coat well outside and inside.  Lay each onto the baking sheet.     Repeat until all rings have been coated.  Pop into 450º oven for about 25 minutes.  They tend to brown more and faster on the bottom where they touch the pan, so you will want to turn them over at the 15 minute mark.  Not much grease so no draining is necessary.  Lift onto serving platter and ENJOY!

NUTRITIONAL INFO:   Makes 4 servings of 2 0z. each.  Each serving contains:

196 cals., 15.6g fat, 5.1g carbs, 0.53g fiber, 4.57g  NET CARBS, 9.5 g  protein, 271 mg sodium

Jack Snack Nachos

My extremely popular recipe for Jack Snacks (millions of fans on Facebook)  I have just taken to a new level.  Last night my husband asked for some and begged me to put just a few refried beans on top this time.  So I did the nutritional math for a tiny bit of those added and the damage wasn’t as bad as I thought:  3.45 net carbs per piece (original version w/o beans is .08 NC per piece), but definitely higher than the inspirational recipe.

These were VERY good and I felt like I was eating a real Texas-style nacho.  I baked them  in two stages and let them get crisper than I usually do so they might get crisp enough for the final nachos to be manageable in our hands.  That surprised me as I thought the moisture in the beans might make them a bit soggy and require a fork to eat them.  But that didn’t turn out to be the case.  These are not suitable until you reach the legumes rung of Atkins Phase 2 carb reintroduction ladder.  Keto folks can have these if the numbers fit your daily limits.  These are not suitable for Paleo or Primal due to the beans.

Many more delicious low-carb recipes can be at your fingertips with your very own cookbooks from LOW CARBING AMONG FRIENDS, Volume 8, by Jennifer Eloff, Chef George Stella of Food Network fame, and myself.  Volume 8 is almost completely comprised of my recipes! Chef George Stella and Jennifer Eloff are also including several tasty new delights in Vol.  8! Order yours (or any of our earlier cookbooks) from Amazon  or our direct order site: amongfriends.us/order.php.  Remember, they make GREAT birthday or holiday gifts!  If you’ve already purchased a book, the team would appreciate it if you would please take a moment and drop by the our Amazon page to leave your personal review.  🙂

INGREDIENTS:

1 recipe my Jack Snacks

½ c. canned refried beans, warmed a bit in the microwave for a minute or so

1/3 c. shredded Cheddar cheese

DIRECTIONS:  Preheat oven to 375º.  Per the Jack Snack recipe, place 1 T. of the shredded Monterrey Jack cheese on a parchment-lined baking sheet.  A total o f 16 little piles should be formed equally spaced apart.  Pop into the hot oven and bake about 10-15 minutes or until golden on top and around the edges.  Remove pan and dot each cheese portion with about ½-3/4 tsp. of the warm beans.  I used a tiny demi-tasse spoon to dip these up for portion control.  Do not spread the beans out lest the cheese bases get soggy!  Lay the jalapeno slice on top of each and sprinkle the 1/3 c. shredded Cheddar on top.  Pop back into oven and bake until the Cheddar has melted or about 7-10 minutes longer.  Remove from oven and cool a minute or so so the bases can form/crisp up for removing.  Serve and enjoy!

NUTRITIONAL INFO:   Makes 16 nachos, each contains:

45 calories, 3.3 g fat, 3.73 g carbs, 0.59 g fiber, 3.45 g NET CARBS, 1 g protein, 107 mg sodium


Cheese Puffs

Cheese Puffs

I decided to modify my Cheese Thin Buns recipe by adding some Carbquik to the ingredient line-up.   What a marvelous change that makes!  These tasty little snacks are less than 1 net carb per puff!  We both love snacking on cheese bread, but that isn’t exactly on a low-carb diet.  This is my answer to a late night snack that is suitable on a very low-carb diet.  These are easy to make and I’m certain they’ll be a hit with your family.  If you don’t like things spicy, omit the cayenne; if you do like things spicy, you may even want to increase the amount of cayenne!  🙂  These are suitable once you get to the end of Phase 2 Atkins.

INGREDIENTS:

3 eggs, beaten

½ c. water

2 T. olive oil

2 c. shredded Cheddar cheese

1 T. + 1 tsp. glucomannan powder (there is no substitute here)

¼ c. whey protein powder (plain)

1 T. (3 tsp) baking powder

¼ tsp. garlic powder

¼ tsp. onion powder

¼ tsp. cayenne pepper (optional)

1/8 tsp. sea salt

1 c. CarbQuik (or other low-carb bake mix)

DIRECTIONS:  Preheat oven to 350º.  Measure out the dry ingredients in a small mixing bowl and stir well to evenly mix.  In a separate medium mixing bowl, beat the wet ingredients with an electric mixer or whisk.  While you are whisking the egg mixture, slowly add in the dry ingredients until all is well blended into a batter resembling pancake batter.  Stir in the cheese and mix it well.  Let the dough stand a few minutes as it will thicken/stiffen up a bit.

I use a non-stick mini-muffin pan.  The cheese will bleed out some oil, so you shouldn’t have to oil a non-stick pan.  But if yours is NOT non-stick, oil the cups of your mini-muffin pan lightly with a brush.  Using a measuring spoon, put 1 level tablespoon of batter into each cup raking it out with a finger to get it all.  Will make exactly 34 muffins, so a second baking will be necessary unless you own two mini-muffin pans.  Pop into 350º oven and bake for 17 minutes or until browning on top.  We found browning enhances flavor, so you may want to even bake yours a bit longer.  Remove from oven and cool a couple minutes.  If cooled a bit, they will come out of the pans with a knife tip’s help without tearing apart.  If removed too hot, you are going to tear them up.

NUTRITIONAL INFO:    Makes 34 Cheese Puffs, each contains:

50.6 cals., 4.52 g fat, 2.13 g carbs, 1.43 g fiber, 0.70 g NET CARBS, 3.06 g protein, 138 mg sodium

Ham-Tuna Cheesies

I’ve posted my Tuna Cheesies , a long-time family favorite snack, some time back.  A number of you have tried and loved them.  Those are made and served on low-carb crackers.  Today for lunch, I wanted to “push the diet envelope” and take these to an even lower carb level and try them without actual crackers!  I had a piece of cured ham leftover from breakfast, so I decided to make my “crackers” from that fried ham.  What a GOOD IDEA that turned out to be!  At first, I was not sure ham and tuna would go well together together.  Well, I’m here to tell you they are wonderful together!  The cheese rounds out the flavor profile quite nicely!  Sometimes cooking whims really do work!  If you’ll let these slightly cool a bit before serving, they are easier to lift off the pan with a thin spatula and easier to hold in your hand for eating.  Plus…….you won’t burn the top of your mouth with the very hot, gooey cheese.  These tasty snacks are suitable for all phases of Atkins, Keto diets and for those Primal Blueprint folks that consume the occasional dairy.

Many more delicious low-carb recipes can be at your fingertips with your very own cookbooks from LOW CARBING AMONG FRIENDS, Volume 8, by Jennifer Eloff, Chef George Stella of Food Network fame, and myself.  Volume 8 is almost completely comprised of my recipes! But George Stella and Jennifer Eloff are also including several tasty new delights to try in this latest Volume 8! You’ll LOVE these delicious recipes, so order yours (Volume 8 or ANY of our cookbooks) from Amazon  or our direct order site: amongfriends.us/order.php.  For a limited time, there is free shipping if you order 2 or more cookbooks on the same order.  Remember, they make GREAT birthday or holiday gifts!If you’ve already purchased a book, take a moment and drop by the our Amazon page and  leave your personal review on the latest book.  Inquiring minds want to know. 🙂

VARIATION:  Use diagonally sliced pieces, pre-browned smoked sausage in place of ham.

INGREDIENTS:

4 oz. fried, cured ham

4 oz. (slices) American Deluxe or Cheddar cheese, shredded

½ small pouch (1.3 oz) water-pack tuna

Dash onion powder

Dash cayenne pepper

1/8 tsp. Worcestershire sauce

2 T. softened butter

DIRECTIONS:  Preheat oven to 350º.  Slice ham off into ¼” slices and then cut those into 16 pieces.  Place them on a parchment-lined pan with ample space between them, as the cheese topping will sprawl beyond the ham bits during cooking.  Place remaining ingredients in a small bowl and mix well with a fork until the butter is binding the cheese and tuna together nicely.  Spoon or fork about 1 T. of the mixture onto each slice of ham, evenly distributing any that is left over.  Slightly press the mixture down with fingers or your fork if it seems a bit “loosey-goosey”, as I call it when a mixture isn’t cohesive enough.  Pop the pan into a hot 350º oven for about 10 minutes or just until the cheese-tuna mixture melts.  It will spread over and beyond the ham most likely.  Remove pan from oven and cool a couple minutes.   Using a thin metal spatula, remove the cheesies from the pan to a serving platter and serve at once.

NUTRITIONAL INFO:  Makes 16 cheesies, each contains:

48.6 calories, 3.75 g fat, 0.36 g carbs, 0.0 g fiber, 0.36 g NET CARBS, 3.38 g protein, 187 mg sodium

Banana-Peanut Butter “Twinkies®”

One of my Mom’s regular afternoon snacks to offer us when I was growing up was half a banana sandwich with a smear of peanut butter dotted on the bananas.  If there were animal crackers in the house, she’d place a slice of banana on top of one of those with a dot of PB on top.  Well, I took those memories to a new little creation…….a banana-PB  muffin of sorts.   These were tasty beyond words. 

My Twinkies® are a little carb-y, so obviously not for daily consumption, but a tasty treat once in awhile.  🙂  These are not suitable until you have reached the higher-carb fruits level of the Atkins carb reintroduction ladder and are nearer to maintenance.  These are too high carb for most Keto followers, but those at goal weight might indulge occasionally.  Totally not suitable for Primal-Paleo followers.

VARIATION:  If you don’t have a Twinkie® pan, just make as muffins.  They’ll be just as good.

INGREDIENTS:

1 recipe my Banana Muffin batter

1 ripe banana, mashed

2 T. natural peanut butter (I use Laura Scudder)

DIRECTIONS:  Preheat oven to 350º.  Lightly grease a non-stick Twinkie® pan (or use a regular muffin pan if you don’t have a Twinkie® pan).  Make the recipe of banana muffin batter in a medium bowl.  Stir until smooth.  Spoon into the 12 slots of the pan equally (will be quite full as they don’t rise much).  Bake at 350º for about 22-25 minutes.  I’m still learning to use a new oven in a new house so these came out a little browner than I like, but the oven performed pretty well for me.  Remove when firm to the touch and cool off.  Slice in half and set aside.  Stir the mashed whole banana and peanut butter together until well-blended.  Makes 3/4 c. filling or exactly 12 tablespoons.  Fill each “Twinkie”® with 1 T. of the filling, spreading somewhat evenly.  You can, if you prefer, just “frost” the tops of the Twinkies® with the filling, if you find this easier.  🙂  ENJOY!

NUTRITIONAL INFO:  Makes 12 Twinkies®, each contains:

244.7 calories, 19.76 g  fat, 13.15 g  carbs, 4.29 g  fiber, 8.86 g  NET CARBS, 6.83 g  protein

Einkorn Tuna Pimiento Cheese Muffins

Tuna is always in my pantry, so I reached for some to make lunch today.   These two-bite mini-muffins I created today, honestly……..my husband had trouble stopping at SIX of them!  But he’s a big eater.  I stopped at four. 🙂  These go together fast and only took 13 minutes to bake.  I highly recommend slightly cooling before attempting to loosen them from even a non-stick pan, as baked egg tends to stick to whatever pan you use.   I’ve not had good luck baking tuna items in silicone pans.  Tuna likes browning.  I used a 24 ct. metal pan to bake these.  This recipe is not suitable until Phase 2 Atkins  when you are nearing maintenance, due to the Einkorn Bake Mix.   You can lower the carb count per muffin even more using a lower carb bake mix than mine, which has Einkorn Flour in it.  But the count is already pretty darn low in my opinion.  Those still in the initial 2-week Induction Phase of Atkins need to eliminate the bake mix entirely and increase the eggs to about 6.  The muffins will naturally have a different, and somewhat eggier texture than mine here, but should taste about the same.  These should freeze nicely for about a month.  If you do the Induction version, adding 1-2 T. flax meal to that variation would add a little firmer structure to them.

Many delicious low-carb recipes can be at your fingertips with your very own cookbooks from LOW CARBING AMONG FRIENDS, by Jennifer Eloff and low-carb friends (me included).  Chef George Stella also brings to the table a wealth of delicious recipes added to the collection!  You’ll LOVE these recipes!  Order your copy today from Amazon  or our direct order site: amongfriends.us/order.php.

INGREDIENTS:

4 beaten eggs

3 small pouches (7.8 oz. total) water-pack tuna

1½ c. my Einkorn Bake Mix

3/4 tsp. my Seafood Spice Blend

¼ tsp. sea salt

1 lg. 4-0z. jar chopped pimiento, drained

1 lg. green onion, chopped fine

2 2/3 slices American Deluxe or Cheddar cheese, 2 cut into 9 squares, 1 cut into 6 squares

VARIATION:   Add a few drops of Tobasco or a few shakes of cayenne pepper to the batter for a spicier muffin.

DIRECTIONS:   Preheat oven to 350º.  Beat the eggs in a medium bowl.  Add all other ingredients but the cheese.  Oil 24 slots of a mini-muffin pan.  Using a 2 T. scoop, add one level scoop to each slot.  They will be nearly full and there should be just enough batter for 24.  Place 1 square of cheese atop each and push it down slightly into the batter.  Pop into hot 350º oven.  Bake for 13-15 minutes or until they puff up and the cheese just begins to brown on top.  Remove and cool slightly.  If you try to remove while too hot, they will tear up on you.  Gently loosen with a knife tip or fork and enjoy.  A modest serving would be 4 mini-muffins.  A big eater will want 6 of these minis.

NUTRITIONAL INFO:    Makes 24 muffins, each contains:

22 calories, 0.9 g fat, 0.35 g carbs, 0.08 g fiber, 0.27 g NET CARBS, 3.22 g protein, 74 mg sodium

“Ravioli” Bites

ravioli-bites

Here is an exciting and delicious way to use my incredible glucomannan dumpling dough!  Man, are these ever good, and for only 1.28 net carbs per bite!  Can’t beat that.  Picture a platter full of these for Super Bowl next year!  And guilt free!  Very similar to Totino’s Pizza Rolls in taste but even better!   The cooking is a two-step process, but necessary for the dough to fully cook all the way through.  These are suitable for all phases of Atkins and Keto diets.  Omit the bit of flour, subbing in oat flour (slightly higher carbs), and these are suitable for Primal-Paleo as well!   An added note, I reheated the leftovers in the oven for lunch today (350º for 15 minutes) and they were GREAT!  I suspect these would freeze nicely, too, as the dumpling dough has proven, after simmering in sauces, to freeze well.

Many delicious low-carb recipes like this can be at your fingertips with your very own cookbooks from LOW CARBING AMONG FRIENDS, by Jennifer Eloff and low-carb friends (me included).  Chef George Stella also brings you a wealth of delicious recipes you will love!  Order yours TODAY! from Amazon  or our direct order site: amongfriends.us/order.php.

INGREDIENTS:

2 recipes my Peggy’s Original Dumplings dough

2 T. finely grated Parmesan cheese

2 T. total Einkorn flour or oat flour (from certified gluten-free oats if required)

1 tsp. olive oil

6 oz. Italian sausage, cut into 3/8″ slices

½ c. low-carb spaghetti sauce (I use Lucini or Classico Italian)

DIRECTIONS:  Preheat oven to 350º.  Make the double batch of dumpling dough (adding the Parmesan and 1 T. of the flour to the dry ingredients) per that recipe’s instructions.  When the dough has firmed up nicely, divide into eighteen equal balls around 1½” round.  Dust the counter with the remaining flour and pat your fingers in it frequently to keep them  from getting sticky as you pat/work each ball of dough into a small 2″ round on your fingers.  You’re not looking for perfection here.  This soft dough is very difficult to roll, so I just do this in my hands.  Again, keep touching the flour with your fingers and patting onto the dough surface as you work so your fingers don’t get sticky as you work.   Place a slice of sausage on one side of each circle of dough, fold the other side on top and very gently press the edges together to close it up.   Repeat for all 18 ravioli.  Set on counter or paper towel.  When all 18 are made, heat oil on griddle and brown each side lightly.  With tongs, gently lift them onto a parchment lined pan and pop into 350º oven for about 5-10 minutes to finish baking and browning.  Remove and serve with a cup of your favorite low-carb spaghetti sauce for a light dip.  ENJOY!

VARIATION:  Use pepperoni slices instead of the sausage.  Alternately, you can take the finished raviolis after griddle searing and just pop them into a huge pot of your favorite marinara sauce and eat them more like traditional ravioli is served.  You could also, after baking, pour some of my Pink Cream Sauce over them and garnish with parsley.  BE CREATIVE with sauces!

NUTRITIONAL INFO:    Makes 18 “ravioli”, each contains:

43 calories, 3.06 g fat, 3.15 g carbs, 1.87 g fiber, 1.28 g NET CARBS, 2.57 g protein, 188 mg sodium

Eggplant Focaccia

Eggplant Focaccia

This is a fairly easy dish to throw together and it is quite tasty.  Any leftovers can be reincarnated the next day by adding some browned Italian sausage and mushrooms or some super thin slices of green pepper and seeded tomato.  My husband is a hearty eater and had 3 slices.  It took only 2 to satisfy me.  Not suitable until Atkins Phase 2 OWL unless you use a different, Induction-friendly bread instead of the bread mentioned below.  I added 2 sausage patties to the focaccia pictured above, because that’s what I had cooked, leftover in the fridge.  Next time I’ll use 4 patties.  If you add sausage, be sure to add that to the nutritional info shown below.

INGREDIENTS:

1 batch of Artisan Flat Bread  (use Jen Eloff’s Gluten-Free mix in this bread for gluten-free version)

8 oz. unpeeled, eggplant (sliced thin, about 1/8″-¼” thick)

2 T. extra virgin olive oil

1 T. chopped fresh rosemary

¼ tsp. crushed dried oregano

Pinch each onion powder and garlic powder

3 oz. Havarti, Emmentaler, Swiss or Jack cheese, shredded

1 oz. Parmesan cheese for final topping

VARIATION:   Add a little cooked crumbled pork or Italian sausage crumbles to crust before layering with eggplant. 

DIRECTIONS:  Slice eggplant and spread onto paper towels and lightly salt.  Let sit 10 minutes and pat the water off tops.  Repeat for other side of eggplant.

Preheat oven to 350º.  While eggplant is “bleeding” out its water, make the Artisan Flat Bread per recipe instructions.  I always use mozzarella cheese where the recipe says Italian blend cheese. Spread batter onto parchment-lined 13×15 pan.  If you want to make this look like pizza, use a pizza pan instead.  Spread batter all the way to the edges of whatever pan you use.  Sprinkle rosemary, oregano and onion and garlic powder on top.  Now evenly spread half the grated cheese onto the batter.  If adding sausage, do it now.  Arrange eggplant slices in 1-2 slightly overlapping layers evenly on top.  Sprinkle with remaining grated cheese.   Finally, top with the Parmesan. Drizzle with the olive oil and bake for 30 minutes at 350º or until eggplant is done.  Remove from oven and slice into 12 pieces.  Serve immediately.  This is nice with a green or tomato salad.  Easiest eaten with your hands like pizza.

Shown with a little cooked sausage added under eggplant layers.

NUTRITIONAL INFO:  Makes 12 servings.  Excluding any added sausage, each serving contains:

238.5 calories, 19.7 g  fat, 4.76 g  carbs, 2.34 g  fiber, 2.42 g NET CARBS, 14.1 g  protein

Meatza “Donuts”

Meatza BatelsI wanted to make a crustless pizza today for lunch yet didn’t want to do my usual Quick Skillet Pizza or a traditional round shape.  I thought first about my stick/bar pan, a muffin pan and then my eye caught my donut pans.  Light bulb moment.  So I decided on making Meatza “Donuts”!  They came out so cute and quite delicious as well.  These are suitable for all phases of Atkins, Keto diets and Primal.  Not suitable for Paleo unless you have a plan-suitable non-dairy cheese.   These can be refrigerated or frozen.  They would make great portable food for camping or office reheating.   Great for a meal or for a late night snack.  🙂

More delicious low-carb recipes can be at your fingertips with your very own cookbooks from LOW CARBING AMONG FRIENDS, by Jennifer Eloff and low-carb friends.  Chef George Stella also brings you a wealth of delicious recipes you will love!  Order yours TODAY! from Amazon or our direct order site: http://amongfriends.us/order.phpDISCLAIMER: I do not accept payment for this book promotion. I promote the books because they are GREAT cookbooks anyone would be proud to add to their cookbook collection.

VARIATION:  Add 1 tsp. pizza or meatless spaghetti sauce (lowest carb) before adding toppings.

INGREDIENTS:

1 lb. lean ground pork

1/8 tsp. garlic powder (or coarse granulated garlic)

1/2 tsp. fennel seed, crushed

¼ tsp. oregano

1 T. parsley, chopped

3/4 c. shredded mozzarella cheese

¼ c. grated Parmesan cheese

3 T. thin slivers green bell pepper

12 black olives, sliced into 3-4 slices

DIRECTIONS:   Preheat oven to 350º.  Press meat into two large doughnut pan slots (total 12 slots).  It will take about 3 T. per slot and each will be pretty full.  if using sauce, smear 1 tsp. atop each “donut”.  Add 1 T. mozzarella cheese atop each “donut” trying to keep in on the meat and not all over the pan.  It’s actually not easy to do.  🙂  Push any roaming bits of cheese back onto the meat. 🙂  Then put 4-5 slivers green pepper on each one.  Slice the olives into 3-4 slivers and put 3-4 slices onto each “donut”.  Finally sprinkle 1 tsp. Parmesan over each circle.  Press each on top slightly to seat the toppings well into the meat.  To maintain the donut shape, take your finger and push any cheese off the center post of each form.

Pop pan into middle shelf of oven and bake for about 20 minutes or until slightly browned on top.  Meat should also be done at that juncture.  Remove pans from oven and walk over to sink and tip each pan slightly to drain off most excess grease and juices that bled out during cooking.  Using a knife, loosen each donut with a knife point, lift out of pan and place them on your serving platter.  ENJOY!

NUTRITIONAL INFO:    Makes 12 Meatza “Donuts”, each contains:  (two filled us up nicely)

144 calories

11 g fat

0.89 g carbs, 0.21 g fiber, 0.68 g NET CARBS

9.9 g protein

158 mg sodium

Tuna-Cheese Stuffed Mini Peppers

Tuna-Cheese Stuffed Mini Peppers

I have been seeing mini bell peppers of late in the stores and find them so cute and colorful I decided to buy some this week.  Decided on a tuna stuffing for them.  The tuna and cheese flavors here play nicely with the sweet edge of the peppers.  The touch of cayenne pepper give them just a little bite.  Omit that if you don’t like spicy food, but this amount isn’t very hot to me, as I don’t like real spicy foods myself.   These are suitable for all phases of Atkins and Keto diets if the carbs will fit your daily limits.

INGREDIENTS: 

14  small sweet mini bell peppers (red, yellow, orange)

1½ c. shredded Cheddar cheese (I used a mixture of Cheddar and American Deluxe)

3 oz. softened cream cheese

1/8 tsp. red cayenne pepper (more for spicier version)

6.2 oz. tuna, oil pack (I use the foil pouch)

VARIATION:  Instead of cayenne, use 1 tsp. Tobasco brand Chipotle Hot Sauce

DIRECTIONS:  Bring a 4 qt. pot of water to boil.  Cut stem end off peppers and seed with the point of a knife. Cut in halves lengthwise.  Plunge them in the boiling water for 2 minutes just to soften just a bit.

Line a baking sheet with parchment.  Preheat oven to 350º.  In a medium bowl, soften cream cheese on a covered paper plate in your microwave set on defrost for about 20 seconds.   Add the Cheddar cheese, cayenne and tuna.  Mix well, blending with a fork.  Using your fork, fill each half with about 1-1½ tablespoons of the filling.  Place them on the paper covered pan.  Pop pan into 350º oven for about 10 minutes just long enough to melt the cheese and they barely begin to brown.  Serve hot!

NUTRITIONAL INFO:   Makes 28 pieces, 4 pieces per serving and each serving contains:

202 cals, 14.14g fat, 3.98g carbs, 0.67g fiber, 3.31g NET CARBS, 14.3g protein, 267 mg sodium

BBQ-dogs

Click to enlarge

When you BBQ a big piece of brisket, like we do from time to time, it seems there’s always so much leftover (there are just two of us here).  I like to chop some of the leftover meat, add a little of my low-carb BBQ sauce, so there is some convenient chopped beef BBQ for sandwiches throughout the week.

Last time we grilled a brisket, I also happened to need to bake some low-carb bread, as I was down to my last.  Then when I started stirring all those ingredients up in my mixing bowl this finger-food idea just popped into my head.  Using my protein bar silicone baking pan (but you could use a regular muffin pan), I formed the tastiest little treats!  These are great for parties, great snacks or even several for a grab-and-go lunch!  They’re low in carbs, too!

I have started adding 1 tsp. yeast dissolved in 1 T. warm water to my bread batter, not for rise, but for flavor.  You can omit that, but it will only lower net carbs by .13 g, so why not go ahead and add it for that touch of yeast flavor?  These are suitable once you get to the nuts level of Atkins Phase 2 (OWL, Ongoing Weight Loss).  If you add that cheese, be sure to add in those cheese carbs.  You can bake these in muffin pans if you don’t own or want to get the specialty pan shown below.  I just happen to have stumbled on a couple of these pans in my local Tuesday Morning store one day.

More delicious low-carb recipes can be at your fingertips with your very own set of Jennifer Eloff and friends’ best-selling cookbooks LOW CARBING AMONG FRIENDS.  She has collaborated with famous low-carb Chef George Stella and several other talented chefs to bring you a wealth of delicious recipes you are going to want to try.  Even a few of my recipes are in her cookbooks! Order your 5-volume set TODAY! (available individually) from Amazon or: http://amongfriends.us/order.php

DISCLAIMER: I do not get paid for this book promotion or for the inclusion of my recipes therein.  I do so merely because they are GREAT cookbooks any low-carb cook would be proud to add to their cookbook collection.

INGREDIENTS:

1 recipe my gluten-free grain-free focaccia bread

12 oz. leftover chopped BBQ beef or pork

¼ c. low-carb BBQ sauce  (1-2 carbs per tablespoon or less)

VARIATIONS:  Add 1 tsp. shredded Cheddar cheese or some chopped green onion on top of the meat portion before topping with the “cover” batter.  🙂

DIRECTIONS:  Preheat oven to 350º. Make up the bread recipe per that recipe’s instructions.  If you like, you could add a little onion powder to the batter, or finely minced green onion, but be sure to add in those carbs if you do!  Toss the chopped beef with the ¼ c. BBQ sauce.  If not using silicone pans, grease your muffin cups generously to prevent sticking. Dip up about 2 tsp. batter into each of your pan’s 12 slots.  This should take about half the batter.   Using a spoon or fork, spread it evenly on the bottom of the form.  Next dip 1 oz (about 1 Tbsp.) chopped beef mixture onto the batter.  Gently spread the meat evenly.  Finally, spoon the remaining batter on top of the meat in each slot (about 2 tsp.).  Again, with the back of a spoon, spread that batter carefully and as evenly as possible.  You want to completely cover the meat as best you can.  There will barely be enough batter to complete the job, so it is important you measure the bottom and top batter as suggested to avoid running out before all 12 “dogs” are “constructed”.  Place silicone pan on a sheet for support and pop into 350º oven for 25 minutes or until lightly browned as shown.  ENJOY!  Below is a pic of the silicone pan I used, but these can be made in muffin shapes just as well.

Click to enlarge

Click to enlarge

NUTRITIONAL INFO:  Makes 12 “dogs”, each contains:

193 calories

13.3 g  fat

2.71 g  carbs, 1.05 g  fiber, 1.66 g  NET CARBS

15.7 g  protein

145 mg sodium


Nacho Cheese “Corn Chips”

Nacho Cheese "Corn Chips"

Nacho Cheese “Corn Chips”

I am leaving this recipe on my blog so as not to break links on any forums I have shared it on.  But I have come to the conclusion that these just won’t stay crisp long enough after frying to call them “chips”.  As they cool, the centers soften up.  Not what I’m looking for in “chips”.  But they were crisp, if browned properly, when eaten hot.  I

Man, I have often wondered if you could deep fry jicama, but I honestly just didn’t believe you could hide the sweet quality of jicama enough to bother to try it.  I also didn’t think I could ever slice it thin enough to work for something like this.  So I bought a little folding Rival slicer and tried jicama on it today  to have with my bunless burgers.  The nacho cheese corn chip version shown above was sprinkled with a mixture of nacho cheese popcorn seasoning, corn bran and sea salt.  This is the closest to a true tortilla chip as I’ve come to in my my attempts to come up with one.  Though crispy fried jicama usually tastes more like potato chips, this combination of seasoning gives it more of a corn chip flavor.  These are suitable once you get to the grains rung of OWL due to the tiny bit of corn bran.

The corn bran, virtually pure fiber and no carbs, I have only found at Honeyvillegrains.com.  But sadly, they only sell it in a huge bag, so it’s probably not worth your trouble to buy just for this recipe (though it was cheap, as I recall).  I keep mine in my freezer and have been using the same bag for a couple years now with no ill effects during storage.  It is used in very tiny amounts to add a slight corn flavor to recipes.

I used Kernel Seasons brand of cheese popcorn seasoning I get at Walmart where the popcorn is shelved. Yeah, yeah, I know it’s not the greatest product in the world, for anybody, but this tiny amount shouldn’t kill your daily carb count and brings sooooo much cheesiness to these nacho chips.  If you can get pure powdered cheese, that would be a healthier choice.

If you omit the corn bran, you can enjoy these during Atkins Induction.  These are great with burgers, just as a snack, or would compliment your next Mexican food dinner quite nicely!  ENJOY!

More delicious low-carb recipes can be at your fingertips with your very own set of Jennifer Eloff and friends’ best-selling cookbooks LOW CARBING AMONG FRIENDS.  She has collaborated with famous low-carb Chef George Stella and several other talented cooks to bring you a wealth of delicious recipes you are going to want to try.  Even a few of my recipes are in each of the 5 volumes! Order your set TODAY! (also available individually) from Amazon or: http://amongfriends.us/order.php

DISCLAIMER: I am not paid for this book promotion nor for the inclusion of my recipes therein.  I do so merely because they are GREAT cookbooks any low-carb cook would be proud to add to their cookbook collection.

INGREDIENTS:

6 oz. peeled jicama, (that’s about 1/4-1/3 of a 6½” jicama)

Oil of your choice 1″ deep or more (I use palm shortening)

1/8 tsp. corn bran (optional, I order at Honeyvillegrains.com)

1/4 tsp. nacho cheese popcorn seasoning (or pure powdered cheese if you can get it)

Dash sea salt

DIRECTIONS:  Mix seasoning and salt in a paper plate.  I poured mine into an empty salt shaker I keep for such purposes.  Set some paper towels on newspaper  by your stove-top for draining purposes.  Next, peel and slice jicama VERY thin.  I used a Rival fold-up slicer set on the thinnest setting, but a mandoline set on the thinnest setting would also work.  You’ll just never get them thin enough with an ordinary knife.  My food processor doesn’t slice this thin with either of the blades I have, but maybe you have a thinner blade than I.  You’re aiming for 1/16″ thick cut on the jicama.

Heat oil in a deep skillet or deep fryer.  Drop about half the slices in so as not to crowd or cool off the oil to much.  The bottoms will begin to brown first, so I flipped mine over several times to get the most even browning.  You want these quite brown, but of course, not burned.  Any white areas in the center will NOT be crispy, but rather chewy.  But if these are browned well, they will be crisp even after they cool off!  I was most impressed with that fact.  When brown, lift out of oil with slotted spoon onto awaiting paper towels. While still hot and oily, sprinkle with the seasoning mixture on both sides.  Fry the second half of the chips and season as well.

NUTRITIONAL INFO:  Makes 1 serving of about 20-25 chips (depends on size).  Entire batch contains:

186 calories

13.7 g  fat

15.4 g  carbs, 8.5 g fiber, 6.9 g NET CARBS

1.2 g  protein

161 mg sodium

Beef Jerky

Peggy's Beef Jerky2

Jerky has been around for centuries and in all parts of the world.  It goes as far back as Egyptian times.  It was such an integral part of earliest America’s days, particularly frontier life.  I can’t imagine the Lewis and Clark Expedition surviving without it, can you?      I do think of it as American food, but it most assuredly not just American.  It is loved around the world.  Many like my husband are almost addicted to the stuff and replenishes the pantry supply the minute it is gone.  So I think it deserves a place in our American food ‘classics’ discussion.

I just love my 10-tray Guide Gear food dehydrator.  All metal parts so none crack from heat over time.  🙂  It cranks out the most beautiful, tasty batch of beef jerky in 4 hours flat!! I love beef jerky!!  This has always been my husband’s favorite snack as well.  And the perfect low-carb snack indeed!  At a range of $26-$29 per pound now (beef has skyrocketed recently), this is a very expensive little snack!  For years I made my own jerky on regular sheet pans in the oven at 155-170º for 5-6 hours, basting and turning the meat a couple times during the drying process.  A dehydrator allows the strips of meat to dry on open racks, with forced warm air circulation around all sides of the meat simultaneously, eliminating the need to turn the meat, as well as speeding up the time required.

This recipe can be done with other cuts of beef, but sirloin will be the lowest in calories and fat (except for skirt meat) and probably the best meat value for jerky, followed by lean round or rump roast.  I began with 4 nice pieces of sirloin (about 6# raw meat total) that when trimmed of all visible fat, sinew, and gristle, yielded exactly 5# of lean strips of raw beef.  That dried out to exactly 2# of finished jerky.  See why it’s so expensive now?  Since I can’t possibly know how much you will eat at a sitting, I’m giving you nutritional info for a 1 oz. serving, which is probably 2-3 pieces.

When slicing your meat, it is important to slice it uniformly thick (FYI, longer strips are best for dehydrator trays.  If oven cooking, the length of the strips is unimportant).  I aim for 3/16″-1/4″ thick slices.  HANDY TIP:  Slicing partially frozen meat is easiest, if you can take the time to partially freeze it.  Any thinner than 3/16″ will reduce your final jerky to crispy critters faster than the thicker pieces (must remove those from cooking sooner); thicker than 1/4″ will take a long time to fully dry out.

I like to marinate my meat for at least 6 hours (or overnight) in the refrigerator in a covered plastic pan before dehydrating.  You will get better flavor results with longer marinating time. 🙂  For those that like a sweeter, teriyaki jerky, you can add 1 tsp. of maple extract and a dab of your favorite sweetening agent.

INGREDIENTS: 

6-6½ lbs. boneless sirloin (will yield about 5 lb. trimmed meat)

1 T. tomato paste (Walmart Great Value brand is pure tomato pulp, no added sugar)

3/4 c. red wine or water

1/3 c. soy sauce (or tamari or coconut aminos)

1 tsp. onion powder

1 tsp. garlic powder

2 tsp. coarse black pepper

1 pkt. stevia, Splenda or other sweetener (optional)

DIRECTIONS:   Trim all fat, membrane, sinew and gristle off the meat.  Any left on will expedite spoilage during storage. Partially freeze meat to facilitate slicing.  Slice the partially frozen meat 3/16″ thick.  In large plastic/glass marinating pan,  blend tomato paste with soy sauce until smooth.  Add water and remaining ingredients and stir well.  Add meat to the marinade and using hands, toss meat several times to coat well.  Cover and marinate 6 hours or overnight, covered, in refrigerator.  You can also marinate the meat in gallon zipper plastic storage bags.  I recommend placing them into bowls/marinating pan, in case of leakage you won’t want to mess up the refrigerator 😉  Stir once or twice during marinating (or manipulate the bag with your hands to be sure all the meat is touching the marinade.

When ready to dehydrate, lift meat pieces out of marinade and lay on dehydrator trays or non-stick baking sheets, leaving a ¼” space between pieces.  You do not want them to touch each other as this will block air/heat circulation. Set dehydrator to meat setting (155º-160º) for 4-6 hours.  I check mine every hour, in case small/thin pieces are over drying. No matter how hard you try, some pieces will slice out thinner than others.  It just happens!

My jerky takes 4 hours in my dehydrator, but it used to take me 8 hours, for several reasons, mostly tray overcrowding in my old smaller dehydrator.  If oven cooking on pans, set oven between 160º-170º. Turn meat every hour (usually 1 or 2 times is enough).  Take pieces out of the dehydrator/oven as they appear to be fully dried.  It goes without saying, any thick pieces will take longer to fully dry out.  Discard any marinate remainders as it is contaminated with raw meat juices.  When jerky has cooled, ENJOY!!

To store jerky, wrap in small batches in foil and then place the foil packs into a large ziploc bag.  Though they can be stored on the counter for 1-2 months, if not 100% dried, it can mold/spoil quickly.  Refrigerating therefore, is always the safest way to store jerky that has not been done commercially.  I actually keep most of mine in the freezer and just thaw 1 foil pack as needed, keeping the open one in the fridge until that pack is fully consumed.

NUTRITIONAL INFO:  Makes 32 oz. (2 lb) finished jerky, or 32 servings of 1 oz. each.  Each serving contains:

94.59 cals, 2.52g fat, 0.58g carbs, 0.09g fiber, 0.49g NET CARBS, 16g protein, 128 mg sodium

Smokin’ Jack Sausage Bites

Click to enlarge

Click to enlarge

A quick snack if using fully cooked smoked sausage.  I had 1 link we grilled this week leftover in my refrigerator and made a plate of these tasty bites for lunch today.  This is Induction friendly.

INGREDIENTS:

1  link smoked sausage, pre-cooked (mine weighed 2½ oz.)

3 oz. pepper jack cheese

DIRECTIONS:  Preheat broiler.  Slice cooked sausage into 12 even slices. Place on metal pan and top with folded bits of pepper jack cheese.  Pop in broiler until cheese is melted and starting to brown.  Place on paper towels a moment to soak up excess grease and put on serving plate.  Have toothpicks handy for easy grabbing.

NUTRITIONAL INFO:   Makes 2 servings, each one contains:

271 calories

22.3 g  fat

1.75 g  carbs, 0 fiber, 1.75 g  NET CARBS

15 g  protein

456 mg sodium

25 % RDA calcium

Prune Protein Bars

Click to enlarge

Click to enlarge

I was shopping last month and found the coolest silicone baking pans on sale at my local Tuesday Morning store.  They only had two of them and they were framed with steel, so they will support themselves and have something to grab onto that supports them when picking up to place/remove from the oven.  The compartments are approximately 4″x 1¼”x 1¼”, which is perfect for individual bar cookies, brownies, protein bars, mini cakes, or making little petit fours.  Here’s what it looks like:  But of course, you can press this dough into a pan and cut into squares with a knife as well.  This specialty pan isn’t essential for making these, just fun!  🙂

This recipe was inspired by a gluten-free granola bar recipe I saw over on Joyfulabode.com.  I decided to sweeten it up more as well as add some protein powder, DaVinci caramel syrup, and dried prunes.  The final result was very, VERY good.  And best of all, no cooking to speak of, so no heating up the kitchen.  These were so easy to make, I’ll be making variations on this recipe, I’m sure!  Plus these are stable/safe to store at room temperature, but I think they are less fragile if kept chilled.  In other words, they are not well-suited for back pack jostling. 🙂  They will tend to break apart if handled roughly.  For anyone interested, I froze a few and they froze just fine.  They did not get sticky on the surface or soggy in any way after defrosting.    This recipe is not suitable until the higher carb fruit rung of Atkins OWL Phase.

INGREDIENTS:

½ c. each almonds, walnuts, and pecans

¼ c. each roasted pumpkin seeds, sunflower seeds and sesame seeds

1½ c. coconut, unsweetened

½ c. erythritol (or preferred ½ c. sugar equivalent sweetener)

1 scoop (¼ c.) whey protein powder, unflavored, unsweetened (I use NOW for 1 net carb per scoop)

½ tsp. cinnamon

5 dried prunes, chopped

¼ c. sugar-free honey (I buy at Walmart)

¼ c. DaVinci caramel sugar-free syrup

1 tsp. vanilla

¼ c. coconut oil

¼ tsp. salt (omit if seeds above are salted)

DIRECTIONS:  Place the first 7 ingredients into the bowl of a food processor (or blender) and pulse 2-3 times to a medium grind.  You don’t want it too coarse; you don’t want it too fine.  🙂  In a small saucepan, bring the last 5 ingredients to a bubble over medium-high heat.  Remove from heat and pour over the dry mix and stir well to moisten all ingredients.  If you have suitable silicone muffin cups, press into 18 patties or bars, making them as level as you can with your fingers.  I found each one took about ¼ c. dough.  If you don’t want round patties, just press dough onto a 9×13 non-stick or parchment-lined pan.  Chill for 1 hour and cut into 18 bars.  Store extras covered in the bottom of your refrigerator or in your freezer.  I actually prefer to just freeze them and eat them right from the freezer, as they never really get hard, hard in the freezer.

NUTRITIONAL INFORMATION:   Makes 18 bars, each contains:

187 calories

16.88 g  fat

5.72 g  carbs, 2.86 g fiber, 2.86 g. NET CARBS

5.1 g  protein

57 mg sodium

159 mg potassium

12% RDA Vitamin E, 34% copper, 17% iron, 18% magnesium, 39% manganese, 113 % Thiamin, 13.3 % zinc

Spicy Onion Rings


Click to enlarge

Spicy Onion Rings

I’ve been wanting to try my hand at onion rings.  I am not so wild about onion rings, but my husband sure loves them.  These are oven-baked instead of fried, so no greasy mess on the stove.  They came out very tasty, but were considerably softer than a deep-fried, batter-coated onion ring.  No surprise there.   The coating browned nicely and was very crunchy.  I would definitely do these again.  Just so you know, only the smallest diameter rings could be picked up by hand easily.  I dipped the larger ones onto my plate and used a fork to cut them in half to eat.  These are Induction friendly.

More delicious low-carb recipes can be at your fingertips with your very own set of Jennifer Eloff and friends’ best-selling cookbooks LOW CARBING AMONG FRIENDS.  She has collaborated with famous low-carb Chef George Stella and several other talented cooks to bring you a wealth of delicious recipes you are going to want to try.  Even a few of my recipes are in the cookbooks! Order your 5-volume set TODAY! (also available individually) from Amazon or: http://amongfriends.us/order.php

DISCLAIMER: I do not get paid for this book promotion or for the inclusion of my recipes therein.  I do so merely because they are GREAT cookbooks any low-carb cook would be proud to add to their cookbook collection

INGREDIENTS:

8 oz. onion cut into ½” rings

2 oz. plain pork rinds, crushed very fine

3/4 tsp. my Seafood Spice Blend

4 T. my homemade mayo

DIRECTIONS:  Preheat oven to 450º.  You will need a large, preferably non-stick baking sheet to bake these.  Slice onion and separate rings until you have 8 oz.  That’s about 16 medium ½” rings.  Parboil for 1 minute in boiling water and lift out onto paper towels to totally dry. Crush pork rinds very fine in processor, blender or by hand.  Remove any larger, hard bits that are invariably in pork rinds when you crush them.  Mix spice into crushed rinds in a small bowl.  In a shallow dish or pie plate, pour the 4T. mayo.    Slowly dip an onion ring into the mayo, coating the outside and the inside (with your finger if necessary.  Then drop them into the pork rinds and coat well outside and inside.  Lay each onto the baking sheet.     Repeat until all rings have been coated.  Pop into 450º oven for about 25 minutes.  They tend to brown more and faster on the bottom where they touch the pan, so you may want to turn them over at the 15 minute mark.  Not much grease so no draining necessary.  Lift onto serving platter and ENJOY!

NUTRITIONAL INFO:   Makes 4 servings of 2 0z. each.  Each serving contains:

196 calories

15.6 g  fat

5.10 g  carbs, .53 g fiber, 4.57 g  NET CARBS

9.5 g  protein

271 mg sodium

85 mg potassium

31% RDA Vitamin B12, 26% riboflavin and 40% selenium

Smoked Oyster Canapes

Click to enlarge

Smoked Oyster Canapés

A quick and tasty snack or party appetizer for your next football game gathering.  Of course, if you don’t care for smoked oysters, you probably won’t like these.  But my folks always kept smoked oysters in the house and it was a favorite snack with saltines.  But I’ve found a low carb way to still enjoy them. Oysters have carbs, but there’s only 7 net carbs in an entire 3.75 oz. can, so eating 4-5 of these is doable for a low-carb snack.  This recipe is Induction friendly.  Every brand of oysters is different the size/number of oysters in the can.  That makes it hard to formulate a big recipe and know how many you’ll end up with.  As a rule, the oysters are very small after smoking, but my can had 27 in it this time.  I make up just the number of these I think I want or need for guests, because my husband is not so fond of smoked oysters and never eats them with me.   So the recipe below is for ONE canapé and you go with that based on consumption.  You’ll need toothpicks to put these together as well.

More delicious low-carb recipes can be at your fingertips with your very own set of Jennifer Eloff and friends’ best-selling cookbooks LOW CARBING AMONG FRIENDS.  She has collaborated with famous low-carb Chef George Stella and several other talented cooks to bring you a wealth of delicious recipes you are going to want to try.  Even a few of my recipes are in the cookbooks! Order your 5-volume set TODAY! (also available individually) from Amazon or: http://amongfriends.us/order.php

DISCLAIMER: I do not get paid for this book promotion or for the inclusion of my recipes therein.  I do so merely because they are GREAT cookbooks any low-carb cook would be proud to add to their cookbook collection.

INGREDIENTS:

1 smoked oyster

1 medium black olive, pitted

1/3 tsp. Philly cream cheese with chive and onion

DIRECTIONS:  Dab 1/3 tsp. cream cheese on each oyster, Spear through both with a toothpick, catching a black olive on the bottom of each canapé.

NUTRITIONAL INFO:   Each canape contains:

12 calories

.8 g fat

.6 g  carbs, .1 g fiber, .5 g  NET CARBS

.7 g  protein

83 mg sodium

Italian Meatballs

Click to enlarge

Click to enlarge

I like to make a huge batch of meatballs when I make them so I’ll have a bunch to freeze for convenient future use.  Not only do these make wonderful snacks as is or with your favorite low-carb sauces, but it’s nice to have them already cooked to pop into your favorite spaghetti sauce.  They make a wonderful meatball sandwich on your preferred low-carb bread as well.  🙂  This recipe is Induction acceptable.  I have to watch my sodium intake now, but if you’re not sensitive, you might want to increase the salt to ½ tsp. in these, as that’s what my original recipe calls for.  I just can’t have that much salt anymore.  🙂

INGREDIENTS:

3 lb. lean ground beef

4 oz. onion, chopped very fine

4 oz. green bell pepper, chopped very fine

2 T. bacon grease

1/3 tsp. dried oregano

1 c. parsley, chopped

3 eggs beaten

4 T. grated Parmesan cheese

1/2 tsp. coarse ground black pepper

1/4 tsp. salt

DIRECTIONS:  Preheat oven to 350º. Lightly grease two baking pans with sides.  Place meat in large mixing bowl.  Chop onion and pepper and saute in bacon grease until completely fender.  Add to meat, grease and all.   Add oregano, parsley and Parmesan.   Add the beaten eggs, salt and pepper.  Mix thoroughly, which is most efficiently done with your hands.  I use a small ice cream scoop, or you could use a large melon ball tool if you have one.  Scoop up equal amounts of meat mixture, enough to roll into 1½” balls.  Place closely together on two baking sheets.  I get 48 meatballs out of this recipe.   Place pans of meatballs in a 350º oven and bake uncovered for about 25-30 minutes.  Check one for doneness.  They should be grey and not pink in the center.  Remove from oven and cool unless using some immediately.  These will exude a lot of beef juice during cooking.  When removing meatballs from the pan, if you twist them as you lift, they will come up without that congealed juice attaching to the meatball.  I scrape all that good solid juice stuff off the pans for my two little rat terriers to have as gravy on their next meal.  🙂  They love me.  🙂

I set aside 10-12 for immediate use and snacks and then freeze the rest on a clean, dry baking sheet so they will freeze individually. Then I pour them all into a gallon ziploc bag and put the rest in my freezer.  For snacks and future use, just defrost the ones you need!

NUTRITIONAL INFO:  Makes 48 meatballs approximately 1¼” in diameter.  Each meatball contains:

88 calories

5.9 g  fat

.44 g  carbs, .12 g  fiber, .12 g  NET CARBS

7.91 g  protein

139 mg sodium

34% RDA Vitamin B12, 7.8% B6, 11% iron, 11% niacin, 13% selenium, 23% zinc

Tuna Pâté Canapés

Click to enlarge

Click to enlarge

These are great for serving at parties or family gatherings.  They are Induction friendly and are very filling.  If you make the pâté and crackers ahead of the special event, these go together in minutes!  And they are often the hit of the party!  My recommendation:  MAKE A LOT!  Serve just as a snack, as finger food at your next big gathering, or with a nice green salad for a light but very satisfying lunch!

INGREDIENTS:

1 recipe Peggy’s Tuna Pâté:  https://buttoni.wordpress.com/2011/06/23/peggys-tuna-pate/

24 Flax Parmesan Crackers:  https://buttoni.wordpress.com/2011/06/27/flax-parmesan-crackers/

12 medium pitted black olives

24 bits of sun-dried tomato chopped small (about 1 T.)

DIRECTIONS:  Spread 2 tsp.  of the tuna pâté on each flax cracker.  Cut the olives in half crosswise and place one half, cut side up, in the center of the tuna on each cracker.  Place a tiny bit of the sun-dried tomato in the olive hole.   Serve as soon as possible to insure the crackers stay nice and crisp.

NUTRITIONAL INFO:  Makes 24, each contains:

68.7 calories

5.65 g  fat

1.16 g  carbs, .59 g  fiber, .67 g NET CARBS

2.96 g  protein

83.9 mg sodium

16 mg potassium

30.38 % RDA phosphorous, 11% selenium, 8% niacin and 15% vitamin B12

Chicken Pesto Sun-Dried Tomato Pizza

This was inspired by a recipe I read on the net for a pasta dish made with pesto and sun-dried tomatoes.  Thought that mixture might make a good pizza and IT DID!  The chicken I added just made it even better! In future, would prefer to use Josephs Flax and Oat Bran Pitas for the crust for this.  It only has 4 net carbs per loaf.  But I don’t have those on hand, so I substituted a slice of Peggy’s Low Carb Bread, sliced thinly (in the photo).  Worked fine and you COULD pick it up and eat it with your hands.  But I know this would be better on the Joseph’s, which has some flour product in it, so that would make this not acceptable until the grains rung of OWL.  Using my low-carb flax bread at the above link, you folks on Induction could have this. But be aware it only lowers the serving net carbs by about 2.5 net carbs.   Please bear in mind, if you serve this with a nice green salad, one pizza would likely serve TWO people and not just one.  That would be a great way to cut the net carb count on this meal.  Another way to cut the net carb count by 2 NC would be to take a knife and open up the pita bread into its two parts and only use ½ the loaf for your pizza.  If you do that, be sure to bake long enough to crisp it up or you won’t be able to pick it up and eat it with your hands.

VARIATION:  Substitute 6 oz. cooked, crumbled Italian Sausage for the chicken.  

INGREDIENTS:

2 loaves Joseph’s Flax & Oat Bran Pitas

1 T. olive oil

3 oz. onion, chopped

6 oz. chicken breast, skinless, slivered in very small pieces

2 T. sun-dried tomatoes (the kind in a jar packed in olive oil), chopped

2 T. my pesto sauce (or use commercial pesto sauce)

Pinch oregano

4 oz. mozzarella cheese, grated

4 T. Parmesan cheese, grated

DIRECTIONS:   Preheat oven to 350º.  Heat olive oil in non-stick skillet.  Saute onion until tender.  Add chicken and saute until completely done.  Remove from heat.  Add pesto, sun-dried tomatoes and oregano.  Stir well.  Place “crusts” on a no-stick baking sheet.  Sprinkle 1 oz. of the mozzarella on each pizza.  Evenly spread the chicken mixture on top.  Sprinkle the remaining mozzarella over the chicken mixture and top with an even distribution of the grated Parmesan.  Pop into a 350º oven for about 15-20 minutes to melt cheese and blend flavors.  Serve at once.

NUTRITIONAL INFO:  Makes 2 individual pizzas, each contains:

653 cals, 44.3 g fat, 19.1 g carbs, 4.8 g fiber, 14.3g  NET CARBS (less if you use a homemade low carb bread, divide the pitas into thinner slices), 50.6 g protein, 1185 mg sodium (mostly from cheese)


Steak Nachos

Steak Nachos

Steak Nachos

This is a tasty way to use up leftover charcoaled steak.  I just discovered you really don’t need corn chips for a good nacho!  Steak works just fine and this is reminiscent of the fajita nachos the Mexican restaurants serve!  This recipe is not suitable until the legumes rung of OWL unless you omit the beans.  You can use mashed Eden brand black soy beans (instead of the refried beans) for a lower carb count on these.  If you like and use fewer refried beans on each, the carb count will go down as well.

INGREDIENTS:

8 oz. leftover charcoaled ribeye or lean steak of your choice

1 c. (approx.) canned refried pinto beans (mashed black soy beans for lower carbs)

4 oz. Monterey Jack cheese, cut into 16 cubes or small slices

32 cilantro leaves

1 very large jalapeno pepper, (seeded, or not if you prefer), cut into ½-1″ pieces

DIRECTIONS:   Cut steak laterally so it’s about 1/4″ thick.  Then cut those into 8 pieces about 1-1½” in size (each will weigh about ½ oz.). Place cut side of meat down on greased baking pan .  Top each piece with about 1 T. refried beans.  Next place two leaves of cilantro on each.  Then put a cube/slice of cheese on each one.  Top with a piece of jalapeno.   Broil until cheese is melted. Serve warm.

NUTRITIONAL INFO:  Makes 16, each containing:

67 calories

5.62 g  fat

2.83 g  carbs, .91 g fiber, 1.92 g NET CARBS (less if you use mashed soy black beans)

6.88 g protein

53.3 mg sodium


Cranberry Trail Mix


Click to enlarge

Cranberry Trail Mix

I absolutely love this stuff!  It’s like having fruitcake but without all the cake!  🙂     This makes a lovely gift when going to parties or for the holidays.  Just place in a pretty clear glass container and affix a pretty bow on top!  The batch pictured had both roasted and unroasted pumpkin seeds in it, as I had a few unroasted I wanted to use.   Sorry, this treat is not for Induction.

More delicious low-carb recipes can be at your fingertips with your very own set of Jennifer Eloff and friends’ best-selling cookbooks LOW CARBING AMONG FRIENDS. She has collaborated with famous low-carb Chef George Stella and several other talented cooks to bring you a wealth of delicious recipes you are going to want to try. Even a few of my recipes are in each of the 5 volumes! Order your set TODAY! (also available individually) from Amazon or their direct order site.

DISCLAIMER: By personal choice, I do not receive money for this book promotion nor for the inclusion of my recipes therein. I do so merely because they are GREAT cookbooks any low-carb cook would be proud to add to their cookbook collection.

INGREDIENTS:

5 oz. pumpkin seeds, hulled and roasted (I use salted 😦 as I can’t find unsalted)

5 oz. sunflower seeds, roasted (I prefer unsalted)

2 oz. walnuts (about 28 halves), coarsely chopped/broken up

6 oz. fresh coconut meat, slivered thinly

4 oz. sliced almonds

6 oz. (½ bag) fresh cranberries, oven dried per this recipe   http://lowcarbdiets.about.com/od/snacks/r/driedcran.htm

DIRECTIONS: Preheat oven to 200º and spread thinly sliced coconut onto a sheet pan. Dry for about 1½-2 hours, stirring occasionally.  Remove from oven before coconut begins to brown!  You don’t really want to toast it for this recipe.  Remove from oven and cool completely.

Using liquid sweetener for the granular, follow the recipe for making dried cranberries (homemade craisins) as written.  I found this process takes right at 8 hours, so doing this overnight is good.  To save effort in future, you might want to go ahead and dry the entire bag of cranberries while you’re at it.  That way you can bag up and reserve the remaining 6 oz. for future use.  Remove fully dried  cranberries from oven and cool.  Toss all cooled recipe ingredients together in a large bowl and mix well.

NUTRITIONAL INFO: Makes about 6 cups, or twelve ½ c. servings.  Each ½ c. serving has:

273 calories

23.7 g  fat

10.7 g  carbs, 5.1 g  fiber, 5.6 g NET CARBS

9.5 g  protein

71.6 mg sodium


Crustless Skillet Pizza

Click to enlarge

This delicious recipe got me through Atkins Induction whenever I craved a bit of pizza.   I’ve tried so many of the popular low-carb pizza crust recipes and just don’t like all that cheese, the heaviness,  and particularly I don’t like all the salt that is inherent in cheese crusts.  Not fond of the cauliflower crust recipes, because for me, leftovers get a strong taste of cauliflower on day 2.  I find all the low-carb recipes just too “heavy” and greasy.  Even this amount of sausage and cheese packs a whopping amount of sodium, as seen in the nutritional stats below!  But hey, when you’re still on Induction and craving pizza, this’ll do just fine for me.  It can be ready in 10-15 minutes!  And I don’t end up with “sausage fingers” and swollen ankles the next day from water retention due to sodium.  It is my sodium sensitivity that makes me leave off pepperoni from my pizzas.  Jusst adjust the ingredients for more servings.

Now this “pizza” isn’t one you can pick up and eat with your hands.  Even as it cools a bit and the cheese firms up, you’ll still have to eat with a fork.  So I don’t do this recipe for company.  🙂  But I find not being able to pick it up and eat by hand doesn’t bother me one bit.  This tastes just like the best sausage, mushroom, bell pepper pizza I ever had in any Italian restaurant or pizza parlor!  You may prefer to use all sausage or all beef, your call, but nutritional info is for the recipe as written.  If watching your sodium intake on doctor’s orders, using all ground beef and also lowering the cheese to 2 oz. would be wise choices.

More delicious low-carb recipes can be at your fingertips with your very own set of Jennifer Eloff and friends’ best-selling cookbooks LOW CARBING AMONG FRIENDS.  She has collaborated with famous low-carb Chef George Stella and several other talented chefs to bring you a wealth of delicious recipes you are going to want to try.  Order your set TODAY! Special pricing going on right now, too!  Books are always available individually or as a set from Amazon or: http://amongfriends.us/order.php

INGREDIENTS:

001

Ready to dig in!

2 oz. pork sausage (breakfast or Italian)

1 oz. ground beef (or more pork sausage)

¼ tsp. fennel seed

Dash oregano

Sprinkle of garlic and onion powder

1/3 can drained, canned mushrooms (or 2 fresh, sliced)

2 oz. bell pepper

3 T. low carb spaghetti sauce (I use Bello Vita)

2 oz. grated mozzarella cheese

DIRECTIONS: Brown meat in no-stick skillet on medium heat.  Add veggies and continue to cook until pretty tender, about 5 minutes.  Add spices and stir.  Using spoon or spatula, neatly push ingredients away from the edges of the skillet as shown in picture.  Dot the surface with the tomato sauce but no need to stir.  Top with the cheese, trying to keep it pretty much on the ingredients.  Cover and lower heat to lowest setting and heat long enough to melt cheese.   Should be ready in just a few minutes.  Allow to cool a couple minutes so cheese will firm up a tad before attempting to “slice” into two slices.  Using a broad spatula, slide a portion out of the skillet onto the serving plate (or toasted French bread, for non-Atkins eaters). Enjoy!

NUTRITIONAL INFO: Serves 1 and contains:

531 cals, 39.3g fat, 11.2g carbs, 2.9g fiber, 8.1g NET CARBS, 34 g  protein, 1312 mg sodium

Greek Olive Tapenade

Greek Olive Tapenade

This is my take on the olive spread often served with the bread and salad course at Greek Restaurants.  We just love this stuff and it disappears sooooo fast at my house.   I am absolutely in love with spreadding it on my Almond-Flax Crackers or my Almond-Arrowroot Crackers for a delicious snack.  Just made a fresh batch this afternoon!  🙂  Other ways to use this tasty spread:   stuffed inside slit chicken breasts before baking along with a dab of Boursin or cream cheese, spread on top of broiled fish filets when serving, atop tomato slices for a unique salad, or with a little more oil and balsamic vinegar, it’s great as a Greek salad dressing!  This recipe is Induction friendly and the flavor is totally addictive if you like kalamata olives.  

INGREDIENTS:

6 oz. pitted black olives (I use a mixture of canned black olives & kalamata olives)

1 small clove minced garlic

¼ c. olive oil

2 T. chopped parsley

DIRECTIONS:  Pulse all ingredients in a food processor until uniformly coarse texture, smooth but not reduced to a paste.  You want it very finely chopped.  You can pulse in a blender if you do not have a food processor.  Serve with your favorite low-carb crackers or Greek bread (for those not on Atkins).

NUTRITIONAL INFO: Makes about 3/4 cup or serves 6, each 2 T. serving contains:

111.5 cals, 11.7g fat, 2.2g carbs, 1g fiber, 1.2g NET CARBS, 0.4g protein, 200 mg sodium

Eggplant Focaccia


Eggplant Focaccia

Eggplant Focaccia

This is a fairly easy dish to throw together and is quite tasty.  Any leftovers can be reincarnated the next day by adding some browned Italian sausage and mushrooms or some super thin slices of green pepper and seeded tomato.  My husband is a hearty eater and had 3 slices.  It took only 2 to satisfy me.  Not suitable until Atkins Phase 2 OWL unless you use a different, Induction-friendly bread instead of the bread mentioned below.  I added 2 sausage patties to the focaccia pictured above, because that’s what I had cooked, leftover in the fridge.  Next time I’ll use 4 patties.  If you add sausage, be sure to add that to the nutritional info shown below.

More delicious low-carb recipes can be at your fingertips with your very own set of Jennifer Eloff and friends’ best-selling cookbooks LOW CARBING AMONG FRIENDS.  She has collaborated with famous low-carb Chef George Stella and several other talented chefs to bring you a wealth of delicious recipes you are going to want to try.  Even a few of my recipes are in her cookbooks! Order your 5-volume set TODAY! (available individually) from Amazon or: http://amongfriends.us/order.php

DISCLAIMER: I do not get paid for this book promotion or for the inclusion of my recipes therein.  I do so merely because they are GREAT cookbooks any low-carb cook would be proud to add to their cookbook collection

INGREDIENTS:

1 batch of Artisan Flat Bread  (use Jen Eloff’s Gluten-Free mix in this bread for gluten-free version)

8 oz. unpeeled, eggplant (sliced thin, about 1/8″-¼” thick)

2 T. extra virgin olive oil

1 T. chopped fresh rosemary

¼ tsp. crushed dried oregano

Pinch each onion powder and garlic powder

3 oz. Havarti, Emmentaler, Swiss or Jack cheese, grated

1 oz. Parmesan cheese for final topping

DIRECTIONS:

Slice eggplant and spread onto paper towels and lightly salt.  Let sit 10 minutes and pat the water off tops.  Repeat for other side of eggplant.

Preheat oven to 350º.  While eggplant is “bleeding” out its water, make the Artisan Flat Bread per recipe instructions.  I always use mozzarella cheese where the recipe says Italian blend cheese. Spread batter onto parchment-lined 13×15 pan.  You can spread batter all the way to the edges and make the sheet rectangular, or make it oval like I did in the picture below.   Sprinkle rosemary, oregano and onion and garlic powder on top.  Now evenly spread half the grated cheese onto the batter.  If adding sausage, do it now.  Arrange eggplant slices in 1-2 slightly overlapping layers evenly on top.  Sprinkle with remaining grated cheese.   Finally, top with the Parmesan. Drizzle with the olive oil and bake for 30 minutes at 350º or until eggplant is done.  Remove from oven and slice into 12 pieces.  Serve immediately.  This is nice with a green or tomato salad.  Easiest eaten with your hands like pizza.

NUTRITIONAL INFO:  Makes 12 servings.  Excluding any added sausage, each serving contains:

238.5 calories

19.7 g  fat

4.76 g  carbs

2.34 g  fiber

14.1 g  protein

2.42 g  NET CARBS