Iraqi Grilled Cornish Hens

Up until now, I have only used my Baharat spice in braised chicken dishes (cooked in liquid): braised beef and braised lamb.  When I created this recipe, I tried it both grilled and baked in the oven.  I was most pleased with both methods of preparation actually.  Very tasty both ways!  In Iraq, they would likely use whole, cut-up chicken pieces as I don’t think Cornish hens are available there.  I especially like to use Cornish hens for serving company, if I can get them,  simply for the cute visual impact on the plate.  The meat doesn’t taste one bit different than larger chicken.  This recipe would be very for preparing quail, dove or other wild game fowl as well.  

I allow a half a bird per person when buying your Cornish hens but make sure there is one half bird extra for a bigger eater.  Most women and men will only eat ½ Cornish hen when two sides are served.  I have seen a man with a hefty appetite eat a whole hen on one occasion.  I have only done so once in my life, but it was a particularly small hen.   If I fix 2 sides, ½ Cornish hen fills me right up.  This recipe is suitable for all phases of Atkins, Keto diets, Primal and Paleo as well.

INGREDIENTS:

2    1-1¼ pound Cornish hens (or appropriate # pieces cut up chicken for 4 people)

4 T. unsalted butter  (use less if you need to cut calories)

1 tsp. my homemade Baharat Spice Blend

½ tsp. Aleppo pepper  (or dried, ground ancho chile pepper)

1/4 tsp. onion powder

Optional:  1/2 tsp. sumac (if available)

DIRECTIONS:  Preheat oven to 350º.  Melt the butter in a saucer in the microwave.  Stir in the spices to mix well.  Split the hens in half up the back bone with a knife or kitchen shears.  This technique is referred to as spatchcocking or butterflying the bird.   If grilling, prepare the fire.  When it is hot, place the pieces evenly (or butterflied Cornish Hens cut side down) on the grill.  If baking them, place on a grate set inside a baking pan to catch juices. 

Using a brush, baste the hens well with the spice-butter mixture.  If baking, pop pan into 350º oven and bake for 45 minutes.  If grilling, turn once midway through cooking. Cook to internal temperature of 165º in the breast.  Turn up oven to 375º and continue to roast for about 15 more minutes to brown the skin.   Watch them closely this last 15 minutes, as ovens can vary.  When a meat thermometer poked in the center of the breast meat reads 165º they are properly cooked.  Remove from oven or grill and serve half a Cornish Hen to each person at the table to start off.   Only the hardiest of eaters will eat more, most likely.     

Traditionally, this meat is grilled.  Try it that way first as it is truly memorable grilled!  But also try it just baked in your oven sometime so you can see the difference.  This meat pairs nicely with any side dishes you like, but particularly nice with my Shawarma Roasted Vegetables.  I also like to enjoy it with my Iranian Mint Cucumber Salad.

NUTRITIONAL INFO:   Makes 4 servings (I allow ½ hen per person), each contains:

501 cals, 39.3 g fat, 0.62 g carbs, 2.50 g fiber, 2.12 g NET CARBS, 34.1 g protein, 347 mg sodium

Advertisement

Mushroom-Spinach Chicken Breasts

This dish is lip-smacking delicious!  The hemp hearts add a slight nutty taste.  We both gave this creative dish two thumbs up!  It was simple to put together, in the oven in 15 minutes and baked itself effortlessly to delicious perfection!  This will definitely make my regular chicken recipe rotations again!  It had, as you can see in the photo, lovely pan juices for basting during cooking and last minute drizzling over the meat when done.  This recipe is suitable for Phase 2 of Atkins once you have reached the grains level of the carb re-introduction ladder (it has Joseph’s pita bread in it).  You could use flax meal instead of the Joseph’s bread and enjoy this recipe once you reach the the nuts & seeds level of Phase 2, but it will have a grainier taste with that change.  This recipe is not suitable for Atkins Induction or Primal-Paleo followers.

Many delicious low-carb recipes like this one can be at your fingertips with your very own set of cookbooks from LOW CARBING AMONG FRIENDS, by Jennifer Eloff and her low-carb friends (including me).  Famous Chef George Stella also brings to these cookbooks a wealth of his personal recipes you will want to try!  Order yours from Amazon or the direct order site: http://amongfriends.us/order.php. 

INGREDIENTS:

2  medium chicken breasts, skin on, boneless (boil bones for delicious stock for soups!)

2 T. unsalted butter

4 large mushrooms, chopped or sliced

2 c. spinach, chopped (1 c. packed)

2 T. Boursin soft cheese, ‘garlic and fine herb’

3 T. shredded Monterrey Jack

1/2 Joseph’s Flax and Oat Bran Pita Bread, softened with water (or 1 low-carb flour tortilla)

2 T. hemp hearts

Dash coarse black pepper

DIRECTIONS:   Preheat oven to 350º.  Run a sharp knife between the rib bones and the chicken meat to remove the rib bones from the breast.  Boil them down for delicious chicken stock for future uses.  I freeze mine.   With a large knife, laterally slice the breast 3/4 of the way through making a pocket or shelf for the filling.  Place them in a lightly oiled baking dish and set aside.   In a non-stick skillet, heat the butter and sauté the mushrooms until no longer opaque.  Add the spinach and sauté just until it is limp.  Stir in the Boursin and Jack cheese.  Turn off heat.  Add the hemp hearts and stir filling well to blend the cheese.  With your fingers, mush up the softened bread and add it, stirring again.  Spoon half the mixture into each breast and fold the skin half over the filling.  Press lightly and sprinkle with pepper.  Pop the pan into a 350º oven and bake for about 1 hour (less time for small breasts, more for large ones).  When the skin has browned nicely on top, they should be done.   Serve in the baking dish pan so the pan juices can be dipped over the top if desired. 🙂

NUTRITIONAL INFO:   Makes 2 servings, each contains:  (adjust ingredients for more servings)

478 calories, 33 g fat, 5.90 g carbs, 2.85 g fiber, 3.05 g NET CARBS, 39.35 g protein, 645 mg sodium

Air Fryer Whole Roasted Chicken

I finally got around to trying a whole, roasted chicken in my Power XL 7 qt. air fryer and we loved the results.   Haven’t tried it  on the Air Fryer setting on my new wall oven though.  I’m sure it will cook as well in the oven.  Must try that soon.   

The meat of the nearly 5# bird came out moist and cooked perfectly (even at the difficult hip joint).  My husband just loves chicken that is baked or roasted, so he was a fan for certain!  Also tried out my new Peggy’s Poultry Rub on it and that was a delicious choice!  I may add even more of the rub next time!  Yummy!  This recipe is suitable for all phases of Atkins and other keto diets, as well as for Paleo-Primal folks.

INGREDIENTS:

1 whole chicken (mine was 4.75 lbs)

1 t. olive oil

1 T. Peggy’s Poultry Rub (or seasoning of your choice)

DIRECTIONS:  Pat the chicken dry of any water/moisture with paper towels.  Rub olive oil all over the chicken getting all skin surfaces damp with oil.  You’ll want to wash and dry off your hands at this point.  Next sprinkle 1 tsp. of the seasoning bland over the top surfaces of the chicken.  Sprinkle 1 tsp. over the bottom surfaces of the chicken.  Invert chicken to expose the carcass opening and sprinkle the remaining spice blend as best you can inside, rubbing until it is distributed.  Although I did not do it this, next time I may make a slit into the lower leg quarter joints and rub a tad in that joint as well as a tad underneath the breast skin as I am able.

Preheat your air-fryer at 350º a few minutes (mine requires 4 min. preheat).  Open basket/drawer and place seasoned bird into the basket/drawer breast side down. Cook the bird for 30 minutes.  Then open drawer and using a heavy kitchen fork, turn the bird over, now breast up.  Cook for 20 minutes and open basket to (check leg quarter with a meat thermometer (165º internal is done).  Also check thickest part of breast.  If not to 165º yet, continue cooking another 5-10 minutes and check again.  My 4.75# bird took precisely 25 minutes on side two.  Cookers vary, so the rule of thumb with air fryers is CHECK YOUR FOOD OFTEN to avoid under cooking, or worse, over cooking and major disappointment.   Always remember that any air-fryer recipe is just a guideline and nothing more.  Cookers vary for any recipe cookbook for them to be always spot on……….even the manufacturer’s cookbook!  Food size and volume/weight impact any instructions and cooking times/temps.

ADDED NOTE:  I recommend soaking your basket in 1″ water while you enjoy your meal (for easier cleanup).  Also don’t forget when fully cooled, to wipe off (use a soapy sponge) the element at the top and back walls of cooker to get any grease splatters there.  If you don’t do that, the cooker is likely to smoke heavily at next use and you’ll think the machine is dying on you.  It just wasn’t thoroughly cleaned after roasting meat.

NUTRITIONAL INFO:  I can’t really provide that for you as I can’t know what pieces you eat, how large your bird is, nor how many pieces you will eat.  I certainly can’t know how much of the seasoning you will be ingesting on any particular piece.  Best calculation I can recommend for you is to take the stats for the piece/size of piece(s) of chicken you eat and add 1/8 tsp. of the spice blend for each piece you consume.  That said, this recipe is so low-carb…………I wouldn’t bother calculating anything but the meat itself that you consume.  One can get too anal about any diet in my opinion.  Just enjoy this delicious recipe and know that you are not breaking the carb bank doing so!

1 tsp. spice blend = 0.84g NET CARBS

Spinach Parmesan Bake

This has been a very popular side dish on my recipe blog.  Once you taste it, you’ll see why.  Facebook shares were amazing on this recipe.  This dish is simple to make and I’m very please with the resulting flavor profile.  The concept came to me one night when I thought about making a spinach soufflé, but wanted something a little denser and cheesier. 

This pairs nicely with roast pork and was delicious with our rosemary-onion pork steaks the night I created it.  I did put 3 large sliced mushrooms in this, but they added absolutely nothing to the flavor impact.  I won’t bother to include them again and I’m not including those in my recipe here.  This dish is Atkins  Induction suitable.  

INGREDIENTS:

2 T. olive oil

2 oz. onion, chopped

Dash salt

10 oz. box frozen spinach, thawed and drained

2 oz. cream cheese

2 oz. heavy cream

1/3 c. homemade mayonnaise

2 large eggs

3/4 c. grated Parmesan cheese

With Chicken Added for a meal!

VARIATION:   Add 2 c. chopped raw, boneless chicken meat to the skillet with the onion and turn this side dish into a delicious meal.

DIRECTIONS:  Preheat oven to 350º.  Heat olive oil in non-stick skillet over med-high heat.  Add onion and salt and sauté the onion until tender.  Add the drained spinach and cook a few minutes, stirring several times.  Lower heat to medium.  Cut the cream cheese into little chunks and melt and stir it into the warm spinach.  Add mayonnaise and stir well.  Turn off heat.  Beat the eggs in a bowl with the cream and pour it evenly over the top of the spinach.  Top with Parmesan and bake for 20-25 minutes at 350º.

NUTRITIONAL INFO:  Makes 4 servings, each contains:

420 calories, 38 g  fat, 6.78 g  carbs, 2.75 g  fiber, 4.03 NET CARBS, 15.28 g  protein, 622 mg sodium

Chicken Waldorf Salad

Once Atkins followers get to the OWL (Ongoing Weight Loss) carb re-introduction ladder, they can occasionally have a bit of fruit.  I only allow myself to indulge a couple times a month, but it sure is nice.  Sometimes we like to have salads as our main course, and my favorite is a good Waldorf Salad.  

If you use mostly (or all) peeled jicama for the apple in a classic Waldorf Salad, the carbs will be less.  But quite honestly, a little real apple greatly helps in taste.  The nutritional stats below reflect the apple as stated in the recipe.  As a result, this dish isn’t Induction friendly, but it isn’t half bad with just jicama, if you want to try it that way until you graduate out of the Induction Phase.  🙂

INGREDIENTS:

1        13 oz. can chicken meat (water pack only), well-drained and flaked apart

1        red apple, UNpeeled and diced

3/4 c. walnuts, coarsely chopped

1 c.      diced celery

¼ c.   homemade mayo

DIRECTIONS: Mix all ingredients in a mixing bowl with a spoon and serve in a pretty serving dish (over lettuce if you like).

NUTRITIONAL INFO: Makes 3 servings, each contains:

551 cals, 44.9g fat, 11.9g carbs, 3.6g fiber, 8.3g NET CARBS, 31.6g protein, 152 mg sodium

Chicken Pot Pie

chickenpotpie

Baked meat pies were a tradition in England, our Pilgrim ancestors continued baking various types of meat pies after surviving the brutal, long journey across the Atlantic.  Meat baked into pastries have been around ever since.  You can recreate a very popular American comfort food in a low-carb version with this recipe!

This one will amaze you!  I’ve made it numerous times now and it’s consistently reminiscent of my mother’s homemade pot pies and even the little convenience one-crust frozen pies we often had when my parents were eating out (us not included) at someone else’s house.   My brother and I loved them!  The crust is fantastic on this meat pie.  Added note:  this crust is also good for sweet applications like empanadas with fruit or traditional sweet potato fillings.  Makes a great pie crust, too!

This recipe is not suitable for Induction and should not be eaten until the grains rung of the Phase 2 OWL carb re-introduction ladder.  Substituting daikon white radish for the rutabaga will cut the carbs a bit on this dish.  You can also substitute a half recipe of my homemade low-carb Condensed Cream of Chicken Soup in place of the broth, cream and xanthan gum listed if you prefer to make that before starting your pies.

VARIATIONS:  Instead of chicken, use turkey or 6 oz. pouch tuna for a change of pace.   All are good!

CRUST:

2/3 c. CarbQuik bake mix (use Jennifer Eloff’s Gluten-Free Bake Mix for gluten-free)

1/3 c. golden flax meal

1/3 c. oat fiber (or 1/3 c. more Jennifer’s mix)

Pinch salt

2 T. cold butter

1 egg

3 T. cream

FILLING:

12 oz. cooked chicken meat, chopped

6 oz. rutabaga, diced (use daikon radish or turnips for lower carbs)

3 oz. carrot, diced

1 oz. chopped leeks (or 1 green onion)

3 oz. frozen green peas (use chopped green beans for lower carbs)

1 c. cream

1½ c. homemade or low sodium chicken broth

1/2 tsp. xanthan gum

1-3 drops yellow food coloring (optional)

pinch salt and black pepper

DIRECTIONS: Preheat oven to 350º. In a small saucepan, boil diced rutabaga, carrot, leeks and peas (beans) in water until just tender.  Drain and pour into large bowl and set aside.  In another bowl, mix all dry crust ingredients together.  Using a pastry cutter or fork, cut in cold butter until the mixture resembles coarse cornmeal.  Add beaten egg and cream and mix well.  Using hand, knead into a ball of dough and place on plastic wrap.  Place another piece of plastic on top and with a rolling pin, roll dough to slightly larger than the size of pan you are using.  I use an 8″ square Pyrex glass dish that is greased with butter. Let rolled dough set while you mix the filling.

Placed chopped chicken meat into the large bowl where you placed the veggies. Stir in chicken broth, cream, xanthan gum,  food coloring, and salt and pepper.  Pour filling into butter-greased pan.  Now pull the top plastic off the rolled crust.  Grabbing the bottom plastic, pick up the crust at the midpoint (plastic and all), let it fold gently in the middle and place the fold at the pan midpoint.  Gently lift the other half of the dough over onto the pie and remove the plastic wrap slowly & carefully so dough doesn’t tear.  Finish by folding the excess crust edges inside the pan rim and crimp decoratively if you wish.  Poke 3-4 holes in the top of the crust with a fork and bake in a 350º oven for about 35 minutes or until crust is nicely browned.

NUTRITIONAL INFO: Makes 4 servings, each contains:

442 cals, 28.2g fat, 30.2g carbs, 19.55g fiber, 10.65g NET CARBS (less if using green beans), 36g protein, 510 mg sodium

Roasted Turkey

Roasted Turkey (done in a roaster oven)

Although not just a classic American food, turkey is uniquely a North American food.  They also enjoy turkey and dressing for Canada’s Thanksgiving Day celebration that occurs in October.  Turkey is just not seen in the rest of the world.  When I lived in Iran as a child, chicken,  pheasant or wild prairie chicken were all Mom could cook at Thanksgiving.

Although I usually bake my turkey in my regular oven, as it has a built-in meat thermometer probe, I also love cooking my holiday turkeys in my roaster oven.   I especially use this appliance during the holidays when I have company, as it gives me extra oven space for baking all those delicious sides.  🙂

Roaster ovens also do a great job on cakes, muffins, cookies, biscuits and other baked items just beautifully!  So if you’ve never used one, You might like to ask Santa for one this year.   They are getting so cheap, one can be had for sometimes as little as $29 during the holiday season sales.  I paid $60 for my first one in the 60’s, when $60 was worth a lot more than it is today!  I find a roaster oven to be the most useful and versatile small appliance in my kitchen after an electric mixer.  I can carry it out onto the patio to cook for hours in summer, eliminating excess kitchen heat, as well.  🙂

You go about cooking turkey in a roaster oven pretty much as you would in a regular oven.  The lid acts as a foil cover, but it get very hot at the top of the oven.  Important note:  be sure to buy a bird that will FIT in your roaster oven!  🙂  That lid needs to come all the way down to the oven base.  😉  I still cover my wing tips, drumstick knobs and breast meat with foil, as the bird sits so close to the lid where the oven is very hot.  Don’t want to dry out or overcook those areas.

Turkeys consistently come out delicious, exceedingly moist and tender done in a roaster oven.  I’m convinced they cook even BETTER than in my regular oven.  The skin doesn’t get quite as crispy, but crisp enough for me to be able to consistently to get that level of moist meat.

Turkey is suitable for all phases of Atkins, Keto, Primal and Paleo diets alike.  Here’s what a typical Thanksgiving Day feast looks like at my house.

INGREDIENTS:

1  12-13 lb. turkey, thawed (follow chart on wrapper for a larger bird)

4 T. melted butter

Dash each of salt and black pepper

some small pieces of foil

DIRECTIONS:   Preheat oven or roaster oven to 325º.  Open turkey wrapper and I  like to remove bird to a clean sink.  Remove the leg binding gadget.  Remove giblets and set aside for making your gravy.  I only use the neck meat for my gravy so I simmer it for an hour or so with chopped celery and onion.  I like the innards OK, but my husband does not, so the dog gets those goodies added to her kibble for a few days.    🙂

I like to rinse out the inside of the bird.  I then pat the exterior dry with paper towels.  Melt the butter in a small saucepan or in the microwave.   Sprinkle bird inside and out with salt and pepper.  Baste skin with butter all over on the outside and inside with a basting brush, using half the butter.  Place turkey, breast side up in a pan large enough to hold it.

I cook my dressing outside the bird as I like it to brown on top.  You can shove some into the bird cavity if you like that.  Alternately, you can place chunks of celery, onion and parsley inside cavity for flavor enhancement, but I do not, generally.  Your call there, but be sure to add those carbs below if you do and they are consumed. Cover wing tips, leg knuckles and breast meat only with foil so they will not overcook or burn.

Place pan with bird into the oven and cook for about 1 hour.  Lift oven lid just long enough to baste with any remaining butter.  Close oven and cook bird for 1 hour.  Check for doneness with a meat thermometer in the thickest part of the breast and around the thick hip joint (the hidden joint of the leg quarter) which is the slowest area to get done on a turkey.  You want the thermometer to read 170º.  Cook for another 30 minutes or so, checking with thermometer every 10-15 minutes now so as to not overcook/dry out the bird.

Remove pan from oven when thermometer has reached 170º internal temperature at the specified two areas. Set pan for bird to “rest” 10 minutes before attempting to carve.  This resting period will prevent tearing up the meat as it is sliced and will keep all the juices inside the meat instead of running out onto your cutting board.  You want those juices to STAY in the meat!  Lift bird onto a cutting board and slice for serving.  This turkey should be extremely moist.  Cooking this size bird for 2½-3 hours in a regular oven should also render a juicy turkey.

NUTRITIONAL INFO:   I can’t know what pieces or amount you will eat, so I’ll inform as follows:

4 oz. dark meat, skin eaten, contains:  250 calories, 13 g  fat, 0 carbs, 0 fiber, o net carbs, 31 g  protein and 269 mg sodium

4 oz. white meat, skin eaten, contains:  222 calories, 9.4 g  fat, 0 carbs, 0 fiber, 0 net carbs, 32.3 g   protein and 255 mg sodium

Southern Fried Chicken

Southern Fried Chicken

It doesn’t get much more American than fried chicken!  Some 4 years into my low-carb journey, my husband asked me “Can you make fried chicken low-carb?”  At first I said, I didn’t really think so because I can’t make it with real flour (key to the great flavor of fried chicken).   But not long after that, I decided I, too, wanted some fried chicken.  Decided to give it a try…….. What did I have to lose?   Haven’t been pleased with any of the low-carb fried chicken recipes I’ve found on the net that I’ve actually fried.  Decided I was going to have to put on my experimenting hat.  Although I hate standing over hot, popping grease, I will do so for fried chicken.

I wasn’t sure what to coat it with, but remembered reading a recipe somewhere on the web for a coating that used whey protein powder, so I decided that would be my foundation ingredient.  To that I added crushed pork rinds for crunch and a touch of oat fiber for a flour-y taste.  BINGO!  The resulting coating was the closest to my old high-carb flour coated chicken. I was astounded!  Although I didn’t make any cream gravy with the browned skillet bits, I tasted them and they would have made an excellent batch of gravy.  Had I made some mashed cauliflower, I sure would have made some cream gravy from the browned skillet bits.

I’m so pleased with this recipe we make it again and again!!  Great flavor!  Crispy!  Works in an air fryer, if sprayed with olive oil on the surface.  Until you try this one, you just won’t believe it tastes just like flour coated chicken!  A real keeper!!!  It’s great leftover, cold, too!!  Hubby said this was the best low-carb fried chicken I have cooked to date on my low-carb journey.  My heretofore popular Oven-Fried Chicken, although very good, is just not the same as classic skillet fried chicken, ya know what I mean?  Not like my Granny made, at least.  This new recipe IS like my Granny’s and Mom’s fried chicken!

As I can’t know how you cut up your chicken, or what size pieces you tend to eat, I can’t really provide nutritional stats for the entire final meat dish.  Instead, I am providing nutritional info for 1/10 of the coating, as it was just enough to coat 10 pieces of chicken: 2 legs, 2 thighs, 2 wings and 4 pieces of breast as I cut them into halves to speed cooking time.

INGREDIENTS:

3/4 c. plain whey protein

1 c. crushed pork rinds (about 2 oz.)

1 T. oat fiber (omit if on Induction or use certified oats ground into flour for gluten-free version)

1 tsp. my Seafood Spice blend (or other seasoning)

½ tsp. onion powder

½ c. Parmesan cheese

1/8 tsp. coarse black pepper

2 large eggs

¼ c. heavy cream

¼ c. water

½-3/4″ deep hot oil (I used palm shortening I order in winter on-line)

DIRECTIONS:  Measure out and mix all dry ingredients in a paper bag by shaking well.  In a large bowl, whisk the eggs, cream and water together.  Toss in the pieces of cut up chicken into the egg wash and turn several times to well coat each piece.   Pick each piece of meat out of the bowl and drop into the bag of seasoned “flour” and when you have 3 pieces in the bag, holding the top closed, shake the bag to coat the chicken.  Don’t put more than 3 pieces into the bag at a time or they will not coat well.

Heat 3/4″ deep oil over high heat.  Place the pieces closely together.  If you’re creative, you can get an entire chicken in a 14″ skillet.  Lower heat to medium-high so larger pieces don’t over-brown before done. Repeat the coating process with the remaining pieces of chicken.  I was only able to fry 8 pieces of chicken in my largest skillet at a time, so I saved the wings for last as I knew they would cook quite fast.  Brown the chicken well on one side disturbing as little as possible.  Turn pieces of chicken over carefully to brown the second side.   When brown and done (about 30 minutes) remove to paper toweling to drain.  Finish cooking the remaining pieces if you were unable to get them all in your skillet.   Serve at once with your favorite sides.  I served mine with steamed cauliflower I topped with cheese and chives.

NUTRITIONAL INFO:  Makes enough coating for 10 pieces of chicken.  Numbers are for the coating only.  Be sure to add in the info for the chicken piece(s) you eat!  1/10 batch of the coating contains:

113.4 cals, 7.26g fat, 1.72g carbs, 0.53g fiber, 1.19g NET CARBS, 12.8g protein, 209 mg sodium

Asian Turkey Tofu Soup

I made a delicious soup for lunch one day earlier in the month. My husband came across a 9.5# bird (a rarity) at the grocery store and bought it just because of its small size. The soup came out delicious. Small as my bird was, we still had a lot of meat leftover. This is one of the things I made with the leftover meat. As I was in the middle of our Indian food extravaganza here on the blog, I just photographed it and waited until we reached the Asian segment of our food travels to share this one with you. This soup was very light yet surprisingly quite filling.

We ate what we could for lunch that day (having seconds) and I froze the rest. This makes a big batch of soup! Should be good for about a month. Turkey fat can actually go rancid (even cooked) in your freezer. Been there myself once and had to throw out the meat. So I never keep cooked turkey frozen for long.

INGREDIENTS:

10 oz. turkey meat, chopped (with any meaty turkey bones you saved)

8 c. water

½ c. dried tiger lily flour, cut in halves

1½ c. bean sprouts

1 jalapeno, seeded & chopped

2 oz. red bell pepper, chopped

2 oz. green bell pepper, chopped

2 tsp. fish sauce (I use Thai Kitchen brand)

3 T. rice wine vinegar

1 T. Sriracha sauce

¼ tsp. coarse black pepper

2 T. my Hoisin sauce

3 T. low-sodium Kikkoman soy sauce

1½ c. bean sprouts, rinsed

5 oz. firm tofu, rinsed, cut into ½” bites

DIRECTIONS: Place turkey pieces (along with any carcass bones you probably saved) in large soup pot. Add water and bring to boil over high heat. Cook for an hour on low heat. A good cup or more of the liquid will evaporate during cooking.

Remove carcass to cutting board. Allow to cool a bit for handling and strip meat off bones, chopping up any large pieces. I got about 1½ c. meat off my leg bones, to which I added another cup of loose leftover meat. Add all chopped meat back to pot. Add all other ingredients above except the tofu. Simmer on low heat for maybe 8 minutes, just until bean sprouts are no longer opaque. Cut up tofu to ½”cubes. Add to the pot and stir. If not serving at once, turn fire off as you don’t want to overcook the vegetables. Freeze any leftovers.

NUTRITIONAL INFO: Makes about ten 1 cup servings, each contains:

89 cals, 3 g fat, 5g carbs, 1g fiber, 4g NET CARBS, 15g protein, 430 mg sodium

Moo Shu Pork

               Roll Under Construction

                   The filling

And now, as promised, my recipe you can try out my Hoisin sauce on.  We were  first introduced to Moo Shu Pork by a friend in Houston probably 40 years ago (Has it been that long?) by a friend who was married to a girl from China.  We fell in love with Moo Shu Pork at first bite!  There’s something about the unusual ingredients and the sweet, tangy bean/plum sauce that is a flavor marriage made in heaven.  As with any Chinese food, more time is spent in slicing/cutting up the ingredients than the actual cooking takes, but this dish is so worth the effort!

I line up paper plates by my stove and get each ingredient chopped and onto a plate, ready to add to the wok at the right moment.  I first soak the tiger lily buds, cloud ear and mushrooms in little bowls in hot water to rehydrate them while I’m cutting other items up.  I make the marinade in a bowl and set aside.  I next scramble the eggs, chopping them when cooked into smaller bits (but not too small).  I slice all the veggies last.  Then I’m ready to cook!

This recipe is slightly higher in carbs than most on my site and therefore it is not suitable until you are closer to goal weight, but this dish is a special treat to me and I don’t indulge in this one often.  The way I look at it, I consider any recipe below 10g net carbs per serving to be OK, considering that is ever so much lower than the average carb count for most Standard American Diet (SAD) entrées of my past.  🙂

NOTE:  Shitaake mushrooms, Cloud Ear Fungus (also called wood ear mushroom) and Tiger Lily Buds are essential to traditional Mu Shu Pork classic flavors.  If omitted, you are not eating Moo Shu Pork.  Asian groceries will all carry these items.  I have to order mine on-line.

MARINADE INGREDIENTS:

¼ c. mushroom soaking liquid

4 T. my homemade Hoisin Sauce

1 T. rice wine vinegar

1 T. fish sauce (I use Thai Kitchen brand) [or a good bottled oyster sauce]

1 tsp. toasted sesame oil

3 cloves garlic, minced

1 tsp. Sambal Oelek chili sauce

¼ tsp. xanthan gum or preferred thickener

FILLING INGREDIENTS:

2 large eggs, scrambled in 1 T. butter

8 oz. lean only pork loin, sliced thin

3 T. peanut or olive oil (or your preferred oil)

½ c. cabbage, sliced thin as in photo above

4 large dried shitake mushrooms, soaked

3 large green onions, cut 3/4″ pieces

1 c. fresh bean sprouts

¼ c. canned bamboo shoots, julienne  sliced

½ c. dried Cloud Ear Fungus strips, soaked (if using whole, slice them)

½ cup dried Tiger Lily buds, cut in half, soaked

8 low-carb flour tortillas (I use ‘La Banderita’)

Hoisin sauce to “dress” each roll before rolling/eating

VARIATION:  Use slivered chicken in lieu of pork for a Moo Shu Chicken version

DIRECTIONS:  In 3 small bowls, soak mushrooms, Tiger Lily Buds and Clour Ear in very hot water until soft.  You want to save the mushroom liquid and just lift them out of that “stock”.  Cut out the tough mushroom stems and slice the mushroom flesh.  Place on paper towels to dry off for now.  Discard water off the Cloud Ear Fungus.  If using whole ones, chop or slice and paper towel dry.  If using pre-cut strips just set them on paper towel to dry.  Discard water off the Tiger Lily Buds and chop them in half.  Dry on paper towels.  Set these 3 ingredients near the stove.

Mix all marinade ingredients in the small bowl.  Add ¼ c. of the mushroom soaking water.  When well-mixed, pour half the marinade into medium bowl and add the sliced meat.  Toss the meat with your hands to coat meat well and let it marinade while you continue your prepping.  Remaining marinade will be added to the wok at the end of cooking.

Scramble the eggs over medium in the butter until set.  Remove from heat and chop into medium bits (but not too fine).  Set those aside by stove so they are at-the-ready.

Now you’re ready to cook.  Heat a dry wok or large skillet.  Chinese cooks have a saying:  “Hot Wok; Cold Fat.”  If you do it this way, the meat does not stick to the pan.  If you heat the oil as you heat the wok,  the meat almost invariably sticks to the pan!  When the steel is VERY HOT, quickly dump in the oil and promptly the meat into the cold oil.  Don’t worry, the oil will get hot quick when it hits the hot metal.  Stir-fry with spoon until meat is no longer pink.  Add in cabbage and Cloud Ear Fungus next.  Stir-fry until they just barely begin to go limp.  Next add the bean sprouts & scallions and cook those just 1 minute.  Add the mushrooms, bamboo shoot slivers and Tiger Lily Buds next, cooking the mixture 2-3 minutes.  Pour in the remaining marinade and stir well so all filling is now moistened.  Cook another minute or so for the thickener in the marinade to do its job.   Add the egg to the wok last, during the final minute of cooking. Turn off heat and stir once just to mix the egg in well.  Remove wok from heat.

Serve the filling at the table (I like to do it right in the wok so it stays warm) with low-carb tortillas and the hoisin sauce.  I haven’t gotten around to creating a Chinese-style pancake, but give me awhile and I may do that one day.  Place about ½-3/4 c. filling on the tortilla down the center.  Dab a little extra hoisin sauce down the filling edge (as shown above) and fold the bottom edge up like an envelope end (to catch juice as you eat).  Then fold the sides of the tortilla inward, first the left side, then the right side, much like you’d form a burrito.  Pick up and eat it with your hands, like a burrito.  Moo Shu Pork is traditionally eaten with hands and is actually rather messy/difficult to eat with a fork, to be quite honest.

NUTRITIONAL INFO:   Makes 8 servings, each contains:  (Includes tortilla but does not include hoisin sauce)

216 cals, 12.4g fat, 24.35g carbs, 13.72g fiber, 10.63g NET CARBS (plus hoisin consumed), 13.7g protein, 814mg sodium

Pepper & Bok Choy Chicken

chinese-chicken-with-peppers-bokchoyYesterday I shared my Pepper Steak recipe.  Today let’s do that classic with chicken and a little bok choy thrown in for color and flavor!  This colorful creation is simply yet delicious.  It is quite “light” in flavor yet satisfies my desire for Chinese stir-fry.  Once you have all the sauce ingredients handy and the veggies cut up, you can be eating this tasty meal in 15 minutes!  We ate it as is since rice isn’t allowed on a low-carb regimen, but you could serve this on a nice bed of steamed cauli-rice.  This recipe is suitable for all phases of Atkins, Keto diets, Primal-Paleo as well, provided you omit the xanthan gum or use a plan-suitable thickener.

INGREDIENTS:

1 large chicken breast, de-boned, skinned  & cut into small pieces (mine yielded 10 oz.) save skin and bones

3 T. coconut or light olive oil

3 oz. yellow or white onion, sliced in wedges

1 medium carrot, peeled and sliced thin

3 oz. red bell pepper, cut into small pieces

2 cups bok choy (1-2 stalks), sliced, keeping white & green parts separate

½ c. canned mushrooms, drained  (or 1 cup fresh, sliced)

¼ c. green onion tops, chopped ½”

2 cloves garlic, minced

2 tsp. minced ginger root

1 c. chicken broth  (from boiled bones/skin you saved)

2 T. low-sodium soy sauce

¼-½ tsp.  Sambal Oelek chili paste  (or ½ tsp. Sriracha sauce)

¼ tsp. xanthan gum or your favorite thickener

OPTIONAL:  Sprinkle on some sesame seeds.

DIRECTIONS:   Debone chicken breast, cutting meat into small pieces.  Set meat onto a paper plate.  In small saucepan, boil bones and skin for the needed broth.  Discard bones and skin.  Discard all but 1 cup of the broth.  Stir the soy sauce, Sambal Oelek, garlic, ginger root and xanthan gum into the broth and set aside while you cut up the veggies.

Cut up the carrots and onion and place in one paper plate.  Open and drain mushroom liquid into the bowl of broth (or slice up fresh mushrooms if using fresh). Place mushrooms on paper plate.  Tear apart bok choy leaves and place on mushroom paper plate.  Slice the white stems and place in a separate paper plate with the sliced green onions.  Line up these plants so they’re right by your stove.

Heat a wok empty over high heat a couple minutes.  Add the oil and chicken immediately before the oil fully heats up.  Old Chinese cook’s saying: “Hot Wok, Cold Fat”.  This method prevents meat from sticking to the pan. Stir-fry until chicken is no longer pink and just beginning to slightly brown.  Add the yellow onion and carrots.  Continue stir-frying until they just begin to soften a bit but are still quite firm.   Add red pepper and white bok choy stems next.  Stir fry until they are just slightly softened.  Add mushrooms, bok choy green leaves and green onion last, stirring a few times.    Lower heat to medium-high and now pour in the sauce you set aside.  Simmer just long enough for the bok choy to go limp, or about 2 minutes.  If using, add sesame seeds and stir one last time. Serve at once as is or on steamed cauli-rice.

NUTRITIONAL INFO:   Makes 4 large adult servings, each contains:

250 calories, 13.2 g fat, 9.30 g carbs, 2.92 g fiber, 6.38 g NET CARBS, 25 g protein, 712 mg sodium

Asian Cabbage Salad

001

When we lived in Galveston, we discovered a fun fast-food Chinese place near a favorite shopping center in Houston called General Joe’s Chopstix.  Their menu was varied, but their steamed dumplings and seared pot stickers were to-die-for and a real bargain!  They put just the right amount of jalapeno in them for me, too!  A year later, one of these places opened up right on the Seawall in Galveston.  We were ecstatic!!  One of their specialties we loved to order at lunch was a tasty light chicken salad made with napa cabbage and a most interesting dressing.  It had crisped rice noodles on top for a bit of crunch.  My husband was particularly fond of this salad.

Sadly, General Joe’s went out of business a number of years later (not sure why), so I had to create my own version of this delicious salad we just couldn’t get enough of.  I love this recipe in the summertime when we tend to eat light!  So easy to throw together and no heating up the kitchen.  When I have a little leftover cooked or grilled chicken, I like to add it to the top of this salad.  But this salad is actually delicious without any meat on top!  🙂 .  This tasty dish can be enjoyed by people on all phases of Atkins and Keto diets.  It is suitable for Primal-Paleo followers as well.

INGREDIENTS:

2 T. lime juice

2 T. rice wine vinegar

1 tsp. plum sauce or my homemade hoisin sauce

2T. + 2 tsp. sesame oil

¼ tsp. Sriracha sauce

3-4 drops liquid sweetener

3 T. low-sodium soy sauce

1 tsp. minced fresh ginger

6 c. shredded napa cabbage

1 c. chopped fresh cilantro

1 shredded carrot

½ large or 1 small fresh jalapeno, seeded, sliced thinly

OPTIONAL:  2 T. peanut butter added to dressing (not calculated in below).  Leftover cooked chicken chopped or sliced.  Adding ½ c. chicken adds about 150 calories, 9g fat, 18g protein to each serving.

DIRECTIONS:  Whisk first 7 ingredients together in a small bowl for the dressing.  Set aside.  Shred/slice napa cabbage and place in large bowl.  Add grated carrot, cilantro and julienned jalapeno.  Toss well and plate servings.  You can alternately plate directly in layers on each person’s plate if you prefer (what I did in the photo above).  If adding any meat, sprinkle in equal amounts on each serving.  Provide dressing in individual small cups for each person to add as they like.

NUTRITIONAL INFO: Makes 4 servings, each containing approximately:

95 calories, 3.6 g  fat, 2.9 g  protein, 13.5 g  carbs, 5.0 g  fiber, 8.5 g  NET CARBS, 350 mg sodium

Moroccan Chicken and Olives

I absolutely love olives but tend to think of them as a food eaten separately, or atop salads.  However every time I adventure out and put them into meat dishes I’m always amazed at what they bring to the final dish.  This was yet another example of a tasty surprise for me.  Since they have a lot of olive trees on the shores of the Mediterranean, they do tend to use them in a variety of ways.  

The Baharat spice blend I chose for this dish is also prevalent in this region.  So I put 2 and 2 together and voilà, a dish to remember!  If you haven’t tried it yet, I think you’ll like this spice on chicken.  I highly encourage you to give this blend a try sometime, even if not on this particular dish.    It was incredible on the chicken tonight and it’s great on baked or grilled fish.  The cinnamon and cloves come through the most, but the other spices in the blend have a subtle flavor presence as well.  The spice here is the key flavor ingredient here so I would not encourage substitutions or you will be creating a totally different dish.   This meal is suitable for Atkins Induction, Keto diets, and Primal-Paleo lifestyles as well.  Be sure to use a good quality extra-virgin olive oil for this recipe.  

INGREDIENTS:

3 medium chicken thighs

3 medium chicken drumsticks

3 T. extra virgin olive oil

2 cloves garlic, minced

1 tsp. my Baharat Spice Blend  (the key flavor, so don’t substitute)

4 oz. purple onion, sliced lengthwise

3 plum tomatoes, each cut into 4 wedges

24 medium black olives

Dash each salt and pepper

VARIATION:   Substitute my Moroccan Spice Blend for the Baharat Spice mentioned in the ingredients.  Makes a slightly spicier final dish.  🙂  

DIRECTIONS:  Preheat oven to 425º.  Place olive oil, Baharat spice and minced garlic in a pan large enough to hold your chicken without any crowding.  Stir it well.  Take each piece of chicken and dip each side into the oil mixture.  Rub or baste each piece all over well.  Evenly space the pieces skin-side up in the pan.  Cut the tomatoes into wedges and space them evenly around the chicken in the pan, trying not to cover the pieces of chicken.  If covered, the juice from the tomato will inhibit browning of the skin.

Next place the olives evenly around the chicken pieces.   Lastly, separate the slivers of onion and spread them all around the chicken.  Dip a basting brush into the olive oil mixture and baste the olives and vegetables with the oil (add more oil if needed).  Lightly sprinkle with the salt and pepper.  Pop into a preheated hot 425º oven and bake for about 1 hour, re-basting at 30 minutes cooking time to be sure the vegetables don’t dry out.   I served this with buttered, steamed asparagus.  It would also be good with a Greek salad.

NUTRITIONAL INFO:   Makes 3 adult servings (serving = 1 drumstick + 1 thigh).  Each serving contains:

438 cals, 32g fat, 8.26g carbs, 2.26g fiber, 6g NET CARBS, 29.8g protein, 742 mg sodium

Moroccan Grilled Chicken


The Moroccan spice blend in this grilled chicken is an interesting creation that will take ordinary grilled chicken to a whole new level.  I have also used it on on grilled beef chuck, lamb, pork and even for a whole grilled fish with good results.  For those who don’t do much grilling, this recipe bakes nicely in your indoor oven.  This one is suitable for all phases of Atkins and other Keto diets.  I do hope you’ll try it someday.  I think you’ll like it if you do!

INGREDIENTS:

1 lb. chicken breasts or 4 thighs, deboned only if you wish to speed up cooking

3 T. olive oil

1 T. my Moroccan Spice Blend

6 T. your favorite low-carb BBQ sauce + 3 T. water

DIRECTIONS:   Preheat oven to 400º.  Slice deboned chicken breasts laterally on an angle to form 4 thinner pieces.  If using thighs, slit with knife so you will be able to spread the meat out as flat as possible.  Place oil in baking sheet.  Dip each piece of chicken into oil to coat.  Sprinkle the spice blend over all meat surfaces.  Lay coated chicken onto awaiting hot charcoal grill or your oiled baking pan  if cooking indoors.   If meat is deboned, grill for about 12-13  minutes on a side.  Alternately, bake at 400º oven for about 20-30 minutes.  Baste with sauce a couple times during cooking.  Time will slightly vary depend on thickness of meat, type of meat/fish and of course, the heat stage of your fire/oven.   If grilling, cook as you normally would the particular meat you are doing, basting with sauce several times during cooking to keep meat moist.  I recommend serving with a green salad topped with tahini dressing, tabouleh salad, or roasted/grilled veggies of your choice.

NUTRITIONAL INFO:   Makes 4 servings, each contains:

306 cals, 19 g fat, 3.1 g carbs, 0.95 g fiber, 2.25 g NET CARBS, 33.7 g  protein, 42% RDA Vitamin B6, 30% iron, 102 % niacin, 34% phosphorous, 275 mg potassium and 50 % selenium.  Another very healthy dish!

Moroccan Walnut Chicken

Moroccan Chicken

This is one of our favorite ways to have chicken.  It’s a little carb pricey and not doable during Induction due to the prunes.  They really are a key flavor in this dish, so wait until Atkins Phase 2 to prepare this one properly.  🙂    I can only “afford” the carbs  on this dish when I work to keep my breakfast and lunch carb numbers pretty low that day.  🙂   The spices in this dish will astound you.

Let me just say it:  This dish is not Atkins Induction friendly!   Wait until farther along with your weight loss journey to enjoy this wonderful entrée.  Be sure to read the ingredients label and use only fruits with no added sugar!  Del Monte brand dried prunes are “virgin” and acceptable for low-carbers to use in recipes in very small amounts.   I actually cooked more pieces of chicken in the batch pictured so I would have leftovers, as this is one of those dishes that gets better each time it is reheated!

INGREDIENTS:

2 T. olive oil

1 chicken breast

2 chicken legs

2 chicken thighs

4 oz. onion, sliced thin

2 cloves minced garlic

3/4 c. chicken broth, low sodium

½ tsp. each coriander, cinnamon, paprika, cumin and black pepper

¼ tsp. cayenne

1 tsp. ground ginger

1 T. tomato paste

5 dried prunes (no added sugar variety), each cut into 4-6 little pieces

OPTIONAL:   1 oz. coarsely broken walnuts

VARIATION:   Substitute chopped dried pieces or apricots for the prunes.  Delicious!

DIRECTIONS:  Heat oil in a deep non-stick Dutch oven or a large, deep, non-stick skillet.  Cut breast into two pieces, making a total of 6 medium-size pieces of chicken.  Brown chicken in oil until skin is golden brown.  Drain off excess oil if desired, but its value is included in the nutritional info below, so you may prefer to leave the oil in the pan and reap its nutritional benefits!  Scatter the onion and garlic over the top.  Mix the spices into the chicken broth and pour over the chicken.  Add the tomato paste, nuts and prunes.  Stir well.  Cover and reduce heat to low.  Simmer for about 45-1hr. 30 minutes or until chicken is clearly done (depends on size of chicken pieces).  Uncover and simmer for another 10-15 minutes to reduce and concentrate the juices a bit.  Serve each piece of chicken with some of the cooking broth/fruit/nut mixture spooned over it.  For non-Atkins eaters at the table, this dish is outstanding served over Basmati rice.

NUTRITIONAL INFO: Serves 3 adults, or 2 adults and two children.  Two pieces with sauce contains: These numbers do NOT include the optional walnuts

468 calories, 25.5 g  fat, 14.2 g carbs, 2.7 g  fiber, 11.5 g NET CARBS, 43.8 g  protein, 80 mg. sodium

Lebanese Baked Chicken (Frarej)

Lebanese Baked Chicken

This recipe has been one of my most popular Middle Eastern recipes therefore I would be remiss in not including it in our adventure through my Middle Eastern recipe collection.  It has garnered millions of Facebook fans where I once maintained a presence, during those years I was on the Low Carbing Among Friends team.  I no longer maintain a Facebook page or presence. 

Our dear friends in Dallas have taken us several times to a wonderful little Lebanese restaurant over in Ft. Worth named Hedary’s.  Family-operated for many years by a Lebanese family.  I can say their tabouleh  salad and kebabs are the best I’ve ever eaten.  So is their slow-roasted baked lemon chicken known as Frarej.  For those tables positioned close enough to do so, they used to serve their fresh-baked Lebanese bread all the way from behind the counter on long, paddled poles used to place them into and out of the ovens for cooking.   Don’t know if they still do that, but is sure was fun to watch!  Next time you’re in Ft. Worth, give Hedary’s a try! 

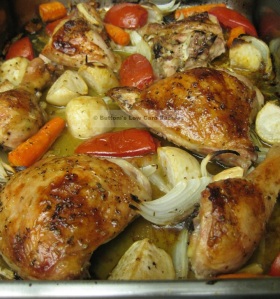
In the meantime…………………..experience their delicious baked chicken at home!  This Induction friendly version of their ever-popular lemony chicken dish is slightly changed, but just as yummy nonetheless.  The original dish has potato wedges, so I always substitute rutabaga or turnip wedges to keep the carbs reasonably low.  I did not include the root vegetables in the nutritional info below as I don’t always include them in the pan.  I tend to vary the vegetables I use based on what I have on hand.  So be sure to calculate the veggies you add (and consume) over and above what I consider to be the base recipe of onion, garlic and tomatoes.  If you have family that are not on Atkins, I would definitely use a few wedges of potato for those folks, as they soak up those tasty pan juices like a sponge and are sooooooo tasty.

My rendition is very close to the inspirational dish from Hedary’s, though the tomatoes are my personal addition.  I must confess, mine is good, but not QUITE as it is at Hedary’s.  Sigh.  I understand Hedary’s has left the original location and moved farther out in Ft. Worth somewhere.   This meal is easy to prepare and the oven basically does the work for you!  Gives a whole new meaning to Ron Popeel’s expression “Set it & forget it.” for a sheer heavenly, delicious dinner almost effortlessly.  🙂  Please follow directions closely as they are KEY to getting the best results.

INGREDIENTS:

4 T. olive oil

1 whole chicken cut into 8 pieces, cutting breast in half (Do not remove skin or you will ruin this dish)

4 oz. onion cut into wedges (separate layers)

2 Roma tomatoes cut into wedges

6-10 cloves garlic, (leave half of them whole, mince the rest)

½ tsp. oregano

Juice of 1 lemon

Dash salt and pepper

OPTIONAL: Original dish had potato wedges and whole carrots roasted in the pan with the chicken.  The carrots are OK  but I’d substitute in pieces of rutabaga, turnip or daikon radish for the potato wedges to keep carbs down.

DIRECTIONS:  Preheat oven to 500º (therefore do NOT use a ceramic baking dish!).  Cut up chicken into separate pieces making 8 pieces in all.   I never use the back as I simmer that for broth to freeze for other purposes or it becomes dinner for my dogs.  🙂  Drizzle 1 T. of the olive oil on the bottom of a very large METAL baking/roasting pan (I use a 12 x 15 stainless steel metal pan).    If you don’t yet have a really large, good quality stainless steel roasting pan, I think it is one of the single most important investments you can make in your kitchen tools.  Place chicken skin side up  in the pan.  You don’t want any overlapping or crowding.  Do not use a glass/ceramic baking dish as it will break in a 500º oven.  

Crowding of this chicken and the veggies in the pan will result in deeper pan juices.  Deeper juices keeps chicken from crisping of the chicken, so use a really large pan.  Place tomato wedges around and in between chicken pieces.  Do the same with the onion pieces and add the garlic.  If using the root vegetables, cut them up and place them evenly around the chicken.  Squeeze the lemon over everything in the pan.  Drizzle remaining olive oil over the pan contents as well.   Lightly sprinkle some oregano or Greek seasoning over all (about 1/4-½ tsp, I don’t measure it).   Bake 30 minutes at 500º.  Baste with pan juices, lower heat to 350º and bake another 20 minutes or to internal temperature of 170º on a meat thermometer.   Baste with pan juices just before serving.  I like to place the juices in a gravy boat and have it on the table for basting the drier breast meat while eating.  If there are any juices leftover after the meal, I always freeze them and add them to the bottom of the next pan I make of this recipe (which is often!).  Each successive pan is therefore better than the last!  I like to serve this chicken dish with my Cucumber Mint Salad or my Tabouleh salad

NUTRITIONAL INFO: (does NOT include the optional vegetables).
Please note, these numbers are only approximate, because the actual counts will vary depending on which pieces of chicken and which roasted veggies you consume.

Serves 4, each 2-piece serving contains: (these numbers do not include the carrots or rutabaga)

447 cals, 30.4 g fat, 7.98 g carbs, 1.1 g fiber, 6.88 g NET CARBS, 34.8 g protein, 39 mg. sodium

Iraqi Grilled Cornish Hens

Up until now, I have only used my Baharat spice in braised chicken dishes, braised beef and braised lamb.  When I created this recipe, I tried it both grilled (traditional) and baked in the oven.  I was most pleased with both methods of preparation actually.  Very tasty both ways!  In Iraq, they use whole, cut-up chicken pieces as I don’t think Cornish hens are available there.  When I do this dish for company, I prefer to use Cornish hens, if I can get them,  simply for the visual impact at table.  The meat doesn’t taste one bit different than larger chicken.  

Allow a half a bird per person when buying your Cornish hens.  Most women and men will only eat ½ Cornish hen, but I have seen a man with a hefty appetite eat a whole hen a few times in my life.  I have only done so once in my life, but it was a particularly small hen.   If I fix 2 sides, ½ Cornish hen fills me right up.  This recipe is suitable for all phases of Atkins, Keto diets, Primal and Paleo as well.

INGREDIENTS:

2    1-1¼ pound Cornish game hens

4 T. unsalted butter  (use less if you need to cut calories)

1 tsp. my homemade Baharat Spice Blend

½ tsp. Aleppo pepper  (or dried, ground ancho chile pepper)

1/4 tsp. onion powder

Optional:  1/2 tsp. sumac (if available)

DIRECTIONS:  Preheat oven to 350º.  Melt the butter in a saucer in the microwave.  Stir in the spices to mix well.  Split the hens in half up the back bone with a knife or kitchen shears.  This technique is referred to as spatchcocking or butterflying the bird.   If grilling, prepare the fire.  When it is hot, place the pieces evenly (or butterflied Cornish Hens cut side down) on the grill.  If baking them, place on a grate set inside a baking pan to catch juices. 

Using a brush, baste the hens well with the spice-butter mixture.  Pop pan into 350º oven and bake for 45 minutes.  If grilling, cook (turning once midway) to internal temperature of 165º in the breast.  Turn up oven to 375º and continue to roast for about 15 more minutes to brown the skin.   Watch them closely this last 15 minutes, as ovens can vary.  When a meat thermometer poked in the center of the breast meat should read 165º at which time they are properly cooked.  Remove from oven or grill and serve 1 Cornish Hen to each man at the table;  half a bird to the women at the table.  The other halves of the women’s birds are usually leftover at my house.  

Traditionally, this meat is grilled.  Try it that way first as it is truly memorable grilled!  But also try it just baked in your oven sometime so you can see the difference.  This meat pairs nicely with any side dishes you like.  I serve it with a sauté of spinach and kale and my Iranian Mint Cucumber Salad.

NUTRITIONAL INFO:   Makes 4 servings (I allow ½ hen per person), each contains:

501 cals, 39.3 g fat, 0.62 g carbs, 2.50 g fiber, 2.12 g NET CARBS, 34.1 g protein, 347 mg sodium

Iranian Grilled Chicken

Leaving Italy, let’s turn our fun food ‘tour bus’ a bit toward the east.   That part of the world produces so many  culinary delights.  As I’ve said before, we lived in Teheran for two years when I was just a wee lass of 10-12.  Sometimes we would take a 4pm hike on 6-lane Shimran Boulevard to go buy our daily fix of fresh-baked Iranian flatbread called ‘noon‘.  It was so good, some of the bread didn’t make it all the way home most trips.  🙂 

On our walk, we passed a number of merchant shops where turban-wearing shopkeepers were crouched down  cooking their dinner on portable Aladdin kerosene heaters they used as grills.  I still own our old Aladdin in fact.  They might be cooking a lamb grill or curry; perhaps kubideh meat rolls, or this popular grilled chicken.    It was fascinating to watch and the aromas on our ventures were indescribable!  Fatimeh, our maid and ‘translator’, would often stop & chat with the ‘cooks’.  They offered my brother and I a bite of their goodies more than once.  We knew just a few words of  Farsi, so we would just soak it all up, mesmerized.  This yogurt sauce with onions was about the sum total of what went on the chicken.       

This is a dish we attempted to copy, with pointers from Fatimeh and our motor pool driver, Reza.   Just talking about this evokes those olfactory memories.  I understand they renamed many streets after the Iranian Revolution so Shimran Blvd. may even be called something else now.  Not sure which aroma was more intense on our walks to get ‘noon’, the chicken or the fresh wheat bread sheets cooking in the kiln-like open-front pebble ovens.  At my age, it was always fun picking off the remaining pebbles when we got home, as some typically burned right into the bread surface.   

My changes to the traditional method on this dish:  subbed butter in for some of the yogurt to cut carbs; added the  Spanish paprika.  They used ALL yogurt in their marinates.  They used all sumac & turmeric for the spices, which can be obtained in better spice stores, ordered on-line from places like Penzey’s Spices.   Sumac is the ground, dried berries/fruit of the sumac bush.    It is slightly acidic, lemony tasting and is used in many Iranian, Israeli and other Gulf State dishes.  The yogurt and onions are in the flavor driver’s seat.   This recipe is Atkins Induction friendly and Paleo-Primal acceptable as well.  Because it is impossible to calculate the total nutritional info per serving on a portion of this meal, I will just provide the information for each of 10 servings of the marinade.  You will have to add in the values for the meat pieces eaten.

INGREDIENTS:

1 stick butter + ½ c. yogurt  (or 1c. yogurt & no butter to stay traditional)

Juice of 2 lemons

Dash each salt and black pepper

1 tsp. sumac 

1 tsp. Smoked paprika

½ tsp. turmeric

1 onion (either minced fine or sliver extremely thin)

1 whole chicken, cut in 10 pieces ( cut breasts in half)

DIRECTIONS:  Melt the butter in a small pot.   Remove from heat.  Stir in yogurt and add all other marinade ingredients.  Stir again well.  Cut up the chicken into 10 pieces (I reserve the back for making stock).  Place chicken into gallon Ziploc bag.  Pour 1/2 of the marinade over the chicken.  Zip bag and manipulate it to coat each piece of chicken well with marinade.   Set rest of marinade aside for basting meat during grilling.  Allow the chicken to marinate in the refrigerator for 3-4 hours.  This is important as the yogurt tenderizes the meat. 

Although this chicken is OK baked in a regular oven (I have tried it) it is worlds better done on your grill.  Prepare charcoal fire.  When the coals are hot and white, place chicken on the grill and cook on each side until done (about 20 minutes per side).  Baste with the remaining marinade mix as it cooks.  Allow the last application of yogurt sauce to brown on both sides of meat before taking off fire.  You don’t want to have uncooked onions/sauce in the end.   Enjoy a true Iranian feast!   Typically served with butter basted grilled vegetables like long slices of summer squash, tomatoes, eggplant or bell peppers.  If we don’t grill veggies, I serve with my sour cream cucumber mint salad.  

NUTRITIONAL INFO:   Makes ample sauce for 10 pieces of chicken.  Each serving of the marinade only contains:

95 cals, 9.2g fat, 2.87g carbs, 1.2g fiber, 2.67g NET CARBS, 1.8g protein, 17.9 mg sodium

Chicken Eggplant Parmigiana

This will be my final recipe post in my travelogue of tasty Italian fare.  I love Chicken Parmesan, but I find it a little rich and prefer to tone the richness down with eggplant.  I have a Chicken Parmigiana Casserole on my blog already, but when you serve company, the individual servings are ever so much prettier served up on the plate.  So I developed this construct.  🙂   It’s so simple to make and in no time you are eating these delicious bundles of goodness with a lovely green salad and low-carb garlic bread.  This dish is suitable for all phases of Atkins, Keto diets and Primal Blueprint followers as well.  The cheese makes these unsuitable for Paleo folks.

INGREDIENTS:

2  ¼” thick long slices cooked eggplant (oven-baked or pan seared)

2  8-oz chicken breasts

1 T. butter

½ c. your favorite low-carb spaghetti sauce (I use Lucini “Basil”)

4 oz. mozzarella (4 slices)

½ c. shredded Parmesan cheese

Dash each oregano and basil (or Italian Seasoning blend)

DIRECTIONS:  Debone and remove skin from chicken breasts (if desired).  Slice each laterally into two thinner filets.  Pound with tenderizer to speed up cooking.

Preheat oven to 350º.  Bake the eggplant slices for 20 minutes and set aside.  Melt butter in non-stick skillet.  Sear the four chicken portions on each side until nearly done through and golden brown. Arrange the filets evenly in the skillet or in a baking dish.  Top each with 1 T. of the spaghetti sauce and spread over top surface. Place 1/4 of the mozzarella on top of each filet evenly. Cut the two eggplant slices in half and lay one piece across the top of each chicken filet.  Spread 1 T. more sauce on top of each.  Sprinkle 2 T. shredded Parmesan on top.  Pop pan into preheated oven and cook about 10 minutes just until cheese is melted.  If you are using a baking dish (not the skillet), you can just pop into your microwave for 2-3 minutes on medium to melt the cheeses to speed things up a bit.  When melted, serve at once with a lovely green salad and low-carb garlic bread.  This dish freezes well.

NUTRITIONAL INFO:   Makes 4 portions, each contains:

462.5 cals, 27.15 g fat, 5.32 g carbs, 1.5 g fiber, 3.82 g NET CARBS, 48.5 g protein, 888 mg sodium

Chicken Scalopini

My father did a lot of flying over Italy (interdiction bombing missions) in World War II.  He developed quite a taste for Italian food while stationed in that area and this was one of his all-time favorites.  This was served often when I was growing up made with veal, which is traditional for this dish.  Since veal is no longer politically correct, it’s also super delicious made with chicken.  It’s such a simple dish to make and truly Atkins-friendly without a single modification.  It’s rich, but how I love this one!  Vermouth has a distinctive flavor, but if you don’t have it, you could use an equal amount of dry white wine instead.  This change will, however, greatly change the final flavor that makes this dish so special.  If you decide to spring for a bottle of vermouth, it is also delicious used in sauces for baked whole fish or fish filets.  This dish really delivers on flavor, so I hope you’ll try it.  If you omit the vermouth/wine, this is quite suitable during the initial Atkins Induction Phase.

INGREDIENTS:

4  4-oz skinless, boneless pieces chicken breast

1 ½ T. olive oil

8 oz. mushrooms, cleaned and sliced

¼ c. chopped parsley

½ tsp. dried tarragon

1/3 c. heavy cream

3 T. dry vermouth or white wine (omit if on Induction)

Dash Salt & Pepper to taste

DIRECTIONS:  Pound chicken breasts between two pieces waxed paper until flattened to about ¼” thickness.  Lightly salt and pepper.  In a large non-stick skillet, heat 1 T. of the oil and sear chicken until lightly browned on both sides.  Just cook until done (no pink juice exuding).   Remove to a platter and cover with plate or foil to keep warm.

Add remaining olive oil to skillet and sauté mushrooms, stirring occasionally  until lightly browned and done, about 5 minutes.  Lower heat and add vermouth, cream, tarragon, parsley and deglaze any brown bits off bottom of pan.  Pour mushroom cream sauce over chicken.  Decorate with a sprig of parsley or a sprinkle of chopped parsley.

NUTRITIONAL INFO: Serves 4, each serving containing:

368 cals, 21.43 g fat, 4.25 g carbs, 1 g fiber, 3.25g NET CARBS, 36.88 g protein, 39 mg sodium

Chicken Bolognese

Traditional Chicken Bolognese is made with ground chicken that is put directly into a good Bolognese spaghetti sauce.  But I find the chicken flavor frankly gets lost in that co-habitation arrangement.  This dish is how I think the chicken can shine and it is actually easy to prepare (provided you have the spaghetti meat sauce on hand).  It is quite tasty this way and makes a nice plated dish for serving to company.   This extremely nutritious dinner is suitable for your Atkins Phase I Induction menu rotations provided you omit the bit of red wine. Each serving consists of 5 oz. raw chicken breast, which cooks down to about 4.5 oz.  Of course, you may choose to use larger portions of chicken for the men at the table, but the 4 oz. portions fill me up quite nicely.

INGREDIENTS: 

20 oz. deboned chicken breast, skinless (4 oz. per serving after cooking)

1 c. low-carb spaghetti meat sauce (I used spaghetti meat sauce)

4 basil leaves, chopped

4 oz. shredded mozzarella cheese

½ c. grated Parmesan cheese

1 oz. (2 T.) red wine (omit for Induction compliance)

2 T. olive oil

DIRECTIONS:  Preheat oven to 350º.  Pound the chicken breasts with a meat cleaver between two sheets of plastic wrap until they are just about ¼-3/8″ thick.  Heat the olive oil in a non-stick skillet and sear the chicken on both sides until golden and nearly done.  Turn off heat.  Spoon ¼ c. meat sauce over each of the four pieces of browned chicken.  Next drizzle ½ T. red wine over each serving.   Next sprinkle ¼ of the chopped basil on each piece, followed by 1 oz. of mozzarella on each.  Finally sprinkle the top of each portion with 2 T. Parmesan.    Pop that skillet into your preheated 350º oven.  Bake 20 minutes to finish off.  Serve with your favorite green vegetable or a nice green salad.  If I have some Oopsie Rolls in the fridge, I love to make some low-carb garlic bread to serve with this.

NUTRITIONAL INFO:   Makes 4 servings, each contains:

475 calories, 28.4 g  fat, 6.4 g  carbs, 1.3 g  fiber, 5.1 g NET CARBS, 45.7 g  protein, 702 mg sodium

Porcini-Portobello Braised Chicken

Oh my goodness, does my husband ever like this recipe.  If the way to a man’s heart is through his stomach, I locked it up with this creation.   Porcini mushrooms have a very ‘beefy’ taste and are quite potent, so don’t use too many of them in any dish or you may be disappointed in the results.  

This recipe is a little on the carb-y side as I added 1½ cups  AlDente brand “Carba Nada” low-carb fettucini noodles to the pan.  They soaked up the the rich broth flavors quite nicely.  Clearly that makes this recipe unsuitable for Atkins Induction.  But you could certainly cook some zucchini noodles on the side for a lower-carb option and enjoy this dish once you get to Phase 2 (due to the wine, which is not allowed until Phase 2).  You could even go a step farther and substitute more chicken broth for the wine and enjoy this during Induction Phase!  Won’t be quite as good, but doable early in the diet.  🙂  This dish has stellar flavor and I hope my readers will try it sometime.  We both have always enjoyed the flavor affinity of wine and thyme on chicken and beef dishes.  And this is yet another wine + thyme success.  🙂

INGREDIENTS:

4-5 dried Porcini mushrooms, rehydrated in hot water

2 large chicken breasts (or choice of chicken pieces for 4 portions)

¼ tsp. each coarse black pepper, salt, Spanish paprika and onion powder

2 T. unsalted butter

1 T. olive oil

3 oz. onion, slivered or chopped

2 cloves garlic, minced

1 portobello mushroomgills removed & sliced (or 4 oz. can sliced mushrooms, drained of liquid)

1 c. chicken broth (preferably homemade)

½ c. dry white wine (I used Chardonay)

1 tsp. dried thyme leaves (1 T. fresh, chopped)

¼ tsp. xanthan gum (or your favorite thickener)

1½ c. raw AlDente “Carba Nada” egg fettuccini noodles”  (about 1/3 of bag) [or use 4 c. zucchini noodles]

DIRECTIONS:  Soak the Porcini mushrooms in a small bowl of very hot water for about 30 minutes or until soft.  When soft, slice them, cutting away any tough stems.  Boil the Carba Nada noodles in a medium saucepan until tender but not quite done.  Drain water off noodles and set aside while you prepare the main dish.  Butterfly the chicken breasts so they will cook faster and to create 4 portions of meat.

Mix the black pepper, paprika and onion powder on a paper plate.  Sprinkle the chicken pieces on all sides with the spice mixture.  Heat a large skillet over high heat, melting the butter and oil together.  Sear the chicken pieces on all sides until golden (it will not be done yet).  Remove chicken temporarily to a plate.  Add the onion slices to the skillet and allow it to caramelize in the hot oil.  When the onion is softening and browning, next add the drained canned mushrooms, garlic, chicken broth, wine and thyme to the pan.

Bring to a boil and immediately lower heat to lowest setting so the contents of the pan are just simmering.    Whisk in the xanthan gum and let it begin to thicken for a couple minutes.  Gently stir in the partially cooked, drained noodles (if using), replace the chicken on top, cover pan with a lid and simmer for about 30 minutes on lowest heat possible or until chicken is done and noodles have absorbed most of the liquid (internal temp of 170º).   Remove lid and let dish breathe and moisture to evaporate from atop the chicken.  If substituting zucchini noodles, prepare those while the main skillet is in this final stage of cooking and add their value to the lower nutritional numbers below.   Serve with a nice green salad and enjoy!

NUTRITIONAL INFO:    Makes 4 servings, each contains (calculated using chicken breasts):

With Noodles:  412 calories, 19g fat, 13.75 g carbs, 4.27g fiber, 9.38g NET CARBS, 39.8 g protein and 714 mg sodium

Without Noodles:  377 calories, 18.5 g fat, 7.75 g carbs, 2.87 g fiber, 4.88 g NET CARBS, 36.8 g protein, 709 mg sodium

Chicken Cacciatore

Continuing my journey into Italian food this week, Chicken Cacciatore (Hunter’s Chicken) was the first Italian food I learned how to cook (after ordinary spaghetti meat sauce).   It’s one of the dishes I made my husband before we got married, in fact.   He tells me me often this recipe and the shrimp curry I also made while we were still dating, cinched the proposal.  🙂  This one only takes about an hour from start to finish to get it to the table, so that’s always a plus for me.   I love good food, but don’t wish to be a slave to my kitchen to have it at home.  This dish can be served on the shiratake noodles with oat fiber, or commercial low-carb pasta, but I find I really like it served with seared or baked eggplant slices better.  I think you’ll like this delicious, traditional Italian fare.  

This recipe is not suitable for Induction unless you leave out the red wine.  But it just won’t be classic cacciatore without it, in my opinion.

INGREDIENTS:

1  chicken breast, (around 8 oz) deboned, cut into 2-3 pieces (I leave the skin on)

1 large chicken thigh, deboned

1 large drumstick

2 T. olive oil

4 oz. sliced onion

1 medium green bell pepper, sliced

1 can sliced mushrooms (or 4 fresh mushrooms sliced)

1 clove minced garlic

3/4 c. chicken broth, low sodium

¼ tsp. salt

1/8 tsp. black pepper

1  can (14.5 oz) diced or crushed tomatoes (or 3 fresh Roma tomatoes, cut into wedges)

¼ c. red wine

DIRECTIONS:   Cut up the breast into 2- 3 pieces.  Heat 1 T. of the oil in a non-stick skillet and brown all the pieces of chicken on all sides.  Remove the chicken temporarily to a platter.  Add remaining tablespoon of oil and sauté onion & bell pepper a couple minutes only.  Add all remaining ingredients to skillet, stir and replace chicken pieces into the skillet.  Lower heat to low, cover and simmer about 30-40 minutes or until the largest chicken pieces are fully done.   If it isn’t cooked down enough to be of intermediate thickness, you can thicken it a bit with a light sprinkle of your favorite thickener and simmer, but I don’t usually have to thicken mine.   This dish is traditionally served over spaghetti pasta, but I usually just serve it by itself as a meat entrée or with sautéed eggplant as shown above.  If you like them, the opaque tofu variety of shiratake noodles with oat fiber in them pair well with this recipe.

NUTRITIONAL INFO:    Makes 4 servings each contains:  (does not include the optional eggplant)

274 cals, 13.23g fat, 8.83g carbs, 2.33g fiber, 6.5g NET CARBS, 26g protein, 741 mg sodium

Chicken Eggplant Mushroom Parmigiana Casserole

This Italian dinner was created by me and is not an authentic Italian recipe to my knowledge.  I used leftover cooked chicken breast meat, a small amount of cooked spaghetti sauce and some commercial no-sugar sauce (Lucini) from a jar.  I bought a beautiful eggplant and some nice mushrooms, so I created a quick Parmigiana dish I know you are going to like!  This recipe is suitable for all phases of Atkins, Keto lifestyle and Primal followers that eat occasional cheese.  This meal would not be suitable for Paleo diners due to the cheese.

INGREDIENTS

8 oz. cooked chicken meat, cut bite size

2 T. olive oil

6 oz. mushrooms, sliced

5 oz. eggplant, sliced 1/4″ thick (I do not peel)

1/4 c. low-carb spaghetti sauce (I use Lucini with no added sugar)

3/4 c. homemade spaghetti sauce   [you could use all homemade or all Luccini sauce]

6 oz. Mozzarella cheese, grated

½ c. grated Parmesan cheese

½ tsp. dried oregano (or 1 tsp. fresh, chopped)

¼ tsp. dried basil (or 1 tsp. fresh, chopped)

¼ tsp. dried rosemary (or ½ tsp. fresh, chopped)

DIRECTIONS:  Preheat oven to 400º. Use a small amount of the oil to grease your casserole dish and a small baking sheet.  Place eggplant on baking sheet and bake at 400º for about 15 minutes, turning once during this pre-cooking.  Remove from oven and lower temperature to 350º.

In a non-stick skillet, sauté the mushroom slices in the rest of the olive oil. Place eggplant in a single layer on the bottom of your greased casserole dish.   Spoon half the spaghetti sauce over the meat. Top with the shredded chicken meat.  Sprinkle on half the Parmesan and half the mozzarella cheese.  Sprinkle with half the spices.  Spoon on the remainder of the sauce. Sprinkle on the rest of the two cheeses and the last of the spices.  Top with the sautéed mushroom and pop into your 350º oven for about 30-35 minutes or until cheese is melted and the casserole is hot hot in the center.  Serve with your favorite salad or green vegetable and some garlic bread made with low-carb bread.

NUTRITIONAL INFO:  Makes 4 servings, each contains:

427 cals, 26.1g fat, 10.4g carbs, 2.98g fiber, 7.42g NET CARBS, 38g protein, 270 mg sodium

Chicken Chile Relleno Casserole

Thought I’d post my chicken version of a chile rellenos casserole nowI just layer the common chile rellenos ingredients into a casserole dish and bake.  Doesn’t get much easier.   It comes out just as delicious every time, plus so much simpler than stuffing the peppers.  Another plus…….deep frying!  Tastes almost exactly the same as the real deal, but it’s much less trouble for the cook.   Of course, to serve this to company, I would go to the trouble to stuff the peppers and deep fry for authentic presentation.  This Atkins Induction-friendly recipe garnished millions of fans on Facebook when I was posting there regularly for the Low Carbing Friends team.  It deserves to be in my Mexican celebration of great great Mexican dishes.   This one is suitable for all ketogenic diets and Primal diners but is not suitable for Paleo followers.

INGREDIENTS: 

3 poblano peppers (2-2.5 oz. each)

12 oz. skinless, boneless chicken breasts, chopped into bite-size pieces

2 T. olive oil

2 oz. onion, sliced

½ tsp. dried guajillo chile, seeded, chopped fine (optional)

¼ tsp. dried ancho chile powder (optional)

¼ tsp. chili powder  (use ½ tsp. if guajillo & ancho are unavailable)

¼ tsp. garlic powder

3/4 c. Ro-Tel tomatoes and green chiles, solids only (mild)

¼ c. cilantro, chopped

6 oz. Monterrey Jack cheese, grated

DIRECTIONS:   Preheat oven to 450º.  Roasting your peppers will make them milder and sweeter, so don’t bypass this step.  Cut tops off poblano peppers and remove seed cluster.  Cut in halves, lay the halves on a non-stick baking sheet and roast in 450º oven for about 15-20 minutes, turning once during roasting.  Remove and cool.  Lower oven to 350º. Peel tough skin gently off the peppers.  While they are roasting, heat oil in non-stick skillet.  Sauté onion until tender.  Add chicken and sauté until meat is no longer pink.  Add all remaining ingredients except the cheese.  Simmer 3-4 minutes for flavors to meld together.  Lay the skinned poblano pepper pieces in the bottom of 3 individual casserole dishes (or use one larger casserole dish if you prefer).  Top the peppers in each serving dish with 1 spoon of the chicken filling.  Spread 1/3 of the cheese over the chicken filling in each dish. Place the remaining chicken filling evenly in the dish(es).  Top with the remaining cheese.  Pop into a 350º oven for about 20 minutes or until bubbly and the cheese is melted.  Serve at once with a nice guacamole salad (and if you are in Pre-Maintenance or Maintenance, this is nice with a ½ c. of heated refried beans).

NUTRITIONAL INFO:   Makes 3 servings, each contains:

547 cals, 35g fat, 07.7g carbs, 2.23g fiber, 5.47g NET CARBS, 47.7g protein, 620 mg sodium

Chicken Fajitas

We usually do our fajitas (chicken or beef) on the grill, but it was kind of cold out this evening and I decided not to ask my husband to light a charcoal fire for this small meal and stand out in the cold cooking these.  Just did them in my searing skillet inside.  They came out fantastic.  If grilling the meat outside, I leave the pieces of chicken whole for easy turning on the grate and slice them up inside when ready to serve.  I didn’t measure my spices, but estimated 1 tsp. of each one.  This recipe is not suitable until you get past the first 2-wk. Phase 1 Induction of Atkins.

INGREDIENTS:

6 low-carb whole-wheat tortillas (I use Carb Sense from HEB)

2 large chicken breasts, deboned and skinned

3 T. total extra light olive oil or coconut oil

1 tsp. quality chipotle chile powder

1 tsp. smoked Spanish paprika

1 tsp. garlic powder

1 tsp. onion powder

3 oz. slivered onion

Optional:  You can add bell peppers to the meat sauté but my husband is not a fan, so I didn’t.  If you like cilantro, a little chopped sprinkled onto each fajita is also good.

DIRECTIONS:  A couple hours before your meal, skin and debone the chicken breasts.  Boil the bones and skin to chop up for your pet and freeze the broth for soup making and recipes downstream.  Cut the chicken into long strips no more than 5/8″ wide.  If grilling meat, wait and cut into strips AFTER grilling.  Set meat aside a few minutes.

In a gallon Ziploc® bag (or bowl) mix the oil and spices, stirring well.  Add the chicken pieces and toss with a spoon (or manipulate the bag with your fingers to coat the meat well.  Zip the BAG  (or cover bowl with plastic wrap) and place in fridge a couple hours to marinate.

When ready to cook, warm your tortillas on defrost in the microwave on 50% power for 2 minutes (or in regular oven in a covered baking dish).  While those are warming, sliver the onion and have ready by stovetop.  Heat a non-stick large pan or seasoned cast iron skillet over high heat.  Lightly oil pan with remaining 1 T. olive oil and add the meat, sautéing until browned on first side of pieces.  Turn or stir meat to brown other surfaces of meat.  When nearly done, add the onion and sauté with the chicken until the onions begin to turn brown and caramelize.

If grilling, cook over a hot fire until meat is done, just like you would steak.  Sauté onions (and green pepper strips, if using) in 1 T. butter over medium-high heat.  Slice chicken and serve with sautéed onions/peppers when ready to serve at table.

Serve with steamed low-carb flour tortillas and optional cilantro.  To serve, dip some meat and onion/pepper mixture onto a tortilla.  Add cilantro if you like it.  I served these with a tasty guacamole salad.  Truth be told, I actually put the guacamole inside my fajita roll before rolling and eat it altogether!  Yummy!

NUTRITIONAL INFO:   Makes 6 fajita rolls, each will contain:

168.33 cals, 10.03g fat, 14.26g carbs, 10.48g fiber, 3.78g NET CARBS, 14.4g protein, 430 mg sodium

Chicken Quesadillas

Click to enlarge

Continuing my Mexican Food celebration, one of my favorite lunches is quesadillas.  My first exposure to these was at Pappacitas in S.E. Houston.  I ordered their Spinach Quesadillas and was in love.  They were delicious!  Kind of like a Mexican grilled cheese for me.

Since that time, I find myself making these for lunch, as I often have a piece of leftover baked chicken, a small piece of grilled steak or half a fried pork chop.  You guys know how I am about using up leftovers promptly.  I like to make leftovers totally transformed from how they were originally served.  This is often how those bits of leftover meat get used.   They really hit the spot!  I like to whip up a little Chimichurri Sauce to have inside or dabbed on the top of mine.  These lovelies are not suitable until the grains rung of Atkins Phase 2 OWL because of the wrapper.  Primal followers can enjoy these but they are not Paleo-friendly.  Other Keto followers can have them if the carbs will fit into daily limits.

INGREDIENTS:

4  my Low Carb Flour Tortillas  (or other brand)

2 T. my chimichurri sauce

1½ c. cooked chicken, chopped, skin removed

1 c. shredded Monterey Jack cheese

DIRECTIONS:  Make the flour tortillas according to that recipe and set aside.  Make your Chimichurri Sauce according to that recipe and set aside.  Chop the chicken meat and place in a mixing bow.  Add the grated cheese and stir.   The chimichurri sauce can either be tossed in with the meat and cheese for more uniform distribution, or dotted on top of the mixture during assembly.

Place 2 tortillas on a lightly buttered griddle.  Top each with half the meat/cheese mixture.  Dot them with the chimichurri sauce if you didn’t already toss it into the meat mixture.   Place another tortilla on top and turn the heat to medium-high on the griddle. As cheese begins to melt, press the quesadillas with a spatula as the first side browns.  This will facilitate the top tortilla bonding with melting cheese, making them easier to flip.  When the first side is browned, carefully flip the quesadilla over and brown the second side, continuing to press with your spatula as it browns. When done, remove to plates or a large platter and with a knife, cut into quarters.  Serve with a tasty guacamole salad.

NUTRITIONAL INFO:  Makes 2 whole quesadillas or 8 wedge piecesI cut mine into quarters.  However my husband and I both found we could only eat 3 of the 4 pieces on our plate.  So I am providing below the values for 1 whole, uncut quesadilla and you will need to calculate the numbers consumed based on how much of the quesadilla you actually eat.

1 whole quesadilla contains:  699 cals, 55.2 g fat, 10.35 g carbs, 3.1 g fiber, 7.25 g NET CARBS, 42.7 g protein, 950 mg sodium

1 wedge (1/4) contains:  175 cals, 13.8 g fat, 2.59 g carbs, 0.76 g fiber, 1.83 g NET CARBS, 10.70 g protein, 238 mg sodium

Indian Meatball Curry

This delicious curry draws  much of its flavor from the dried fenugreek leaves.  I can’t really describe the flavor of fenugreek, other than it is similar to dried parsley with a musty, somewhat earthy taste.  Although it is available in whole seeds and powder, I prefer using the dried leaf form of this spice in curries.  Widely used in Iranian, and Indian cuisine, it is a nice backdrop flavor that adds something special to the other spice profile of this dish.  I order mine on the internet, but if you’re lucky enough to have an Indian or Middle Eastern grocery in your city, they will surely have it.  You can make this recipe without it, but it won’t be quite as unique in flavor, more like a lot of other curries you’ve had before………good, just not AS good.  🙂

I like to make meatballs in big batches and freeze the leftovers for quick, easy meals in the future.  Although this recipe of meatballs makes thirty 1½ meatballs, I only cooked 9 tonight in my gravy and found that 3 (plus 2 large spoons of gravy) made a nice serving over some cooked cauliflower “rice”.  My husband ate 4 meatballs.    The two leftover (with a couple spoons of sauce) will make a nice lunch one day for someone.

MEATBALL INGREDIENTS: Makes 30 (but leftovers are even better!)

24 oz. (1½ lb.) lean ground pork

18 oz. chicken breast (mine was skin on and bone-in, use only 16 oz. meat after boning, skinning)

2 oz. onion, finely minced

1/3 c. cilantro leaves, chopped

½ jalapeno, seeded and minced

2 cloves garlic, minced

2 large eggs

½ sheet Joseph’s Lavash Flax & Oat Fiber flatbread (omit if still on Atkins Induction Phase)

1/8 tsp. sea salt

1 tsp. Garam Masala Spice Blend

½ tsp. curry powder

¼ tsp. ground turmeric

½ tsp. ground cumin

¼ tsp. coarse black pepper

VARIATION:  Use ground beef or lamb for a change in flavor!

CURRY/GRAVY INGREDIENTS:

2 c. homemade chicken broth

¼ c. heavy cream

½ c. tomato sauce (or 2 T. tomato paste)

¼ cilantro leaves, chopped

½-1 tsp. Garam Masala

1 tsp. curry powder

1/8 tsp. ground turmeric

1 T. crushed, dried fenugreek leaves (or 1 tsp. ground seed)

1/3 tsp. nigella seed (optional), also called Charnushka or Kalongi

1/8 tsp. coarse black pepper (or cayenne if you like curry spicy)

½ tsp. sea salt

¼ c. frozen peas (or frozen green beans to lower carbs)

3 Roma plum tomatoes, cut into chunks (added at very last of cooking)

Optional:  1/2 cup coconut milk for richer gravy (adds 1 more net carb than shown below)

DIRECTIONS: Mix all meatball spices in a bowl and set aside a moment.  Wet the bread with water to soften.  Squeeze out water and break/mush it up in a medium mixing bowl.  Add meat(s) and all other meat mixture ingredients to bowl.  Mix with a fork or your hands (like you do meatloaf) until all ingredients are uniformly blended into one mass of meat.  Using your palms, form thirty 1½” meatballs placing them on a non-stick or parchment-lined sheet pan.  I actually skillet browned the nine I was cooking for tonight’s meal.  Pop into 350º oven for about 30 minutes or until lightly browning.  Remove.

While the meatballs are cooking, if you skillet-browned tonight’s meatballs, in that very same skillet, add all listed gravy ingredients (except the tomatoes) and bring to a boil over high heat.  Lower heat to a simmer and simmer for about 20 minutes.  Add the tomatoes and meatballs back into the skillet at this juncture.  Continue simmering about 10 more minutes to reduce liquid and blend flavors.  The gravy will slightly thicken as it cooks down (keep simmering it too watery.  It WILL thicken up).  If you like your curry gravy thicker, add a light dusting of your favorite low-carb thickener and simmer 1-2 minutes to set up. Serve at once with green side, salad or if preferred, a prepared bed of cooked cauliflower rice.

TIP: Freeze the surplus meatballs for future Indian curry recipes.  Just make up any of your favorite curry gravies and drop the still frozen meatballs, simmering all long enough to gently thaw them and compose you new dish!  A quick week-night meal at the ready in about 30 minutes with pre-cooked meatballs!

NUTRITIONAL INFO:   (meat will make 30 meatballs total).  Using just 9 of them for this meal.  3= 1 serving.  Each serving plus 2 large cooking spoons of the curry/gravy will contain:

349 cals, 21.47g fat, 9.93g carbs, 2.08g fiber, 7.85g NET CARBS, 26.55g protein, 670 mg sodium

Indian Chicken Saag (creamed spinach)

I first tasted this delicious chicken dish when a new Indian restaurant opened here in my town. I had eaten Saag many times before, and make it often at home. However we had never seen it served as a combination dish like a curry. Needless to say, we both loved it! It was served with a cup of basmati rice and was enough to serve both of us generously. The chef dipped the saag up over the chicken when it was served, much like a curry, but it was not very attractive served that way, to be quite honest. I could clearly tell the breast meat had been seared first in butter as a bit was peeking out from under his spooned over saag in the pretty copper & brass serving dish. I chose to serve the butter-seared chicken slices on top of the saag for a little nicer photographic effect. I think you Indian food fans are really going to like this one!

This recipe is suitable for most ketogenic diets. Paleo followers will need to sub in coconut milk for the cream and omit the cream cheese entirely. won’t be quite as authentic, but still pretty good, I imagine.

INGREDIENTS:

16 oz. skinless chicken breast, cut into 6 servings

2 T. unsalted butter + 1 T. extra light olive oil

16 oz. frozen chopped spinach

Water to just cover spinach

3 oz. cream cheese

1/3 c. heavy cream

Dash each salt and black pepper

1 tsp. my Garam Masala spice blend

½ tsp. finely minced ginger root

½ c. cilantro, chopped

¼ tsp. onion powder (2 oz. fresh onion if you prefer)

½ large jalapeno, seeded, chopped

DIRECTIONS:

Preheat oven to 350º. Melt butter with oil in large skillet. Sear chicken pieces in pan over high heat for about 5 minutes on a side or until golden as shown. When fully done, remove meat to a paper plate. Drain off all grease but 1 T. Add spinach and water to the same pan. Bring to simmer and cook until done, or about 5 minutes. Pour into a sieve to drain off water. Press with back of spoon to get as much out as possible. Replace spinach in skillet. Add cream cheese and with back of your spoon, press it out to melt it and stir well into spinach. Add all other ingredients and let simmer for about 4-5 minutes. Now it’s time to place the seared pieces of chicken on the top of the bed of saag. Pop into 350º oven for about 10 minutes to allow flavors to blend. Serve at once. I serve mine over steamed cauliflower pressed slightly with a fork. Non now-carbers at table can enjoy over a bed of 3/4 c. basmati rice. This dish pairs nicely with my Mint-Cucumber Salad.

NUTRITIONAL INFO: Makes 6 servings, each contains:

326 cals, 16g fat, 11g carbs, 2g fiber, 9g NET CARBS, 29g protein, 226 mg sodium

Chicken Fried “Rice”

I had 1 c. chopped cauliflower leaves and stems to use up yesterday so I decided to cook something Asian last night. Decided on fried “rice” since I also have a huge head on hand this week. To lower the carbs so I could eat it, I put minimal real rice and mostly cauliflower rice. My husband just will not eat Chinese food on exclusively cauli-rice……….so we compromise. He gets just enough added in so that he can taste the rice. This works for us.

This recipe, as written is not suitable for Atkins Induction Phase due to the rice mixture. Once you get to the starchy grain rung of the OWL Phase, you could enjoy this one. Those on Atkins Induction need to use ALL cauli-rice and skip the wild/white rice completely. Those who have reached Pre-Maintenance or Maintenance can certainly enjoy this as written if the macros will fit into your daily limits.

INGREDIENTS:

2 T. dry sherry

3 T. Kikoman low-sodium soy sauce

1 clove garlic, minced

1 tsp. ginger root, minced

3/4 c. wild & white rice mix (I use Lundgren’s)

2¼ c. water

½ head large cauliflower (6-7″), riced (reserve leaves/stems & reserve)

2 scrambled eggs, cooked, chopped

¼ C. olive oil, extra light (total)

2 c. cooked chicken meat, chopped (I used 1 thigh + 1/3 breast)

1 large carrot, sliced thin or chopped (your preference)

½ medium leek, washed and sliced

1 c. green onion, chopped

½-1 tsp. Sambal Oelek chile sauce

leaves/stems from 1 cauliflower (or Bok Choy or celery)

2 oz. red bell pepper, chopped coarsely

DIRECTIONS: In a small bowl, mix the first 4 ingredients and set aside for now. Add the Sambal Oelek as well for best distribution.

With 1T. of the oil, scramble the eggs in a non-stick skillet (or your wok if it is non-stick or heat is low enough). Remove, chop and set aside or put on paper plate to await their use.

Place rice in saucepan with indicated water above. Bring to boil over HI heat, immediately lower to lowest heat possible, cover with tight-fitting lid that has either paper toweling or thin kitchen towel folded up around the lid to keep it away from the flame/heat source. This absorbs excess steam when cooking rice. Simmer about 30-35 minutes (due to brown/red rice in the mixtures) or per your package’s directions. Peek at 20 minutes to be sure water hasn’t completely cooked away. Add 2-3 T. more if it has all evaporated. When done, remove from heat and set aside. I like to make my rice for fried rice applications in the morning so I can chill it completely in the refrigerator before making the dish for dinner. It just fries up better with less stickiness, when fried cold.

Cut off leaves/stems and slice them thinly. Set aside. Coarsely cut caulifower into 1″ pieces and pulse in a food processor or blender until all is riced. Place in microwaveable dish/bowl and cook on HI a total of 4 minutes, stirring after each minute. Set aside for now.

To put the final dish together, heat a wok on HI heat. Add 2 T. of the oil to wok. Add carrots, cauli stems/leaves (or sub in 1 c. celery or Bok Choy). Stir fry 2 minutes. Add chicken and stir fry about 2 minutes to slightly brown. Add leeks, green onion and red bell pepper next. Cook, stirring constantly for about 1minute. Add remaining oil to prevent pan sticking and the soy sauce mixture now. Stir fry 1 minute. Stir in rice now and blend evenly, cooking about 2 minutes. Then very gently stir in the cauliflower rice and eggs and it’s done. Serve at once.

NUTRITIONAL INFO: Makes six 1½c. servings. Each serving contains:

295 cals, 16 g. fat, 27g carbs, 3 g fiber, 24 g NET CARBS, 16 g protein, 338 mg sodium

Asian Cabbage Salad

001

I love this recipe in the summertime!  So easy to throw together for lunch without heating up the kitchen.  When I have a little leftover cooked chicken or steak, I like to add it to the top of this salad to make it a complete meal.  But this salad is delicious without any meat on top!  🙂 .  This tasty dish can be enjoyed by people on all phases of Atkins and Keto diets.  It is suitable for Primal-Paleo followers as well.

INGREDIENTS:

2 T. lime juice

2 T. rice vinegar

2T. + 2 tsp. sesame oil

1 tsp. hot sesame oil (or ¼ tsp. Sriracha sauce)

3-4 drops liquid sweetener

3 T. low-sodium soy sauce

1 tsp. minced fresh ginger

6 c. shredded Napa cabbage

1 c. chopped fresh cilantro

1 shredded carrot

½ fresh jalapeno, seeded, sliced in small julienne strips

OPTIONAL:  2 T. peanut butter added to dressing (not calculated in below).  Leftover cooked steak (or chicken as shown above). Adding ½ c/ chicken to each serving adds about 150 calories, 9g fat, 18g protein to each serving.

DIRECTIONS:  Whisk first 7 ingredients together in a small bowl for the dressing.  Set aside.  Shred/slice napa cabbage and place in large bowl.  Add grated carrot, cilantro and julienned jalapeno.  Toss well and plate servings.  You can alternately so plate directly in layers on each person’s plate if you prefer (what I in the photo above).  If adding any meat, sprinkle in equal amounts on each serving.  Provide dressing in individual small cups for each person to add as they please.

NUTRITIONAL INFO: Makes 4 servings, each containing approximately:

95 calories, 3.6 g  fat, 2.9 g  protein, 13.5 g  carbs, 5.0 g  fiber, 8.5 g  NET CARBS, 350 mg sodium

Creamy Dreamy Chicken-Broccoli Casserole

I don’t usually like broccoli cooked into casseroles because it invariably gets “overdone” and strong-tasting by the time the dish is fully cooked.  But I think I’ve found a solution to that issue with the method I used to put this sinfully rich, tasty casserole together tonight.  The broccoli went into the mixture raw!  Voilà!…….problem solved.  The broccoli was still quite firm in this final dish and for once, I actually liked this  broccoli casserole!  My husband REALLY liked this and kept dipping up more and more!  I loved it, too!  Guess this one will be a keeper for us. 🙂

I used precooked chicken, but you could dice up your chicken breast and sear in grease if you don’t happen to have any pre-cooked on hand.  This recipe is EASY! PEASY!  Basically you just toss the ingredients together in a bowl,  pour the mixture into a greased casserole dish, top with cheese and bake!

This recipe is not suitable for Atkins Induction unless you omit the wild rice.  Just increase the broccoli by 1 more cup and the dish will taste just fine.  This recipe, because of the small amount of wild rice in it, should not be enjoyed until you reach Pre-Maintenace or Maintenance due to the rice.  This dish is not suitable for a Primal-Paleo regimen.

INGREDIENTS:

2 c. cooked chicken meat, diced large

2 c. broccoli, cut into 1″ pieces

5 oz. cream cheese, softened

3 T. melted butter

½ c. heavy cream

½ c. shredded Parmesan cheese

3 T. mayonnaise (I use homemade)

½ tsp. my Shawarma Spice Blend (or your favorite blend)

3/4 c. chicken broth (I use homemade)

Dash black pepper

1 c. cooked wild rice (you could substitute hemp hearts to lower the carbs)

4 oz. Monterey Jack Cheese, shredded (for topping)

DIRECTIONS:  Preheat oven to 350º.  Lightly oil a 9×13  or large oval casserole dish.  Cut up the broccoli and chicken and place in large mixing bowl.  Add the softened cream cheese and melted butter.  Stir well.  Now add all remaining ingredients except the  Monterey Jack Cheese.  Stir well to blend and pour into the greased baking dish.  Sprinkle the Jack cheese on top and bake at 350º for 45 minutes to 1 hour.  I served with a nice green salad and some garlic toast made with my favorite Gluten-Free Focaccia Bread.

NUTRITIONAL INFO:   Makes 6 servings, each contains:

485 cals, 39 g fat, 9.70 g carbs, 1.3 g fiber, 8.4 g NET CARBS, 25 g protein, 254 mg potassium, 597 mg sodium

Roasted Shawarma Chicken and Vegetables

Roasted Shawarma Chicken and Vegetables

I have made these Roasted Shawarma Vegetables before as a side dish, but not until I added chicken to the mix had I found a wonderful meal in a pan!  Good decision!  This meal that virtually cooks itself is so delicious!  I saved out 1 chicken breast from this whole chicken to use for something else this week but cooked all the remaining pieces.  If you omit the chicken, this vegetable dish is a marvelous side with grilled steak and chicken!  This recipe is suitable for all phases of Atkins, Keto diets, Primal and Paleo as well.  So ENJOY everybody!

INGREDIENTS:

¼ c. extra virgin olive oil

1 whole chicken, cut up (minus 1 of the breasts reserved for another use)

10 cloves garlic, peeled

1 medium zucchini, sliced thick

1 yellow squash, sliced thick

8 oz. Japanese eggplant, cubed or sliced thick (I don’t peel it)

1 2 3/4″ tomato, cut into wedges

3 oz. onion, sliced (I used red onion)

1 tsp. my Shawarma Spice Blend

DIRECTIONS:  Preheat oven to 350º.  I used my convection settting to speed mine up a bit.  Oil a large metal baking pan with some of the olive oil.  Lay the chicken pieces evenly in the pan (I cut my chicken breast into 2 pieces, as they tend to be large nowadays).  Next add the sliced vegetables evenly around the pieces of chicken. Sprinkle on the Shawarma spice Blend and last of all, place the garlic (whole) around the pan, cutting larger cloves in half.  Pop into 350º oven.  If using convection roast, it will take about 35-40 minutes, or until chicken reads 170º on your meat thermometer.  If using standard oven, it will probably take a full hour, perhaps a bit longer if your chicken is big or you cut your vegetables larger than shown in my photo.  I like to baste the chicken and veggies with pan juices mid-cooking.  🙂  Serve with a nice green salad.   This is delightful with nutty-tasting basmati rice for your non-low-carbing dinner guests.  🙂  I don’t eat anything with mine.

NUTRITIONAL INFO:    Makes around 6 servings, each contains:

384 cals, 25 g fat, 8.08 g carbs, 2.56 g fiber, 5.52 g NET CARBS, 32 g protein, 457 mg sodium

Chicken Bolognese

This dish is very easy to prepare (provided you have the spaghetti meat sauce on hand) and quite tasty!  It can either be served as shown above, or place the chicken on a bed of zucchini or shirataki tofu noodles and spoon the sauce on top of the chicken.  This extremely nutritious dinner is suitable for your Atkins Phase I Induction menu rotations provided you omit the bit of red wine. Each serving consists of 5 oz. raw chicken breast, which cooks down to about 4.5 oz.  Of course, you may choose to use larger portions of chicken, and I did for my husband, but the 4 oz. portion filled me up quite nicely.

INGREDIENTS: 

20 oz. deboned chicken breast, skinless (4 oz. per serving after cooking)

1 c. low-carb spaghetti meat sauce (I used spaghetti meat sauce)

4 basil leaves, chopped

4 oz. shredded mozzarella cheese

½ c. grated Parmesan cheese

1 oz. (2 T.) red wine (omit for Induction compliance)

2 T. olive oil

DIRECTIONS:  Preheat oven to 350º.  Pound the chicken breasts with a meat cleaver between two sheets of plastic wrap until they are just about ¼-3/8″ thick.  Heat the olive oil in a non-stick skillet and sear the chicken on both sides until golden and nearly done.  Turn off heat.  Spoon ¼ c. meat sauce over each of the four pieces of browned chicken.  Next drizzle ½ T. red wine over each serving.   Next sprinkle ¼ of the chopped basil on each piece, followed by 1 oz. of mozzarella on each.  Finally sprinkle the top of each portion with 2 T. Parmesan.    Pop that skillet into your preheated 350º oven.  Bake 20 minutes to finish off.  Serve with your favorite green vegetable or a nice green salad.  If I have some Oopsie Rolls in the fridge, I love to make some low-carb garlic bread to serve with this.

NUTRITIONAL INFO:   Makes 4 servings, each contains:

475 calories, 28.4 g  fat, 6.4 g  carbs, 1.3 g  fiber, 5.1 g NET CARBS, 45.7 g  protein, 702 mg sodium

Chicken Sofrito

Click to enlarge

This delightful dish, which uses sofrito, a Puerto Rican/Spanish  condiment, goes together in about 30 minutes start to finish if your sofrito mixture is already made up.  My kind of dinner!  Just sear the chicken, the bacon, layer it all and pop in the oven for 15-20 minutes.  Very easy; very tasty!  This dish is not suitable for Paleo due to the cheese.  This is acceptable for all phases of Atkins and Keto diets.

INGREDIENTS:

2   5-oz. boneless, skinless chicken breasts

1 tsp. olive oil

1 tsp. butter

2 slices bacon, chopped (I used thick slices)

2 oz. Monterrey Jack Cheese, grated

2 T.  sofrito

DIRECTIONS:  Preheat oven to 350º.  Slice breasts laterally not quite cutting in two.  Lay them out flat and pound a bit with a meat cleaver or rolling pin so they are thinner, to speed up cooking. Heat olive oil and butter in a skillet over high heat. Sear meat on both sides.  When nearly done, push chicken to the side of the skillet and add chopped bacon.  Let it brown, stirring as it cooks.  When both are fully done, turn off heat.  Carefully place evenly 1 oz. cheese on each breast.  Top each evenly with half the bacon.  Finally, evenly dot 1 T. prepared sofrito on top of each serving. Pop skillet into preheated oven for about 20 minutes or until cheese is melted.    Serve with a nice guacamole salad or sides of your choice.

NUTRITIONAL INFO:  Makes 2 servings, each contains:

367 cals, 23.5 g fat, 1.15 g carbs, 0.25 g fiber, 0.9 g NET CARBS, 36 g protein, 770 mg sodium

Chicken à la King

002

This dish comes together amazingly fast and is very easy.  And it’s DELICIOUS!  Because of the slightly higher carbs of carrots and peas, this is not really Induction friendly or Keto friendly as written.   However, if you substitute cut green beans for the peas, use a little less of the condensed soup and add a bit more broth/water, you could fit it into Induction and a Keto program.  This recipe is not suitable for Primal-Paleo.

More delicious low-carb recipes can be at your fingertips with your very own set of Jennifer Eloff and friends’ best-selling cookbooks LOW CARBING AMONG FRIENDS.  She has collaborated with a number of low-carb cooks to bring you a wealth of delicious recipes you are going to want to try.  Even a few of my recipes are in her cookbooks! Order your books TODAY! (available individually or as a set) from Amazon or: http://amongfriends.us/order.php

INGREDIENTS: 

1 large chicken breast (8-10 oz.) (or chopped white turkey meat)

1 T. butter, unsalted

2 oz. frozen peas

2 oz. carrot, chopped

5 oz. daikon radish, chopped

1 oz. red bell pepper, chopped

1 oz. green bell pepper, chopped

1 oz. onion, chopped

Dash black pepper

½ recipe my low-carb Condensed Cream of Chicken Soup

DIRECTIONS:  Cut up the vegetables and simmer in boiling water until just tender.  While they are cooking, skin the chicken and remove from bone with a sharp knife. Slice the chicken into 3 lateral slices for 3 equal portions.  Pound with meat tenderizing tool without tearing them apart.  Sear the chicken until nicely browned on both sides.

When veggies are tender (in about 10-15 minutes), strain off water.  Stir in the condensed soup and toss gently with a spoon.  If too thick, add a bit of water of chicken broth to thin.  Plate the chicken “filets” and spoon the sauce over them. Serve at once with a lovely green salad.

An alternate method of cooking and serving is to cut up the chicken into bite-sized pieces and saute that way and add it right into the creamed veggie mixture.   Then serve over toasted low-carb bread of some sort. Be sure to calculate the bread into the numbers below if you serve it that way, which is traditional for Chicken à la King.

NUTRITIONAL INFO:  Makes 3 servings, each contains (varies with size of chicken breast):

437 calories, 27 g  fat, 10.9 g  carbs, 2.8 g  fiber, 8.1 g  NET CARBS, 25.6 g  protein, 917 mg sodium

Chicken Brussels Sprouts Casserole

Click to enlarge

The dish was literally a toss-in-a-little-of-this-and-a-little-of-that creation.  As is often the case, sometimes those dishes come out tasting quite good.  This one has proven to be extremely popular amongst my Facebook fans.  My husband ate seconds, which is always a good indicator, so I thought I’d share this one with you since I plan to fix it this evening for dinner.  Although quinoa is technically a seed, this recipe is not suitable until you reach the higher-carb grains rung of the Atkins carb ladder (Phase 2 OWL).

You may find this dish a bit carby for your nutrition program, but all the carbs are pretty much coming from the Brussels sprouts and quinoa.  But quinoa is a super food (just take note of the nutritional stats below!)I like to include in my diet once in awhile.  If you are still on Induction or wish just to lower the carb count, you could omit the quinoa altogether, or substitute in rice-shaped shiratake ‘noodles’.  🙂  Hemp hearts are a good low-carb substitution for the quinoa also, but those are still not suitable for Induction.  Sorry.

INGREDIENTS:

1 c. homemade chicken broth

¼ c. quinoa (substitute hemp hearts for much lower carb count)

10 oz. chicken breast, deboned, skin removed, cut in small pieces

4 slices bacon, chopped

2 T. butter

1 c. celery, chopped

2½ oz. onion, chopped

1/2 recipe Jennifer Eloff’s low-carb Condensed Cream of Mushroom Soup

¼ c. heavy cream

Dash each salt and black pepper

3 oz. Smoked Gouda cheese, shredded  (or cheese of your choice)

5 oz. frozen Brussels sprouts, cut into quarters lengthwise (do not precook)

DIRECTIONS:    Preheat the oven to 350º.  First, prepare the mushroom soup, set ½ the mixture into a medium bowl for inclusion in this recipe.  Store the remaining soup in the refrigerator for another use.  Bring chicken broth to a boil in a medium saucepan, add the quinoa and simmer covered for about 5-10 minutes while you prepare the other ingredients.  In a large skillet, fry the bacon until done.  Add the butter, celery, onion, salt and pepper and saute until the vegetables are getting tender.    Add the pieces of chicken next and sautée until no longer pink. Lower the heat and add the soup mix and cream.  Stir well.  Next add the shredded Gouda and Brussels sprouts.  Turn off heat and stir gently.  Add in the quinoa and remaining broth (or steamed cauliflower if substituting).  Toss the mixture well with a spoon.  Pop into a preheated 350º oven and bake for 30-40 minutes or until hot and bubbly.  Serve at once.

NUTRITIONAL INFO:   Makes 4 servings, each contains:

468 cals, 33g fat, 15.27g carbs, 2.9g fiber, 12.37g NET CARBS, 25.8g protein, 880 mg sodium

Momma’s Baked Chicken

Momma's Baked Chicken

This was the baked chicken I was raised on.  Throughout my childhood, I disliked intensely the sour taste of vinegar.  Wouldn’t eat pickles, wouldn’t eat pickled vegetables, wouldn’t eat salads or even condiments that contained vinegar.  But man, when my mom made this baked chicken, I just could not believe I watched her douse it with such an “evil” ingredient and LIKED IT!!!  The natural red grape sugar in the red wine vinegar caramelizes under high heat and gives the chicken skin such a sweet, tangy taste.  The pan juices make a lovely gravy/baste for the drier breast meat.   Fortunately, my taste has changed over the years and I will now consume vinegar without hesitation, provided the food isn’t drowning in vinegar.  🙂

This recipe can be used on a split/butterflied/spatchcocked chicken as pictured, or you and cut the chicken up into pieces.  This method is delicious on Rock Cornish Hens, too.  It is also excellent for BBQ’ing of the chicken, and even for BBQ pork.  This recipe is perfectly suited to all phases of Atkins, Keto diets, Primal and Paleo as well.

SAUCE INGREDIENTS:

6 T.  melted butter

3 T. red wine vinegar

1/4 tsp. salt (omit if using salted butter)

1/4 tsp. coarse black pepper

THAT’S IT!!

DIRECTIONS:  Preheat oven to 400º.  Place butter in baking pan (I use a metal pan) as the oven is heating up.  Remove pan and add red wine vinegar to the butter, as well as the salt and pepper.  Prepare the chicken.  You can either split the chicken up the back with kitchen shears and spread it out as shown above, or cut the bird up into quarters or single pieces.  Using a brush, baste the pieces of chicken all over.  Sprinkle lightly with the salt and pepper and pop into hot oven for about an hour (less time for smaller birds, a little more for the butterflied bird shown) or until golden brown and reaches internal temp of 170º at the joint where the thigh meets the torso and in the thickest part of the breast.  I like to baste the chicken once or twice during cooking for the tastiest result on the skin.  I’m a skin fan, so that’s real important to me.  My husband just rips it off and hands it to me.  That works out just great, huh?  🙂 Remove from oven and serve at once with your favorite sides.  Be sure to put a spoon or brush into the pan for diners to baste their meat with the buttery juices if they wish (or pour the juices into a gravy boat).

NUTRITIONAL INFO:  These numbers are for the baste/sauce only.  You will have to add in the values for whatever pieces of chicken you eat.  Makes enough for 10 pieces of chicken (1 whole l cut-up chicken).  Each portion of the sauce, assuming you even eat that much of the sauce, has:

62 calories, 6.9 g fat, 0.02 g carbs,  0.00 g fiber, .02 g NET CARBS, 0.13 g protein (add in your piece of chicken)

Spicy Boursin Chicken

Click to enlarge

A little Boursin cheese (also known as Gournay), salsa and the right spices mixed with chicken (or fish) creates a wonderful combo.  We both really liked this new creation!  This dish is quite rich, so one bundle is all I could eat. This recipe is quite suitable for Induction.  Calories can be reduced doing this with fish filets rather than chicken.  This dish freezes well, too!

INGREDIENTS:

16 oz. boneless, skinless chicken breasts, cut into six portions (or mild fish filets)

12 oz. frozen chopped spinach

3 oz. red bell pepper, finely chopped

3 T. Herdez canned “hot” red salsa, drained solids only (drained RoTel will also work)

5 oz. package Boursin Cheese with garlic and herbs

¼ tsp. my Seafood Spice Blend:  https://buttoni.wordpress.com/2009/08/20/my-seafood-spice-blend/

Dash black pepper

Available in the specialty cheese bin at Walmart and other grocery stores.

3 T. melted butter

DIRECTIONS: Preheat oven to 350º.  Defrost and squeeze the frozen spinach to remove water and set aside, allowing it to continue draining in a colander or sieve while you prepare the chicken.  Diagonally slice the chicken into 6 thin filets.  Place plastic wrap on top and pound chicken quite thin (without tearing apart) using a mallet.   Now place the spinach in a mixing bowl and add in the Boursin cheese, bell pepper, salsa and black pepper.   Stir well to blend ingredients.  Spoon evenly onto the center of the 6 flattened pieces of chicken and fold the meat over the top.  Place seam side down in baking dish.  Sprinkle well with the spice blend and with a brush, baste each bundle with melted butter.  Pop into hot oven and bake for 30-35 minutes or until meat is golden brown (fish will cook faster, say in about 20 minutes). Spinach/cheese mixture will spill out of the bundles, but not in a messy way, as you can see in the pic above.

NUTRITIONAL INFO: Makes 6 servings, each contains:

323 cals, 27.3 g fat, 4.48 g carbs, 2.05 g fiber, 2.43 g NET CARBS, 26.5 g protein, 580 mg sodium

Lebanese Baked Chicken (Frarej)

Lebanese Baked Chicken

This recipe has been one of my most popular Middle Eastern recipes therefore I would be remiss in not including it in our adventure through my Middle Eastern recipes.  It has garnered millions of Facebook fans where I once maintained a presence, during those years I was on the Low Carbing Among Friends team.  I no longer maintain a Facebook page or presence. 

Our dear friends in Dallas have taken us several times to a wonderful little Lebanese restaurant over in Ft. Worth named Hedary’s.  Family-operated for many years by a Lebanese family.  I can say their tabouleh  salad and kebabs are the best I’ve ever eaten.  So is their slow-roasted baked lemon chicken known as Frarej.  For those tables positioned close enough to do so, they used to serve their fresh-baked Lebanese bread all the way from behind the counter on long, paddled poles used to place them into and out of the ovens for cooking.   Don’t know if they still do that, but is sure was fun to watch!  Next time you’re in Ft. Worth, give Hedary’s a try! 

In the meantime…………………..experience their delicious baked chicken at home!  This Induction friendly version of their ever-popular lemony chicken dish is slightly changed, but just as yummy nonetheless.  The original dish has potato wedges, so I always substitute rutabaga or turnip wedges to keep the carbs reasonably low.  I did not include the root vegetables in the nutritional info below as I don’t always include them in the pan.  I tend to vary the vegetables I use based on what I have on hand.  So be sure to calculate the veggies you add (and consume) over and above what I consider to be the base recipe of onion, garlic and tomatoes.  If you have family that are not on Atkins, I would definitely use a few wedges of potato for those folks, as they soak up those tasty pan juices like a sponge and are sooooooo tasty.

My rendition is very close to the inspirational dish from Hedary’s, though the tomatoes are my personal addition.  I must confess, mine is good, but not QUITE as it is at Hedary’s.  Sigh.  I understand Hedary’s has left the original location and moved farther out in Ft. Worth somewhere.   This meal is easy to prepare and the oven basically does the work for you!  Gives a whole new meaning to Ron Popeel’s expression “Set it & forget it.” for a sheer heavenly, delicious dinner almost effortlessly.  🙂  Please follow directions closely as they are KEY to getting the best results.

INGREDIENTS:

4 T. olive oil

1 whole chicken cut into 8 pieces, cutting breast in half (Do not remove skin or you will ruin this dish)

4 oz. onion cut into wedges (separate layers)

2 Roma tomatoes cut into wedges

6-10 cloves garlic, (leave half of them whole, mince the rest)

½ tsp. oregano

Juice of 1 lemon

Dash salt and pepper

OPTIONAL: Original dish had potato wedges and whole carrots roasted in the pan with the chicken.  The carrots are OK  but I’d substitute in pieces of rutabaga, turnip or daikon radish for the potato wedges to keep carbs down.

DIRECTIONS:  Preheat oven to 500º.  Cut up chicken into separate pieces making 8 pieces in all.   I never use the back as I simmer that for broth to freeze for other purposes or it becomes dinner for my dogs.  🙂  Drizzle 1 T. of the olive oil on the bottom of a very large METAL baking/roasting pan (I use a 12 x 15 stainless steel metal pan).    If you don’t yet have a really large, good quality stainless steel roasting pan, I think it is one of the single most important investments you can make in your kitchen tools.  Place chicken skin side up  in the pan.  You don’t want any overlapping or crowding.  Do not use a glass/ceramic baking dish.  It can break at the very high temperature called for in this recipe.

Crowding of this chicken and the veggies in the pan will result in deeper pan juices.  Deeper juices keeps chicken from crisping of the chicken, so use a really large pan.  Place tomato wedges around and in between chicken pieces.  Do the same with the onion pieces and add the garlic.  If using the root vegetables, cut them up and place them evenly around the chicken.  Squeeze the lemon over everything in the pan.  Drizzle remaining olive oil over the pan contents as well.   Lightly sprinkle some oregano or Greek seasoning over all (about 1/4-½ tsp, I don’t measure it).   Bake 30 minutes at 500º.  Baste with pan juices, lower heat to 350º and bake another 20 minutes or to internal temperature of 170º on a meat thermometer.   Baste with pan juices just before serving.  I like to place the juices in a gravy boat and have it on the table for basting the drier breast meat while eating.  If there are any juices leftover after the meal, I always freeze them and add them to the bottom of the next pan I make of this recipe (which is often!).  Each successive pan is therefore better than the last!  I like to serve this chicken dish with my Cucumber Mint Salad or my Tabouleh salad

NUTRITIONAL INFO: (does NOT include the optional vegetables).
Please note, these numbers are only approximate, because the actual counts will vary depending on which pieces of chicken and which roasted veggies you consume.

Serves 4, each 2-piece serving contains: (these numbers do not include the carrots or rutabaga)

447 cals, 30.4 g fat, 7.98 g carbs, 1.1 g fiber, 6.88 g NET CARBS, 34.8 g protein, 39 mg. sodium

Chicken Florentine

We ate out at a favorite Italian restaurant here in town last night with friends.  I ordered Chicken Florentine expecting something similar to the recipe shown above, although I knew presentation and construction (with pasta) might be different.  Well long story short,  I’ll be sticking to my recipe.  His was way to salty and had waaay too much garlic in it.  He also uses that jarred garlic, which I really think is awful.  His entire recipe, chicken strips and creamed spinach/mushrooms were all mixed together and served over pasta.  I didn’t eat the pasta.  Mine is ever so much better.

This recipe, over time, has become one of the most popular recipes on my website so I tought I’d share it with you since last night’s adventure brought it to mind!  Sometimes we food bloggers get so wrapped up in creating new dishes, we can easily get lost on that ride and forget some of our old favorites and need reminding of that ‘blindness’.

This recipe takes a mere 20-30 minutes to pull together.  It’s amazingly tasty and worth every one of those minutes.  So attractive on the platter, too!  And better yet, it’s Induction friendly!  The creamy spinach-mushroom topping compliments the seared chicken so nicely and is also good on seared salmon!  If in Atkins OWL Phase 2, adding 2 T. white wine to the spinach mixture is very, very good!  🙂

INGREDIENTS:

around 28 oz. raw chicken breast, deboned and skinned

1 T. unsalted butter

½ lb. fresh mushrooms sliced thick

1 clove minced garlic

Pinch salt and pepper

6 oz. fresh spinach (3-4 oz. if using frozen)

1/3 c. heavy cream

1/4 c. chicken broth

3 T. grated Parmesan

2 T. white wine (optional)

Pinch xanthan gum (if needed to thicken)

DIRECTIONS:  If using frozen spinach, cook in water as directed on package in a saucepan and drain well.  Set aside.  Now slice each chicken breast diagonally into 3-4 thinner slices to speed up cooking.  Melt butter in non-stick skillet and sauté the chicken slices or “filets”, as I call them,  until lightly browned and thoroughly cooked (medium-high heat).  This won’t take long at all, which is precisely why I like to slice them.  Remove chicken to serving platter.  Add mushrooms to the same skillet and sauté until done.   Add fresh spinach and garlic.   Sauté until spinach is wilted.  Lower heat and add cream, broth, wine and cheese to spinach/mushroom mixture in skillet.  Add pinch of salt and pepper.  Lightly dust with xanthan gum 2-3 times, stirring between each addition to slightly thicken sauce.   Pour sauce over chicken.  Garnish with a sprinkle of parsley if desired.

NUTRITIONAL INFO: Makes 4 servings each with:

436 cals., 23 g fat, 6.8 g carbs, 2 g fiber, 4.8 g NET CARBS, 49 g protein, 200 mg sodium

Moroccan Chicken and Olives

I absolutely love olives but tend to think of them as a food eaten separately, or atop salads.  However every time I adventure out and put them into meat dishes I’m always amazed at what they bring to the final dish.  This was yet another example of a tasty surprise for me.  Since they have a lot of olive trees on the shores of the Mediterranean, they do tend to use them in a variety of ways.  

The Baharat spice blend I chose for this dish is also prevalent in this region.  So I put 2 and 2 together and voilà, a dish to remember!  If you haven’t tried it yet, I think you’ll like this spice on chicken.  I highly encourage you to give this blend a try sometime, even if not on this particular dish.    It was incredible on the chicken tonight and it’s great on baked or grilled fish.  The cinnamon and cloves come through the most, but the other spices in the blend have a subtle flavor presence as well.  The spice here is the key flavor ingredient here so I would not encourage substitutions or you will be creating a totally different dish.   This meal is suitable for Atkins Induction, Keto diets, and Primal-Paleo lifestyles as well.  Be sure to use a good quality extra-virgin olive oil for this recipe.  

INGREDIENTS:

3 medium chicken thighs

3 medium chicken drumsticks

3 T. extra virgin olive oil

2 cloves garlic, minced

1 tsp. my Baharat Spice Blend  (the key flavor, so don’t substitute)

4 oz. purple onion, sliced lengthwise

3 plum tomatoes, each cut into 4 wedges

24 medium black olives

Dash each salt and pepper

VARIATION:   Substitute my Moroccan Spice Blend for the Baharat Spice mentioned in the ingredients.  Makes a slightly spicier final dish.  🙂  

DIRECTIONS:  Preheat oven to 425º.  Place olive oil, Baharat spice and minced garlic in a pan large enough to hold your chicken without any crowding.  Stir it well.  Take each piece of chicken and dip each side into the oil mixture.  Rub or baste each piece all over well.  Evenly space the pieces skin-side up in the pan.  Cut the tomatoes into wedges and space them evenly around the chicken in the pan, trying not to cover the pieces of chicken.  If covered, the juice from the tomato will inhibit browning of the skin.

Next place the olives evenly around the chicken pieces.   Lastly, separate the slivers of onion and spread them all around the chicken.  Dip a basting brush into the olive oil mixture and baste the olives and vegetables with the oil (add more oil if needed).  Lightly sprinkle with the salt and pepper.  Pop into a preheated hot 425º oven and bake for about 1 hour, re-basting at 30 minutes cooking time to be sure the vegetables don’t dry out.   I served this with buttered, steamed asparagus.  It would also be good with a Greek salad.

NUTRITIONAL INFO:   Makes 3 adult servings (serving = 1 drumstick + 1 thigh).  Each serving contains:

438 cals, 32g fat, 8.26g carbs, 2.26g fiber, 6g NET CARBS, 29.8g protein, 742 mg sodium

Oven-Fried Chicken (KFC style)

photocat

This Induction friendly recipe is one of the many low-carb ways I like to bake chicken now. I haven’t made this in ages and plan on doing so tonight.  This recipe reminds me a little of the KFC Chicken “original recipe” with all the herbs and spices.  Cooking chicken in crushed pork rinds is actually not that unique in the low-carb community.  But I wanted to re-post it for those NEW to my site.  The flavor of this chicken coating changes depending on what spices you use.  For those not so fond of pork rinds, the Parmesan and spices are pretty much in the “driver’s seat” flavor-wise in this dish.  🙂

INGREDIENTS:

3 chicken thighs

3 chicken drumsticks

1/4 c. unsalted butter (or you can use homemade mayonnaise)

½ c. grated Parmesan cheese

2 T. Ranch dressing powder, my Ranch Dressing Powder Blend recipe, an on-line KCF spice recipe, or my Seafood Spice Blend

2 T. parsley, chopped very fine

1/8 tsp. black pepper

¼ c. finely crushed plain pork rinds

DIRECTIONS: Preheat oven to 350º. Melt butter in microwaveable bowl.  In a separate container, mix all dry ingredients.  Dip each piece of chicken into butter, rolling to completely cover.  Then roll in the dry coating mix to cover on all sides.  Place directly on metal baking pan or on foil covered baking sheet.  DO NOT USE A SILICONE SHEET OR IT WILL INHIBIT BROWNING AND CRISPNESS.  Bake at 350º for 1 hour.  If exceptionally large thighs, check for doneness with a knife, right next to the bone.  Add more cooking time if needed.  Serve at once with your favorite side dishes.

NUTRITIONAL INFO: Makes 3 servings, each contains:

579 cals, 40.7g fat, 1.4g carbs, 0.07g fiber, 1.33g NET CARBS, 47g protein, 500-1000 mg sodium (depending on spice blend sodium level)

Chicken Scallopini

This is a recipe I’ve been cooking for many years now.  It’s truly Atkins OWL friendly without a single modification.  It’s rich, but I love this one every once in awhile.  Vermouth has a distinctive flavor, but if you don’t have it, you could use an equal amount of dry white wine instead.  This will, however, greatly impact the final flavor.  This is real easy to put together yet it really delivers on flavor!  If you omit the vermouth/wine, this is suitable during Induction.

INGREDIENTS:

4  4-oz skinless, boneless pieces chicken breast

1 ½ T. olive oil

8 oz. mushrooms, cleaned and sliced

¼ c. chopped parsley

½ tsp. dried tarragon

1/3 c. heavy cream

3 T. dry vermouth or white wine (omit if on Induction)

Dash Salt & Pepper to taste

DIRECTIONS:  Pound chicken breasts between two pieces waxed paper until flattened to about ¼” thickness.  Lightly salt and pepper.  In a large non-stick skillet, heat 1 T. of the oil and sear chicken until lightly browned on both sides.  Just cook until done (no pink juice exuding).   Remove to a platter and cover with plate or foil to keep warm.

Add remaining olive oil to skillet and saute mushrooms, stirring occasionally  until lightly browned and done, about 5 minutes.  Lower heat and add vermouth, cream, tarragon, parsley and deglaze any brown bits off bottom of pan.  Pour mushroom cream sauce over chicken.  Decorate with a sprig of parsley or a sprinkle of chopped parsley.

NUTRITIONAL INFO: Serves 4, each serving containing:

368 cals, 21.43 g fat, 4.25 g carbs, 1 g fiber, 3.25g NET CARBS, 36.88 g protein, 39 mg sodium

Indian Cashew Chicken Curry

Cachew Chicken Curry

This curry recipe is quite unique in flavor from any others I’ve tested.  The fenugreek is what makes the difference.  If you’re a curry fan, you will want to give this delicious recipe a try.   I have had my jar of fenugreek for some time.  I actually bought it for Iranian cuisine, which uses fenugreek often.  I had this thought of using it in an Indian dish and WOW!  Great decision!   This was a delicious surprise!

An added note:  despite the pepper(s) in this, the final dish is NOT too spicy.  As always, I don’t like food too spicy and you won’t find such on my blog.  Something about cooking Indian recipes seems to tone down jalapeno and cayenne in the final dish.  Not sure why, it just does.  This recipe is suitable for Phase 2 of Atkins and beyond, and Keto diets as well.  Omit cashews or use almonds for Atkins Induction folks.

INGREDIENTS:

2 T. coconut oil (or butter)

16 oz. chicken breast, boned, skin removed, cut into big chunks

4 oz. onion, sliced

1 jalapeno, seeded and slivered (will not be hot in the final dish)

2 cloves garlic, minced

1/2 tsp. black pepper (a key flavor in this recipe yet too too hot)

1/8 tsp. cayenne pepper (final dish was NOT hot)

1 tsp. fenugreek seed, ground

Dash salt

¼ tsp. my Garam Masala

Dash turmeric (1-2 shakes from a shaker)

3/4 c. heavy cream

½ c. chicken broth

2 oz. cashew nuts (raw or roasted is OK)

3 Roma tomatoes, cut in chunks

1/8 tsp. xanthan gum (optional, if you want it thicker)

Garnish with a sprig of cilantro if you like

DIRECTIONS:   Melt coconut oil over high heat in a non-stick wok or skillet.  Add chicken and saute to brown on all sides.  Add onion and saute until it, too, begins to brown.  Add slivered jalapeno and garlic.  Add all spices, cream and chicken broth, nuts and tomatoes.  Lower heat to LOW and simmer for about 10-15 minutes or until flavors have had a chance to meld.  Serve alone or over steamed cauliflower rice.  For those not low-carbing at your table, I would offer a bowl of steamed basmati rice.

NUTRITIONAL INFO:    Makes 5 servings, each contains:  (does not include cauli-rice or basmati rice)

353 cals, 19 g fat, 9.4 g carbs, 1.48 g fiber, 8.92 g NET CARBS, 34.4 g protein, 457 mg sodium

Montreal Baked Chicken

Montreal Baked ChickenThis Induction friendly recipe is super easy…..super good!  It has been one of the more popular posts on my blog.  The secret to the crisp skin is to bake at high heat to start, then lower.  This recipe is Induction friendly and I’m proud to say is also appears in Jennifer Eloff’s Low Carbing Among Friends, Vol. 2.  This cookbook series (Vols. 6 & 7) is a wonderful collection of original recipes by some of the most talented low-carb cooks on the net!  Whether you’re a sweet person or a savory fan (like me) you’ll want to grab a set of these cookbooks at Amazon or here to add to your low-carb kitchen arsenal.  This recipe is also suitable for Keto followers, Primal and Paleo as well.  🙂

VARIATION:  A pinch of garlic powder and 1-2 T. Parmesan added to this is very good!

INGREDIENTS:

1 whole chicken cut up (I pull out the back, neck and fat to make chicken stock)

1 recipe my Montreal BBQ Sauce

DIRECTIONS:   Cut up the chicken (I cut breasts in half, remove back, making 10 pieces) and place pieces in a zipper plastic gallon bag.  Mix up the marinade and add to bag.  Manipulate well with your hands and place in refrigerator for 1 hour.  When ready to cook Preheat oven to 475º.  Place pieces of chicken on metal baking pan large enough the pieces don’t overlap, for best browning.  Bake for 30 minutes.  Remove and baste with juices in the pan.  Lower heat to 350º and continue baking for 20-30 minutes.  Time will vary due to size of chicken pieces and ovens vary.

NUTRITIONAL INFO:    Makes 10 meaty pieces or 5 servings.  It would be impossible for me to calculate the exact figures for a serving because that depends upon the pieces of chicken eaten.  But to give you a rough idea, each 2-piece serving will have somewhere in the neighborhood of 393 calories, 28 g  fat, .26 g carbs, .1 g fiber, .16 g net carbs, 33.12 g  protein, 642 mg sodium.  Basically, take the nutritional info for the particular piece of chicken and add in the nutritional info for 1T. of the sauce (.16 net carbs) shown on that recipe.

Turkey Day Feast

CLICK THE LINKS UNDER EACH PHOTO TO SEE RECIPES:

I’m fond of turkey roasted in my roaster oven as they always come out so moist cooked that way.   This year I actually found a small (10#) bird so we won’t have so much leftover (we are but two).  Roaster ovens are especially nice for extra oven space needed holiday gatherings and your oven is full to the brim.  This year my double wall oven died (it’s been giving me signals for over a year now) and my new one is on order, but it won’t be installed until Dec. 9th.  Needless to say this happening just now isn’t the best timing, so my Thanksgiving meal will be much simpler, with as much made ahead as possible.  My roaster oven will be a true blessing for getting the bird and stuffing cooked in time.

What turkey would be complete without a good batch of stuffing?  This recipe, modified to be low-carb, has been in my family for years.  I think you’ll like it.  I like to bake my dressing separately from the bird as I like the crusty bits on top:

Although we debate on what side dishes we want to have “this year” with the two basics above, we keep coming back to these two recipes:

And of course, there must be a sweet, tangy cranberry sauce to top things off.  And why not spike it a bit?:

To top it all off, a lovely dinner roll is in order for the holiday table:

That just brings us to the pièce de résistance, dessert.  Oh, the dilemma!  I usually decide on light rather than rich and heavy dessert as most folks are stuffed to the brim before dessert.  Although pumpkin pie is typical at my house, I think I’ll be doing a sweet potato pie instead this year.  I just substitute an equal amount of cooked sweet potatoes (mashed) in my regular pumpkin recipe.  This year I’m making a large pie and several small ones to save for later in the the holiday season.  A person can never have pumpkin/sweet potato pie too often in my book.  🙂

At a time to be thankful for family, friends and good food to share with them, I can’t imagine a more bountiful meal to serve.  May all my readers be blessed with a lovely holiday get together this year.

Smoked Chicken-Broccoli Casserole

Smoked Chicken-Broccoli CasseroleThis recipe came about from a huge chicken breast we smoked on the grill last week that was not eaten.  This casserole is a perfect meld of flavors that is sure to please.  It is edibly rich and delicious.  My husband rants about this one when I make it.  The smoke flavor of the meat is what makes it so tasty!  This recipe is suitable for all phases of Atkins and Keto diets if you can fit it into your daily macro limits.  You can lower the nutritional numbers below by stretching this to 5 servings or reducing the heavy cream, the cream cheese but bear in mind the final dish will be somewhat “thicker” on the fork.

INGREDIENTS:

1 large grilled chicken breast, chopped (mine yielded 2½ c.)

1 stalk broccoli, stem removed, cut into small flowerets

2 T. butter, unsalted

2 oz. onion, slivered thinly

6 large mushrooms, sliced

8 oz. cream cheese

2/3 c. heavy cream

¼ c. hemp hearts (optional)

1 c. shredded Parmesan cheese

Dash coarse black pepper

DIRECTIONS:   Preheat oven to 350º.  Melt butter in skillet and saute onion & mushrooms until translucent.  While it is cooking, cut up the chicken into bite-size pieces.  Add the broccoli to the pan and saute for just 1-2 minutes.  Dot the skillet with small pieces of the cream cheese and blend to aid in melting.  Add the cream, shredded Parmesan hemp heart and fold all together lightly to blend.  Remove from heat and pour/spoon into a lightly oiled baking dish.  Pop into 350º oven for 20-25 minutes to allow flavors to meld and develop.  Remove and serve with a nice green salad.

NUTRITIONAL INFO:  Makes 4 servings each containing:

736 cals, 59g fat, 8.32g carbs, 2.15g fiber, 6.17g NET CARBS, 44.3g protein, 916 mg sodium


Momma’s Baked Chicken

Momma's Baked Chicken

This was the baked chicken I was raised on.  Throughout my childhood, I disliked intensely the taste of vinegar.  Wouldn’t eat pickles, wouldn’t eat pickled vegetables, wouldn’t eat salads or even condiments that contained vinegar.  But man, when my mom made this baked chicken, I just could not believe I watched her douse it with such an “evil” ingredient  and LIKED IT!!!  The natural red grape sugar in the red wine vinegar caramelizes under high heat and gives the chicken skin such a sweet, tangy taste.  The pan juices make a lovely gravy/baste for the drier breast meat.   Fortunately, my taste has changed over the years and I will now consume vinegar without hesitation, provided the food isn’t drowning in vinegar.  🙂

This recipe can be used on a split/butterflied/spatchcocked chicken as pictured, or you and cut the chicken up into pieces.  This method is delicious on Rock Cornish Hens, too.  It is also excellent for BBQ’ing of the chicken, and even for BBQ pork.  This recipe is perfectly suited to all phases of Atkins, Keto diets, Primal and Paleo as well.

SAUCE INGREDIENTS:

6 T.  melted butter

3 T. red wine vinegar

1/4 tsp. salt (omit if using salted butter)

1/4 tsp. coarse black pepper

THAT’S IT!!

DIRECTIONS:  Preheat oven to 400º.  Place butter in baking pan (I use a metal pan) as the oven is heating up.  Remove pan and add red wine vinegar to the butter, as well as the salt and pepper.  Prepare the chicken.  You can either split the chicken up the back with kitchen shears and spread it out as shown above, or cut the bird up into quarters or single pieces.  Using a brush, baste the pieces of chicken all over.  Sprinkle lightly with the salt and pepper and pop into hot oven for about an hour (less time for smaller birds, a little more for the butterflied bird shown) or until golden brown and reaches internal temp of 170º at the joint where the thigh meets the torso and in the thickest part of the breast.  I like to baste the chicken once or twice during cooking for the tastiest result on the skin.  I’m a skin fan, so that’s real important to me.  My husband just rips it off and hands it to me.  That works out just great, huh?  🙂 Remove from oven and serve at once with your favorite sides.  Be sure to put a spoon or brush into the pan for diners to baste their meat with the buttery juices if they wish (or pour the juices into a gravy boat).

NUTRITIONAL INFO:  These numbers are for the baste/sauce only.  You will have to add in the values for whatever pieces of chicken you eat.  Makes enough for 10 pieces of chicken (1 whole l cut-up chicken).  Each portion of the sauce, assuming you even eat that much of the sauce, has:

62 calories, 6.9 g fat, 0.02 g carbs,  0.00 g fiber, .02 g NET CARBS, 0.13 g protein (add in your piece of chicken)

Chicken in Sofrito Cream

Chicken in Sofrito CreamThis quick dish is absolutely delicious and so incredibly easy to make!  I keep the Sofrito Sauce made up in my freezer in a plastic zip bag and just break off what I need for a recipe.  Once the chicken is seared, this takes only 8-10 minutes to simmer down to delectable deliciousness.  This recipe is suitable for all phases of Atkins and Keto diets.  Primal followers can enjoy if you do dairy but Paleo folks will want to use coconut milk instead of cream.

INGREDIENTS:

1 large chicken breast, skin on (1o oz. of deboned meat)

1½ T. butter

1 c. homemade chicken stock

½ c. heavy cream (use 2 T. less if still on Induction)

Sprinkle xanthan gum

2 T. Sofrito sauce

DIRECTIONS:   Melt butter in a non-stick skillet over high heat.  Slice meat at an angle laterally into 4 smaller filets.   I pounded mine, but that isn’t necessary.  Just a habit with me and chicken.  🙂   Sear the chicken in the hot butter, both sides, until golden.  Lower to medium when both sides are golden and the meat is fully done.  Add chicken stock around the meat.  Add cream and Sofrito sauce and simmer a couple minutes.  Lightly dust with xanthan (less than 1/8 tsp.).  Simmer until it slightly thickens, stirring constantly.  Remove from heat and serve at once with you favorite sides or a nice salad.

NUTRITIONAL INFO:    Makes two adult servings, each contains:

590 cals, 46.3 g fat, 2.6 g carbs, 0.3 g fiber, 2.3 g NET CARBS, 37.4 g protein, 470 mg sodium